
DeVille DHS V8-4.6L VIN Y (2000)
Selector Shaft: Service and Repair
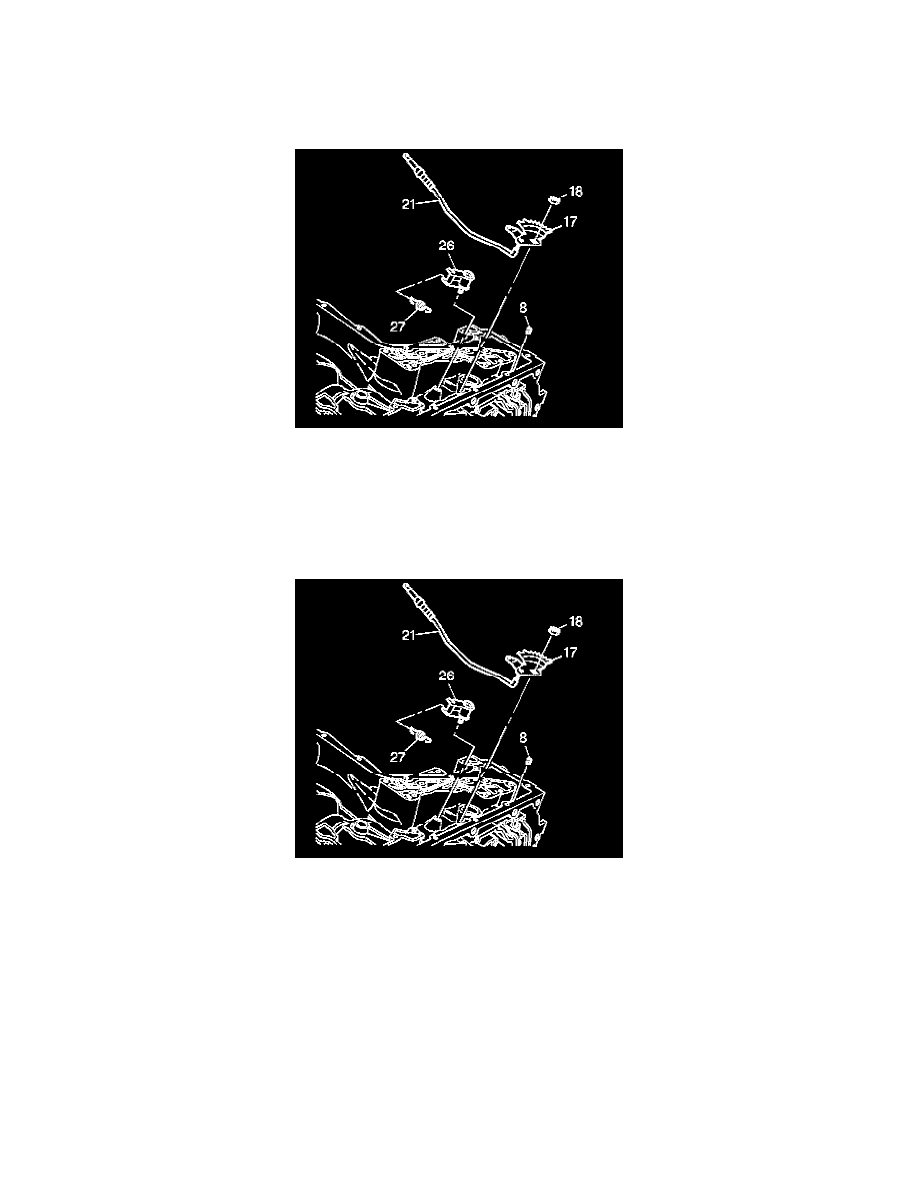
Detent Lever and Roller Assembly Replacement
Removal
1. Remove the scavenge screens. Refer to Scavenge Screens and Seals Replacement.
2. Remove the lower controls and valve assembly. Refer to Lower Control Valve Body Assembly Removal in the Transmission Unit Repair.
3. Using a pair of pliers, grasp the detent roller end of the detent spring (27). Remove the detent spring (27).
4. Remove the 13 mm detent roller bolt pivot arm, the sleeve, and the washer (26).
5. Remove the 15 mm manual shaft nut (18). You must hold the detent lever (17) in place when removing the manual shaft nut (18) in order to
prevent damage to the actuator rod (21).
6. Remove the detent lever (17) and the actuator rod (21).
Installation
1. Install the detent lever (17) and the actuator rod (21).
2. You must hold the detent lever (17) in place when installing the manual shaft nut (18) in order to prevent damage to the actuator rod (21).
Notice: Refer to Fastener Notice in Service Precautions.
3. Install the 15 mm manual shaft nut (18).
^
Tighten the manual shaft to detent lever nut to 8 - 14 Nm (6 - 10 ft. lbs.).
4. Install the 13 mm detent roller bolt pivot arm, the sleeve, and the washer (26).
^
Tighten the detent lever and roller assembly bolt to 8 - 14 Nm (6 - 10 ft. lbs.).
5. Using a pair of pliers, grasp the detent roller end of the detent spring (27). Install the detent spring (27).
6. Install the lower controls and valve assembly. Refer to Lower Controls Assembly Installation in the Transmission Unit Repair.
7. Install the scavenge screens. Refer to Scavenge Screens and Seals Replacement.