
Escalade AWD V8-6.0L Hybrid (2010)
9. Install the right wheelhouse panel. Refer to Wheelhouse Panel Replacement - Right Side (HP2) (See: Body and Frame/Fender/Front Fender/Front
Fender Liner/Service and Repair/Wheelhouse Panel Replacement - Right Side (HP2)).
10. Fully raise the vehicle.
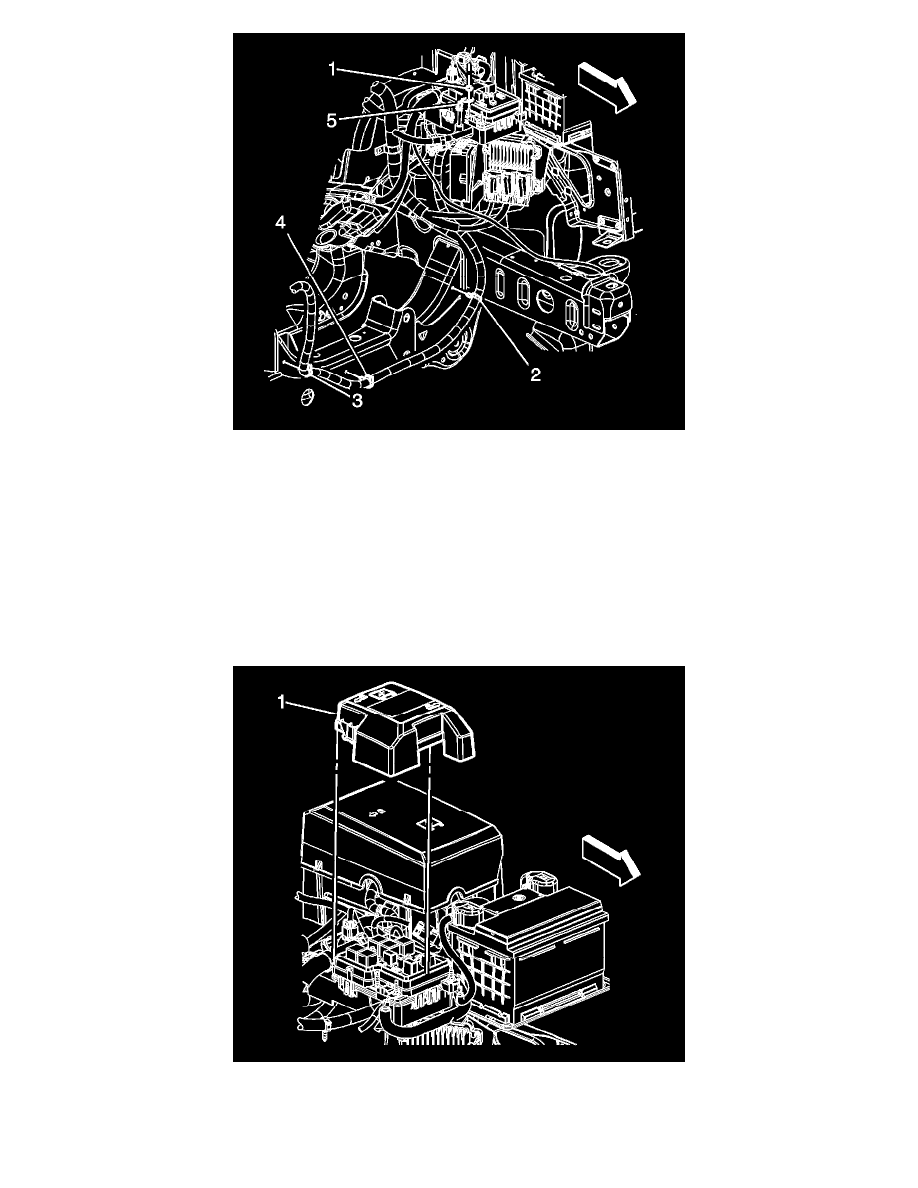
11. Install the positive battery cable clips (2, 3, and 4) to the frame crossmember.
12. Install the engine shield. Refer to Engine Shield Replacement (See: Body and Frame/Frame/Skid Plate/Service and Repair/Engine Shield
Replacement).
13. Lower the vehicle.
14. Install the positive battery cable lead (5) to the mega fuse stud.
Caution: Refer to Fastener Caution (See: Service Precautions/Vehicle Damage Warnings/Fastener Caution).
15. Install the positive battery cable nut (1) to the mega fuse stud and tighten to 9 Nm (80 lb in).
16. Install the auxiliary BEC cover (1).
17. Enable the high voltage system. Refer to High Voltage Enabling (See: Hybrid Drive Systems/Battery System, Hybrid Drive/Testing and
Inspection/Initial Inspection and Diagnostic Overview/High Voltage Enabling).