
Fleetwood V8-368 6.0L VIN 9 FI (1982)
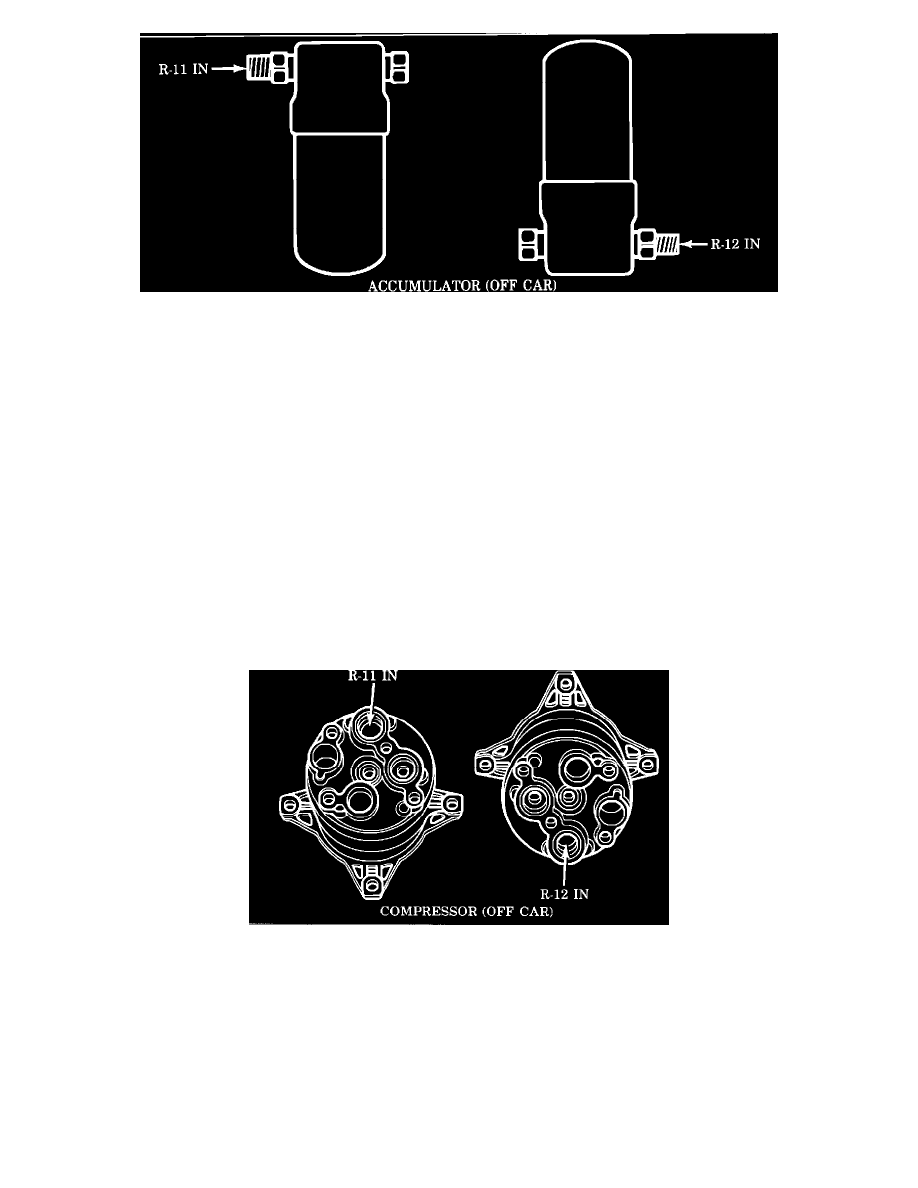
FIGURE 4 - ACCUMULATOR FLUSHING
a.
Attach an extension tube to the accumulator inlet (female threads), invert the accumulator and drain the oil. Keep the accumulator
capped when not draining or flushing.
b.
Set accumulator in the upright (as installed) position and force liquid R-11 into the accumulator outlet (male threads) until clean R-11
flows from the accumulator inlet (female threads) extension tube, see Figure
4.
Use the large orifice nozzle flush gun J-33883-50 or equivalent. Drain into a suitable waste container.
c.
Cap both the accumulator outlet (male threads) and the extension tube with air conditioning hose end caps or appropriate plugs. Shake
the accumulator and allow to soak for a minimum of 5 minutes before removing the caps and draining the accumulator.
d.
Invert the accumulator and force R-12 vapor into the accumulator outlet (male threads) to purge the remaining R-11, see Figure 4. Use
the large orifice nozzle flush gun J-33883-50 or equivalent. Continue to blow R-12 vapor until no liquid is observed leaving the
accumulator inlet (female threads) extension tube.
e.
Remove the extension tube, cap the accumulator and evacuate (just the accumulator using the shrader fitting) to remove any remaining
liquid R-11. This will reduce the evacuation time required once the entire air conditioning system is assembled.
E.Compressor (Off Car) -
FIGURE 5 - COMPRESSOR FLUSHING
a.
Mount the compressor in a vise over a drain pan using Compressor Holding Fixture J-9396 (A-6), J-33026 (DA-6), J-25008-A
(R-4) or J-34992 (V-5).
b.
Invert the compressor and drain the oil through the suction and discharge ports. Also drain A-6 and V-5 compressors through the
crankcase oil drain plug. See "REFRIGERANT OIL DISTRIBUTION" procedures as outlined in the appropriate Service
Information Manual.
c.
Set the compressor in the upright position (suction/discharge ports pointing upwards) and force liquid R-11 into the compressor
suction port (larger internal opening) until clean R-11 flows from the discharge port (smaller internal opening), see Figure 5. Use
the large orifice nozzle flush gun J-33883-50 or equivalent.