
Fleetwood V8-368 6.0L VIN 9 FI (1982)
screw counterclockwise until the plunger breaks contact with the gaging tool. Turn slowly clockwise until the plunger just contacts the gaging tool.
The adjustment is correct when the solenoid plunger contacts BOTH the SOLENOID STOP and the GAGING TOOL.
If the difference in adjustment of the lean mixture (solenoid) screw was less than 3/4 turn, the original setting had been made within
specifications.
4.
Remove gaging tool, and reassemble float bowl.
5.
Remove lean mixture screw plug and rich mixture stop screw plug from the air horn, and reassemble carburetor.
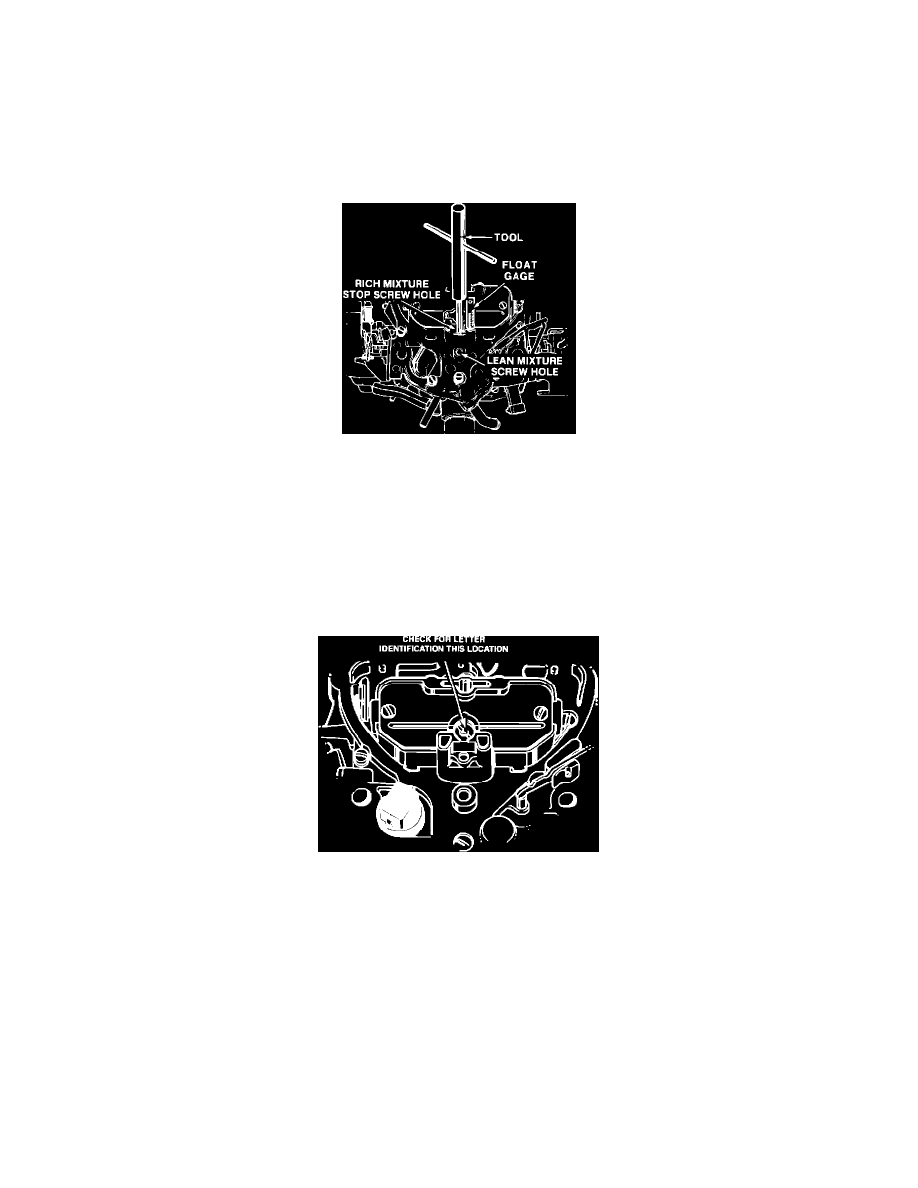
FIGURE 3 - ADJUSTING RICH MIXTURE STOP SCREW
ADJUSTING RICH MIXTURE STOP SCREW
Refer to Figure 3 - Adjusting Rich Mixture Stop Screw
6.
Insert external float gage, J-9789-130, BT-7720, or equivalent, in vent hole. Use tool J-28696-10, BT-7928, or equivalent, to adjust rich mixture
stop screw to obtain 4/32 inch total plunger travel.
7.
Install new screw plugs, supplied in service kit.
FIGURE 4 - IDLE AIR BLEED VALVE
IDLE MIXTURE ADJUSTMENTS
Refer to Figure 4 - Idle Air Bleed Valve-Check for Letter Identification
With cover removed from the idle air bleed valve, look for the presence (or absence) of an identifying letter on the top face of the valve:
If there is NO letter, begin Procedure A (below). If there IS a letter, begin Procedure B.