
Fleetwood V8-368 6.0L VIN 9 FI (1982)
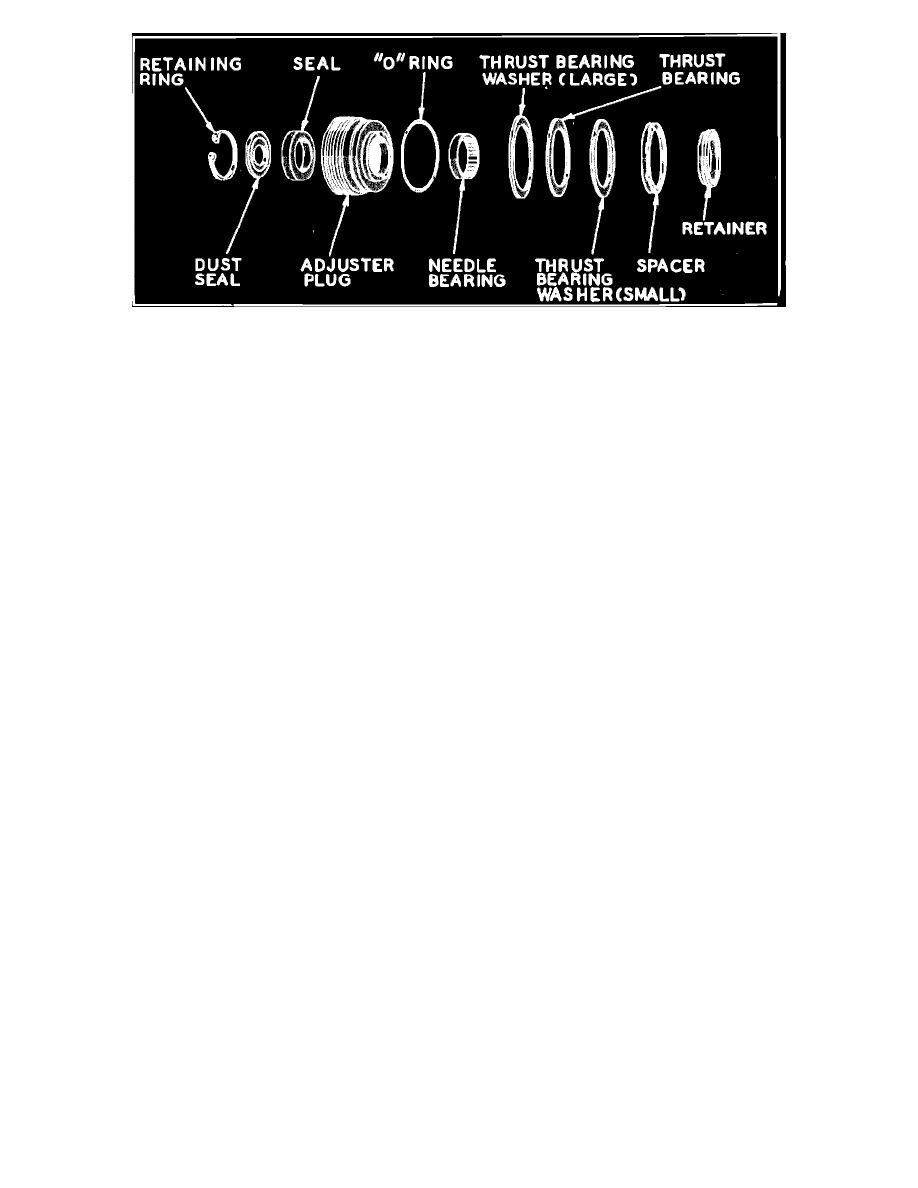
Fig. 18 Adjuster plug parts
Refer to
Fig. 3 and lubricate all parts as they are assembled.
1.
Screw lash adjuster through side cover until cover bottoms on pitman shaft gear. Install lash adjuster locknut while holding lash adjuster with 7/32
inch Allen wrench.
2.
Mount adjuster plug in vise with soft jaws.
3.
If it has been removed, assemble needle bearing by pressing towards thrust bearing end of adjuster plug against identification end of bearing. End
of bearing to be flush with bottom surface of stub shaft seal bore.
4.
Install stub shaft far enough to provide clearance for dust seal and retaining ring. Install new dust seal with rubber surface outward. Install new
retaining ring.
5.
Assemble large thrust bearing race, thrust bearing, small race and spacer (with grooves up) on adjuster plug,
Fig. 18, and secure with retainer.
Refitting Rack-Piston Balls
Do not refit balls unless the steering is loose. If such is the case, a thrust adjustment and over-center adjustment should correct the problem if it lies in
the steering gear. If balls are pitted or rough, then select the proper ball size for proper adjustment.
If the torque reading obtained above is too high or too low (on new balls only), disassemble and reassemble, using the next size smaller (or larger)
balls and recheck worm preload.
A rack-piston nut with a ball size of 7 does not have a number stamped on the flat surface. For ball sizes other than 7, the ball size is stamped on the
flat surface of the rack-piston nut. Ball sizes are numbered from 6 to 11, with 6 being the smallest and 11 the largest. Ball sizes are graduated in
increments of .00008 inch from .28117 inch to .28157 inch.