
SRX 2WD V8-4.6L VIN A (2004)
Tighten the drive flange nut to 60 N.m (44 lb ft).
14.
Remove the J 45012 from the drive flange.
Important:
To ensure proper adhesion and fastener retention if reusing the propeller shaft to flange nuts and bolts, the threads must be free of debris
and/or oil residue prior to the application of thread locker. Thoroughly clean the threads using Brake Clean, denatured alcohol or the
equivalent (DO NOT USE CARB CLEANER. CARB CLEANER LEAVES AN OILY RESIDUE) and allow to dry. Apply High Temp-High
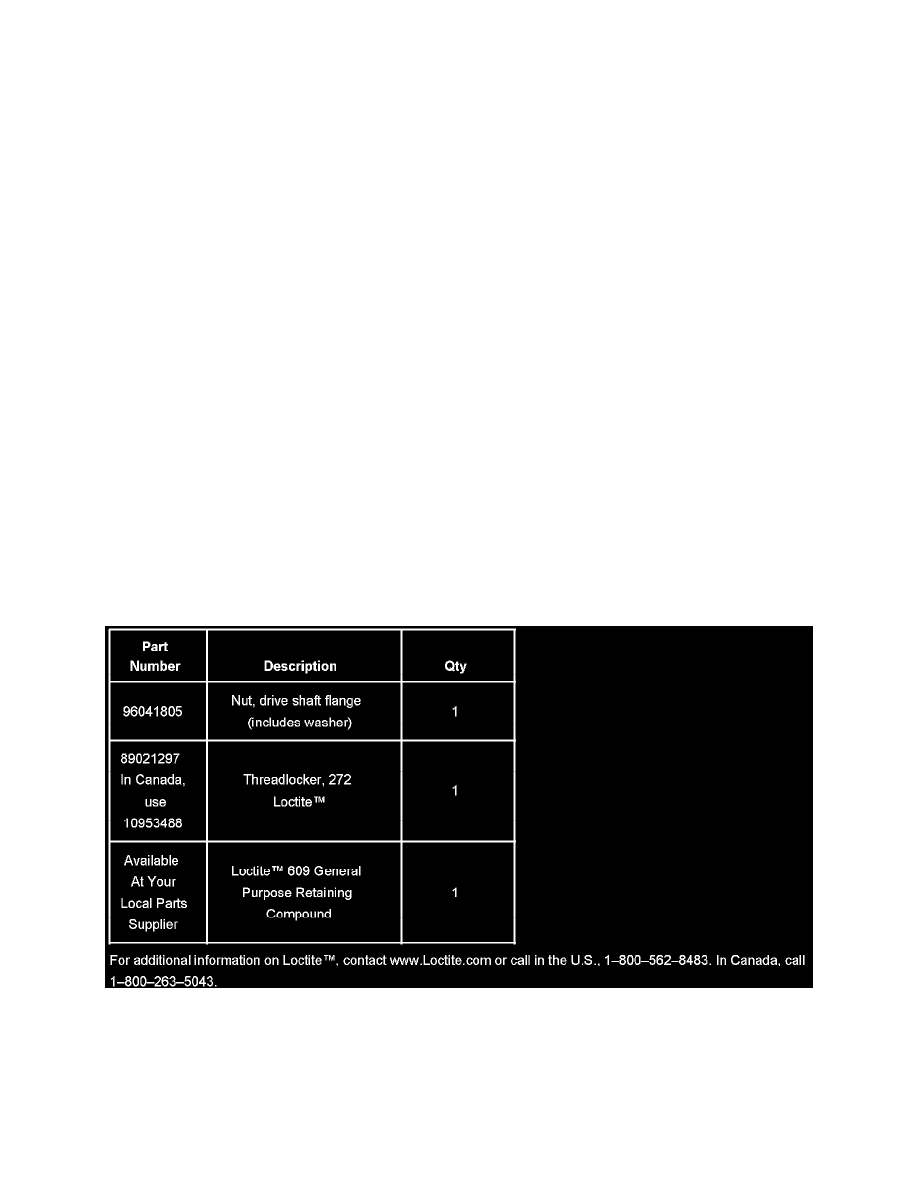
Strength threadlocker Loctite(TM) 272, GM P/N 89021297 (Canadian P/N 10953488), or the equivalent, to the propeller shaft to flange bolts.
Ensure that there are no gaps in the thread locker along the length of the filled area of the bolt. Allow the threadlocker to cure approximately
ten minutes before installation.
15.
Re-install the propeller shaft coupler to the transmission flange.
Tighten
Tighten the propeller shaft coupler-to-transmission flange bolts to 85 N.m (63 lb ft).
16.
Re-install the exhaust system.
Tighten
Tighten the catalytic converter nuts to 15 N.m (11 lb ft).
17.
Re-install the floor pan brace and bolts to the floor pan.
Tighten
Tighten the floor panel tunnel brace bolts to 25 N.m (18 lb ft).
18.
Vehicles requiring additional transmission fluid, refer to Transmission Fluid Checking Procedure.
19.
Lower the vehicle.
Parts Information
Parts are currently available from GMSPO. This condition will only be experienced by a limited number of customers.
Warranty Information