
SRX AWD V6-3.0L (2010)
*
The only suitable lubrication is clear water.
*
Use J 24402-A , J 39032 or equivalent in order to remove the window.
Note: Keep the cutting edge of the knife/tool against the window. Do this from inside the vehicle.
9. If necessary, use a long utility knife or similar tool to remove the bottom corners of the window from the urethane adhesive.
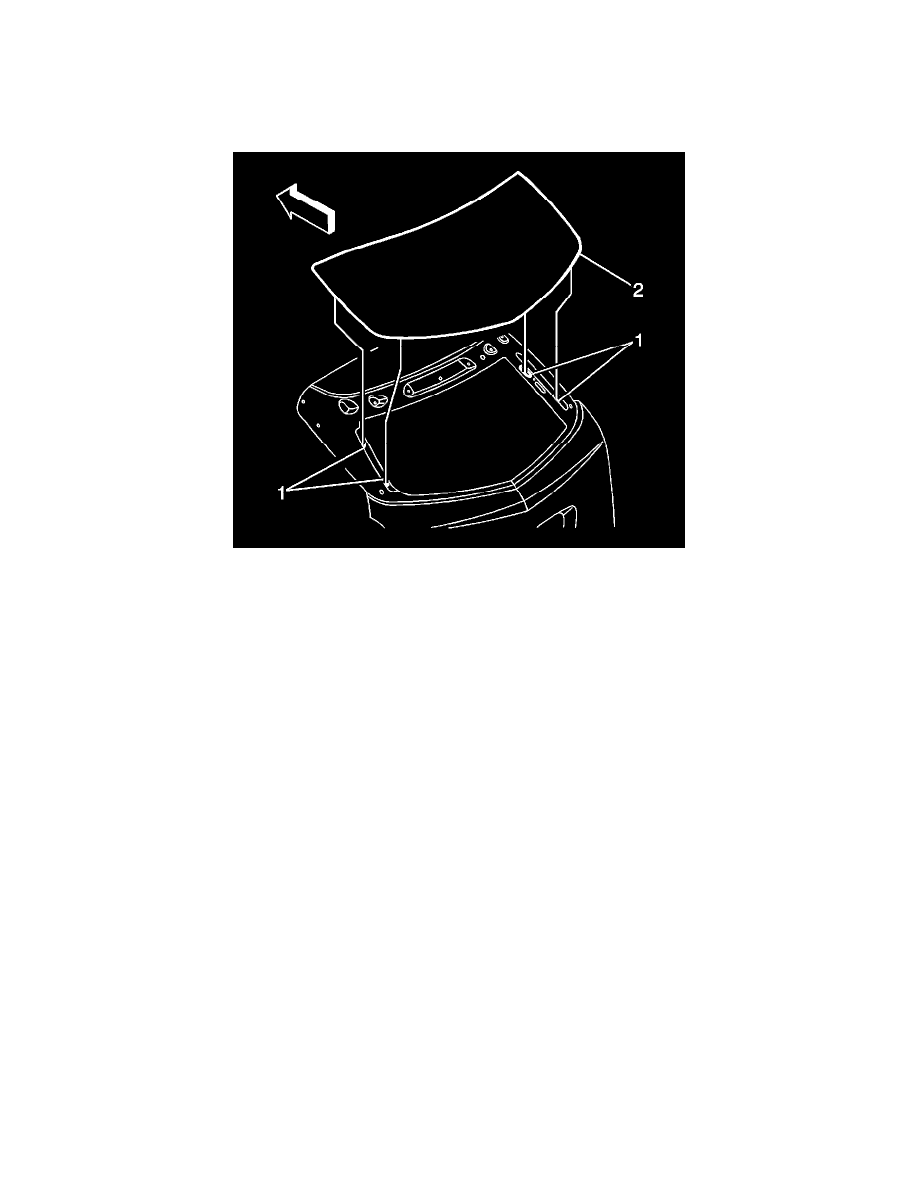
Note: If the retainers (1) are cut off when removing the window (2) it will be necessary to tape it in place.
10. With the aid of an assistant, remove the window (2) from the vehicle.
Installation Procedure
1. Install the liftgate window into the opening. Refer to Adhesive Installation of Liftgate Windows (See: Windows and Glass/Windows/Service and
Repair/Adhesive Installation of Liftgate Windows).
2. Install the rear spoiler. Refer to Rear End Spoiler Replacement (See: Spoilers, Flaps, and Air Dams/Spoiler/Service and Repair).
3. Install the rear window wiper arm. Refer to Rear Window Wiper Arm Replacement (See: Wiper and Washer Systems/Wiper Arm/Service and
Repair/Rear Window Wiper Arm Replacement).
4. Connect the liftgate window rear defogger electrical connectors.
5. Install the liftgate lower trim. Refer to Liftgate Lower Trim Finish Panel Replacement ().
6. Remove the double layer of masking tape around the perimeter of the painted surfaces and the interior trim.
7. Close the liftgate.