
SRX AWD V6-3.0L (2010)
Caution: Refer to Fastener Caution (See: Service Precautions/Vehicle Damage Warnings/Fastener Caution).
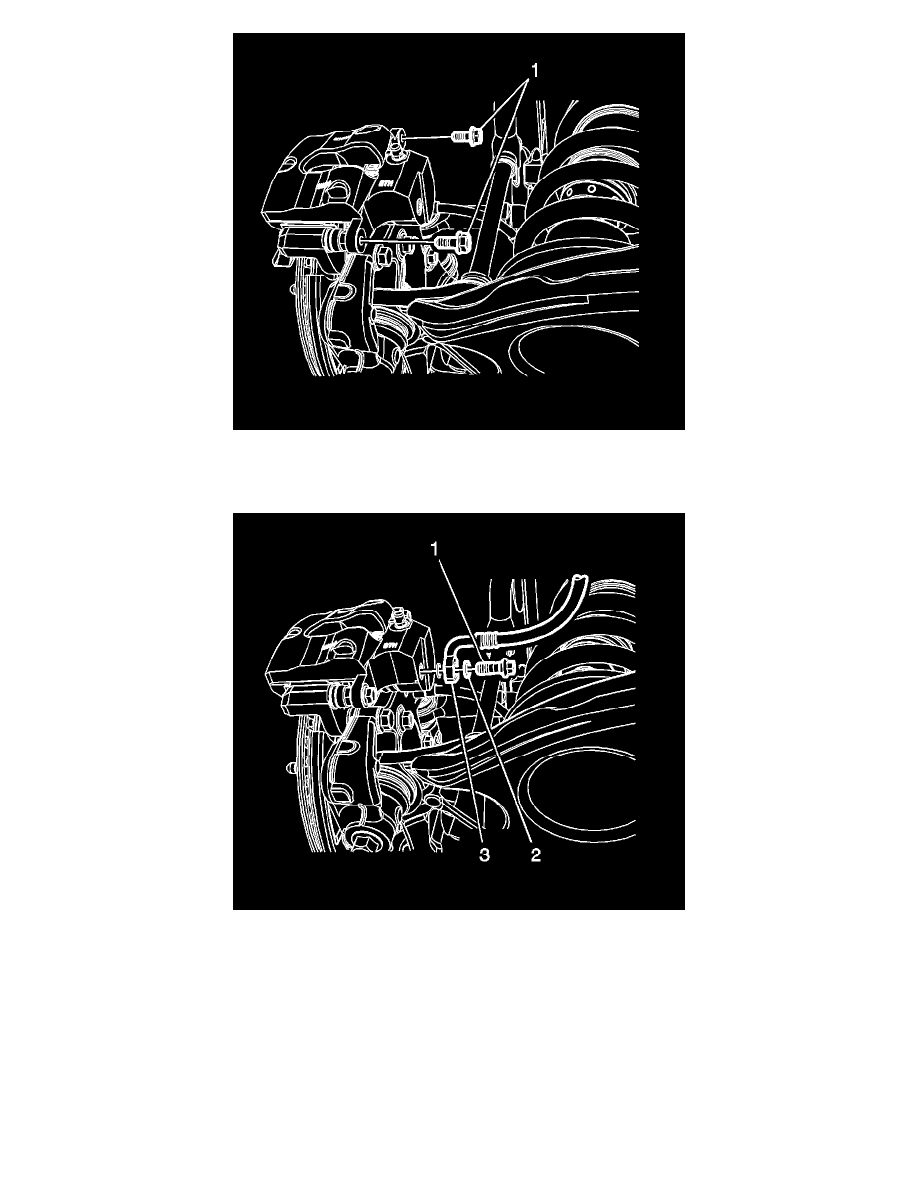
2. Using a backup wrench to hold the brake caliper guide pins stationary, install the brake caliper guide pin bolts (1) and tighten to 60 Nm (44 lb ft).
3. Assemble the brake hose fitting bolt (1) and 2 new brake hose fitting gaskets (2) to the brake hose (3).
4. Install the brake hose assembly to the caliper and tighten the fitting bolt to 40 Nm (30 lb ft).
5. Bleed the hydraulic brake system. Refer to Hydraulic Brake System Bleeding (Manual) (See: Brake Bleeding/Service and Repair)Hydraulic
Brake System Bleeding (Pressure) (See: Brake Bleeding/Service and Repair).
6. Install the tire and wheel assembly. Refer to Tire and Wheel Removal and Installation (See: Maintenance/Wheels and Tires/Service and Repair).
7. With the engine OFF, gradually apply the brake pedal to approximately 2/3 of its travel distance.
8. Slowly release the brake pedal.
9. Wait 15 seconds, then repeat steps 7-8 until a firm brake pedal apply is obtained. This will properly seat the brake caliper pistons and brake pads.
10. Fill the brake master cylinder reservoir to the proper level. Refer to Master Cylinder Reservoir Filling (See: Hydraulic System/Brake Master
Cylinder/Service and Repair/Procedures/Master Cylinder Reservoir Filling).
11. Set the electronic park brake cable tension. Refer to Parking Brake Cable Adjuster Enabling (See: Parking Brake System/Parking Brake
Cable/Service and Repair/Procedures/Parking Brake Cable Adjuster Enabling).