
SRX AWD V6-3.0L (2010)
9. Rotate the rear center bearing bracket and brace (1) to obtain a good view of the rubber insert tab on the rear center bearing bracket brace. Refer to
the illustration.
10. Using a yellow or white marker, mark the location of the rubber insert tab retainers of the brace onto the rear center bearing bracket as shown in
the illustration.
11. Remove the rear center bearing brace from the rear center bearing bracket.
12. Rotate the rear center bearing bracket back to the production orientation.
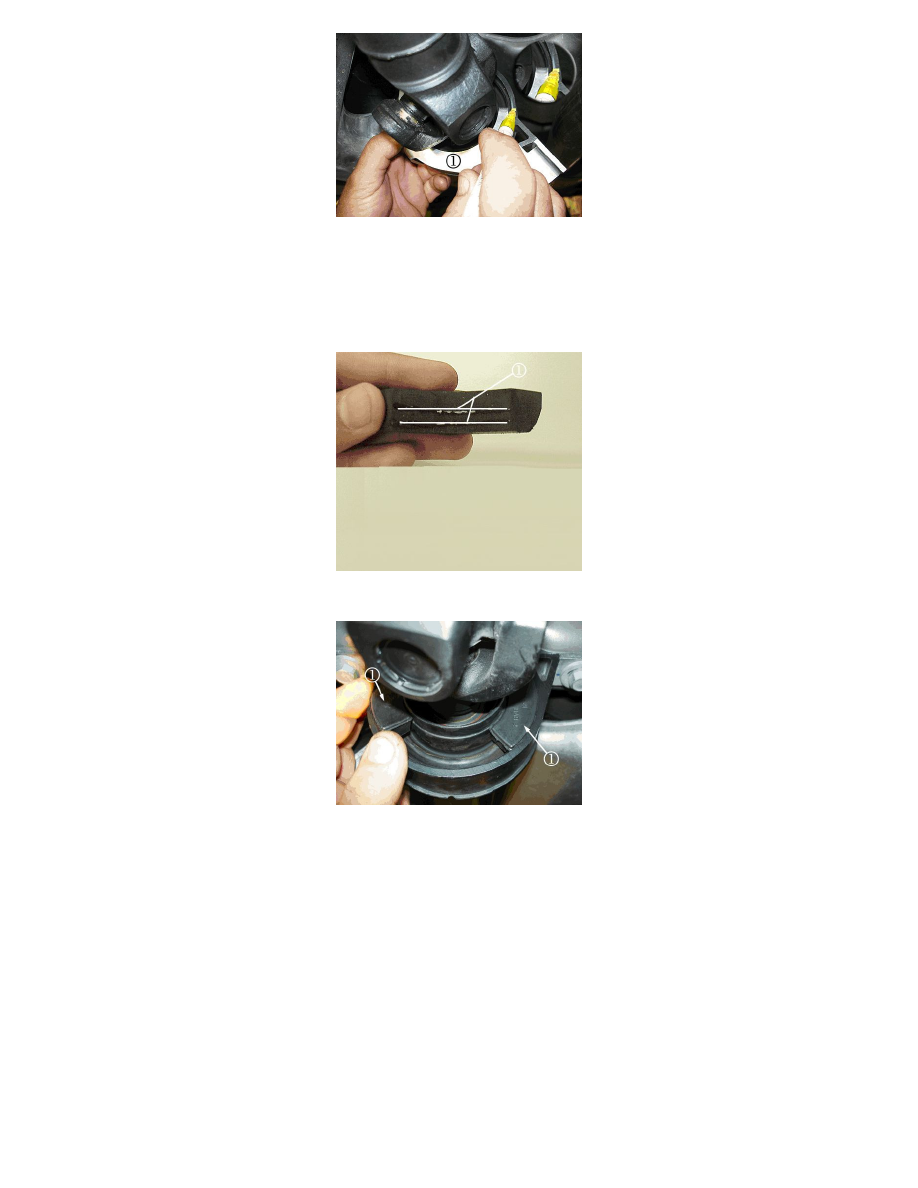
13. Apply two thin beads of LOCTITE(R) 411(TM) (1) along the leading edge on the inner diameters of the rubber inserts as shown in the illustration.
14. Insert the first rubber insert (1) into the housing in a 2 o'clock position as shown in the illustration. Use the rubber insert tab marks created in Step
10 as an alignment reference point for the top portion of the rubber insert (1).
15. Insert the second rubber insert (1) into the housing in an 11 o'clock position as shown in the illustration. Use the rubber insert tab marks created in
Step 10 as an alignment reference point for the top portion of the rubber insert (1).
16. Raise the jack stand and install the rear center bearing bracket and rear center bearing bracket brace (1) together as shown in the illustration.