
Astro Van L AWD V6-262 4.3L VIN W CPI (1992)
Water enters the doors at the top of the rear doors and runs down the rear door trim panels. This may be caused by a poor relationship at the "Batwing
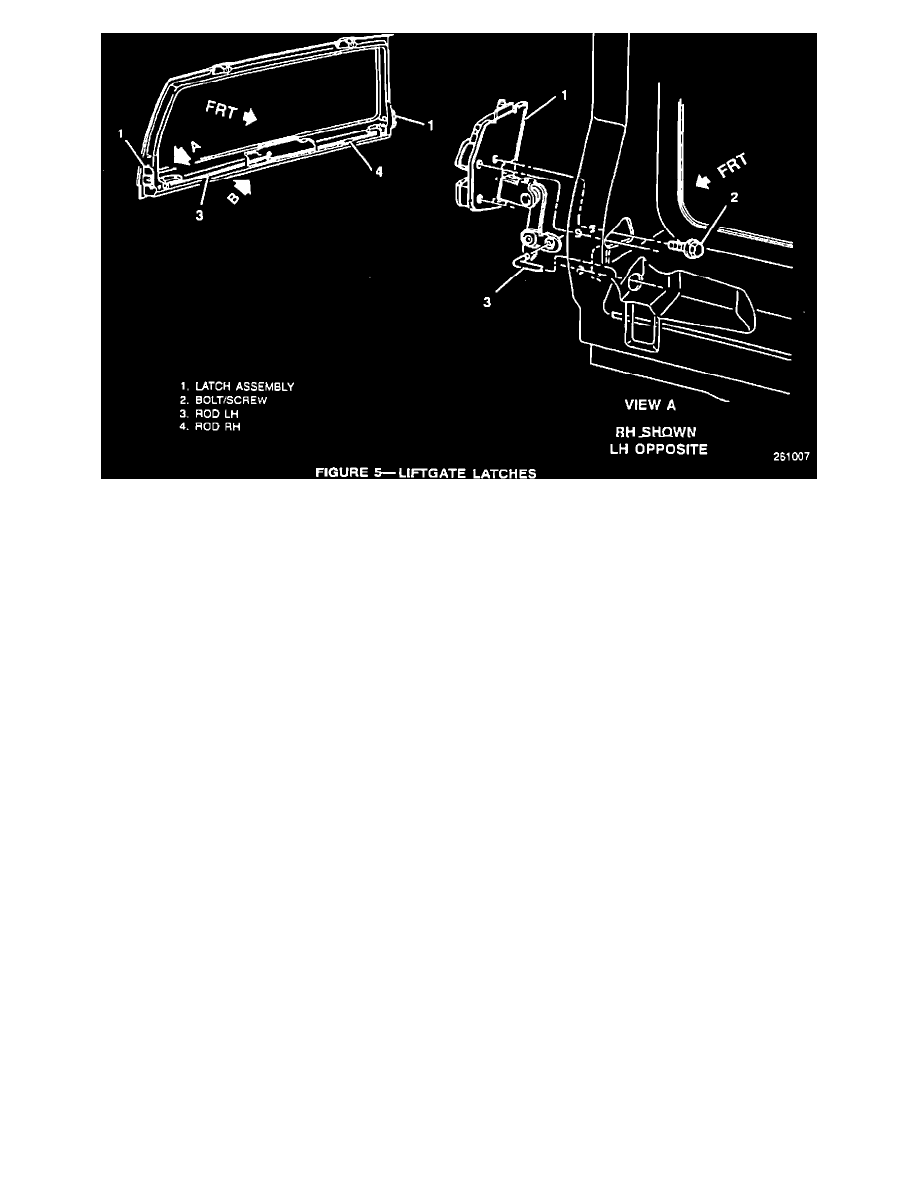
Joint" and the "Golf Club" area (Figures 2, 3, 4 and 5).
1.
Verify that the liftgate is flush with the body of the vehicle.
2.
Remove the liftgate interior handle and trim panel.
3.
Adjust the liftgate outer latch assemblies: Loosen the 3 screws (3 per side) and close the door tight. Retighten the screws, this will insure proper
adjustment (the liftgate latches are self adjusting).
4.
Close the rear doors and align the weatherstrip to the liftgate to insure proper mating (Batwing Joint and at the Golf Club area, Figures 2, 3 and 4).
Alignment can be accomplished by fitting the weatherstrip on the flange while closing one lower door. The "Batwing" should overlap the "golf
club" approximately 1.5 inches from the lower leg of the "golf club".
5.
Verify that the rear door weatherstrip at the "Batwing Joint" is not being trapped under the rear door hinge covers that lay on top of the door
surfaces.
If this occurs, remove the three screws that hold the cover in place and reposition the hinge covers so that trapping does not occur. There is a notch
cut out of the hinge cover molding so that the "Batwing Joint" on the rear doors does not become trapped.
6.
Install the liftgate interior handle and trim panel.
Parts Information:
Part Number
Description
1052915
Clear Silicone
12345097
Black Urethane Adhesive
Parts are currently available through GMSPO.