
C 2500 Truck 2WD V8-5.7L VIN R (1997)
3. Insert the cooler line into the connector until a "Click" is heard or felt.
-
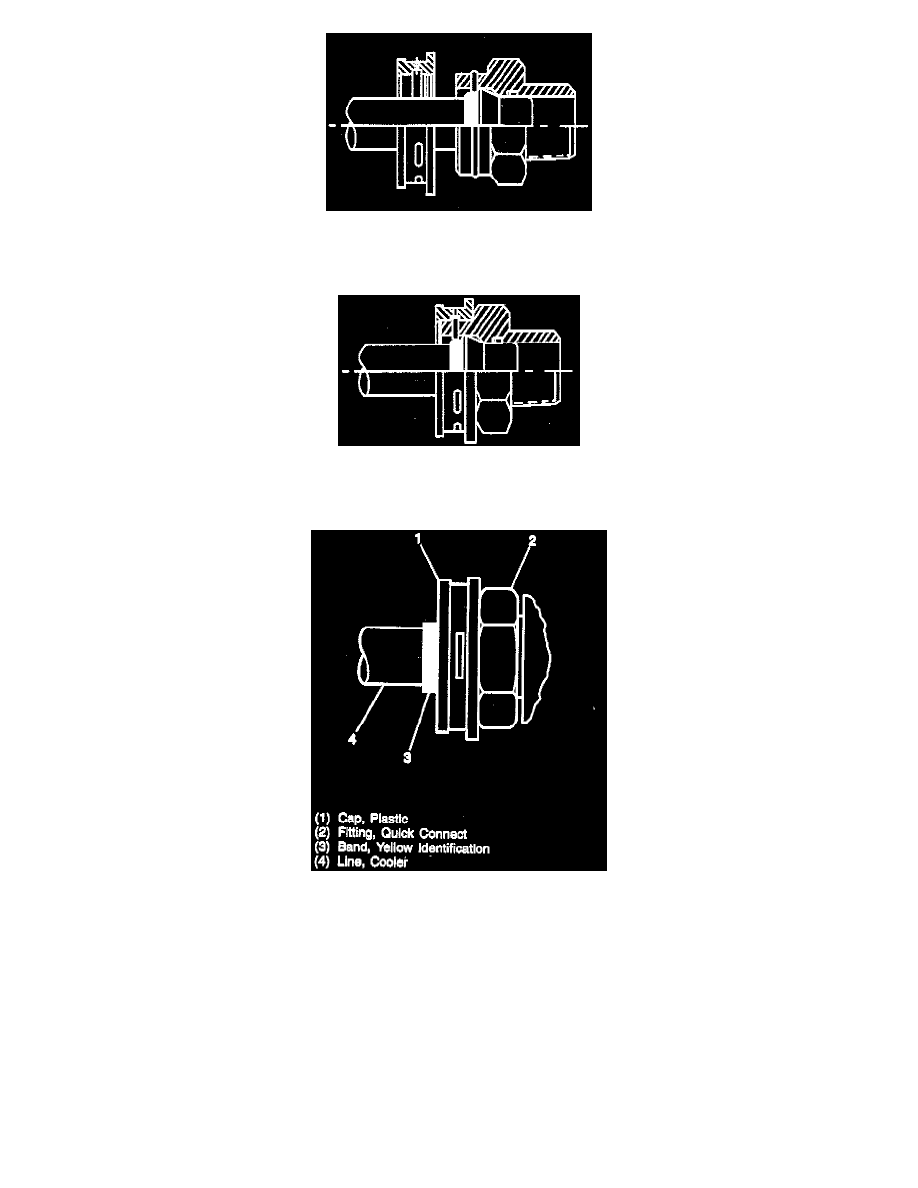
Ensure the yellow identification band on the cooler line is hidden within the quick connector, (this indicates proper joint seating).
-
Pull back sharply on the cooler line to ensure proper installation.
-
Plastic cap by sliding over the attached joint until the cap snaps into place and it is flushed with the connector.
-
Pull back sharply on the cooler line to assure the line is fastened into the connector. If the plastic cap is not properly seated, remove the
existing retaining clip and install a "NEW" retaining clip per step 2 of the installation procedure.