
C 2500 Truck 2WD V8-6.6L DSL Turbo VIN 1 (2001)
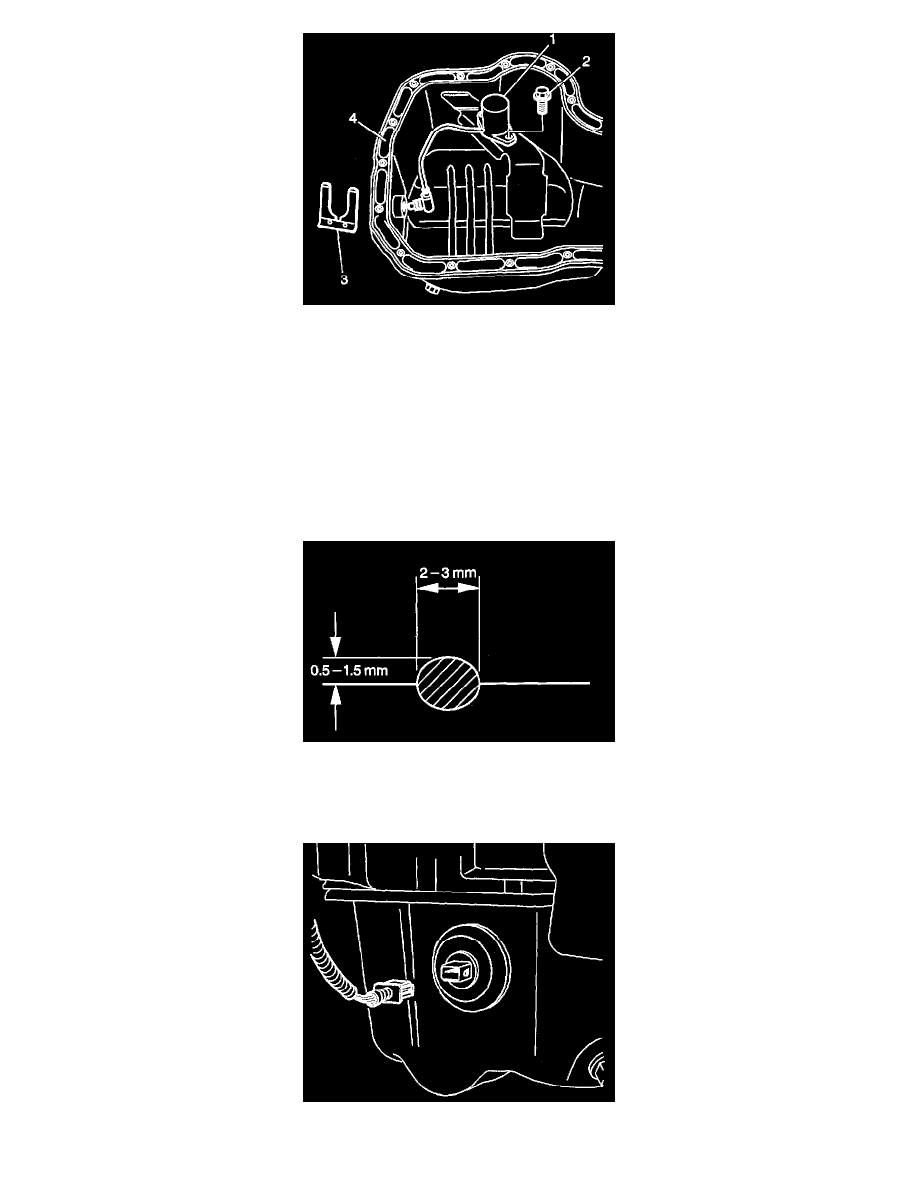
1. Remove the oil level sensor (1) and retaining clip (3).
2. Clean the lower oil pan. Remove any sludge or other deposits.
3. Clean the lower oil pan mating surface (4).
4. Inspect the lower oil pan for dents or distortion.
5. Inspect the lower oil pan mating surface for damage.
6. Replace the lower oil pan if any damage is found.
7. Install the oil level sensor (1) and retaining clip (3).
Notice: Refer to Fastener Notice in Service Precautions.
8. Install the oil level sensor bolt (2).
^
Tighten the engine oil level sensor bolts to 9 Nm (80 inch lbs.).
9. Apply a 2 mm (1/8 inch) wide bead of sealant GM P/N 12378521 or equivalent to the lower oil pan mating surface.
10. Install the lower oil pan.
11. Install the lower oil pan bolts and nuts.
^
Tighten the oil pan bolts and nuts to 10 Nm (89 inch lbs.).
12. Connect the oil level sensor and install the clip.