
Colorado 4WD L4-2.8L VIN 8 (2004)
3. Position the oil pan to the engine block.
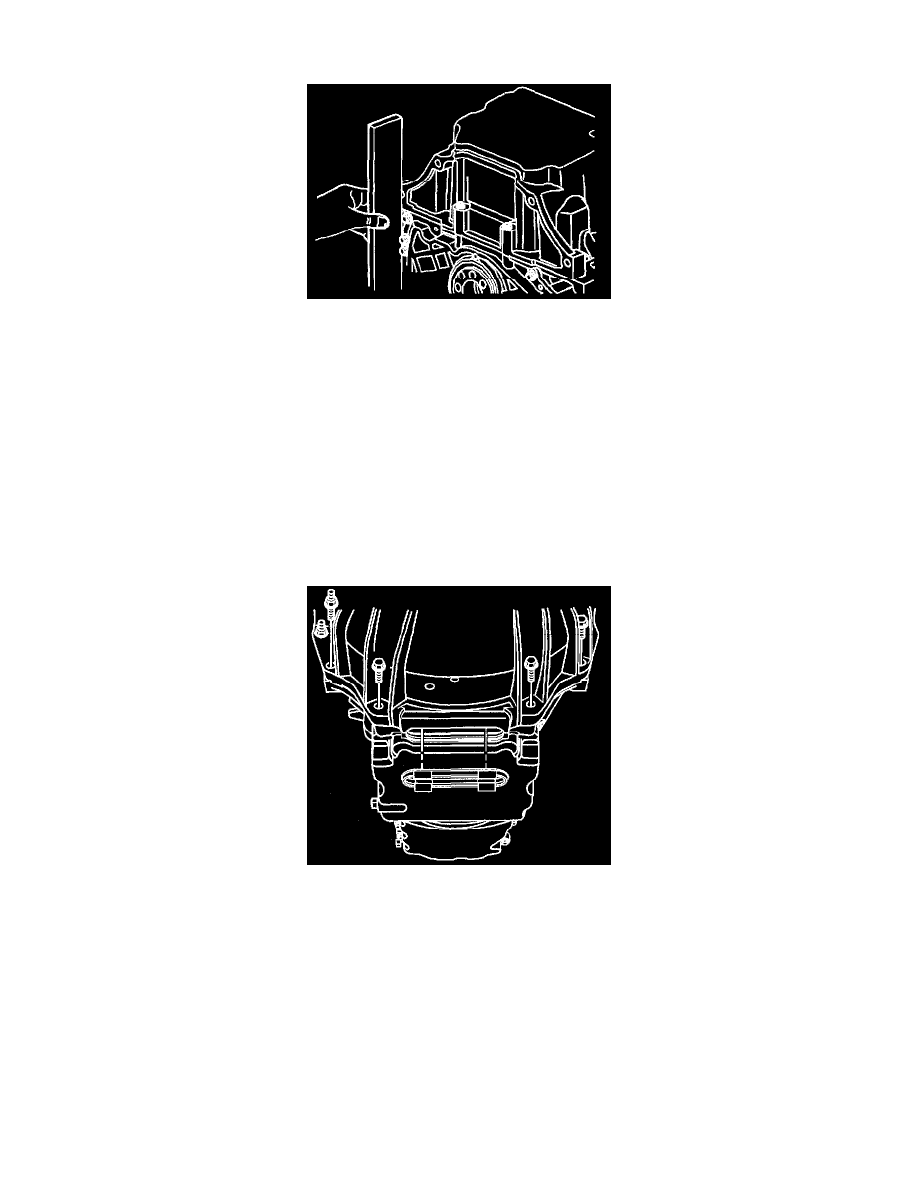
Important: The rear oil pan surface needs to be flush with the rear block surface.
4. Use the following applicable step to properly align the oil pan:
^
Transmission Removed Use a straight edge at the rear of the block and oil pan for proper alignment.
^
Transmission Installed Ensure the oil pan is positioned fully rearward against the transmission mounting surface.
5. Install the oil pan bolts.
Notice: Refer to Fastener Notice in Service Precautions.
6. Tighten the oil pan bolts. Tighten
^
Tighten the (side) oil pan bolts to 25 Nm (18 ft. lbs.).
^
Tighten the (end) oil pan bolts to 10 Nm (89 inch lbs.).
7. Connect the engine wiring harness retainers to the oil pan.
8. Position the power steering gear upward to the frame assembly.
9. Install the power steering gear mounting bolts.
10. Install the 4 lower transmission mounting bolts.
^
Tighten the transmission mounting bolts to 50 Nm (37 ft. lbs.).
11. Install the nuts securing the fuel hose/pipe bracket to the transmission.
^
Tighten the fuel hose/pipe bracket nuts to 20 Nm (15 ft. lbs.).
12. Install the service slot plug.