
Corvette V8-7.0L (2007)
Fuel Tank Unit: Service and Repair
Fuel Tank Module Replacement - Right Side
Fuel Tank Module Replacement - Right Side
Tools Required
J39765-A Fuel Sender Lock Ring Tool
Removal Procedure
1. Disconnect the negative battery cable.
2. Remove the right fuel tank.
3. Place the fuel tank on a suitable work surface.
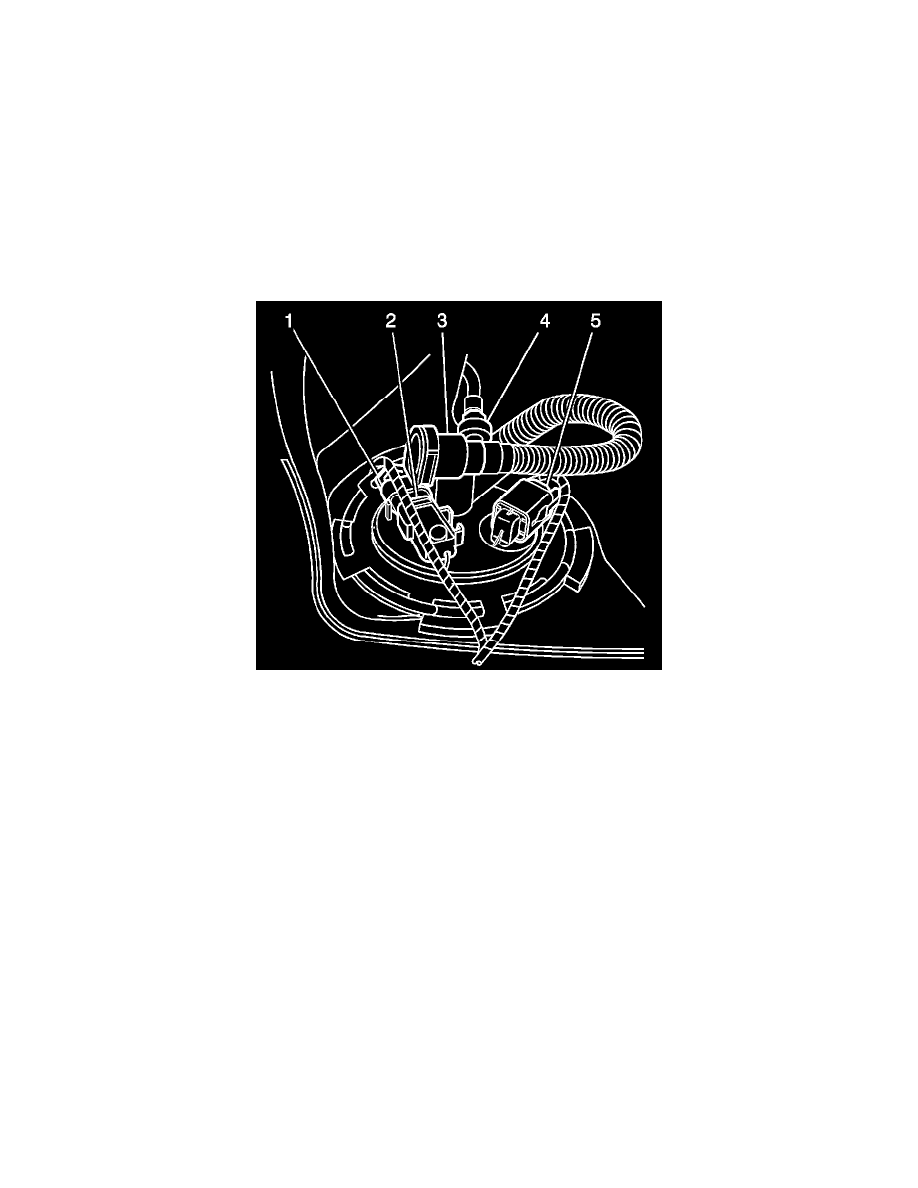
4. Disconnect the evaporative emission (EVAP) purge line (4) from the fuel pump module.
5. Disconnect the fuel pump module harness connector (5).
6. Disconnect the fuel tank pressure (FTP) sensor harness connector (1).
7. If replacing the fuel pump module, remove the FTP sensor (2). Refer to Fuel Tank Pressure Sensor Replacement.
8. Disconnect the jet line insert connector from the crossover tube to fuel tank opening.
Important: The fuel pump module is spring loaded and will spring upward when the locking ring is removed.
9. Using the J39765-A , remove the fuel pump module locking ring.