
Cruze L4-1.4L Turbo (2011)
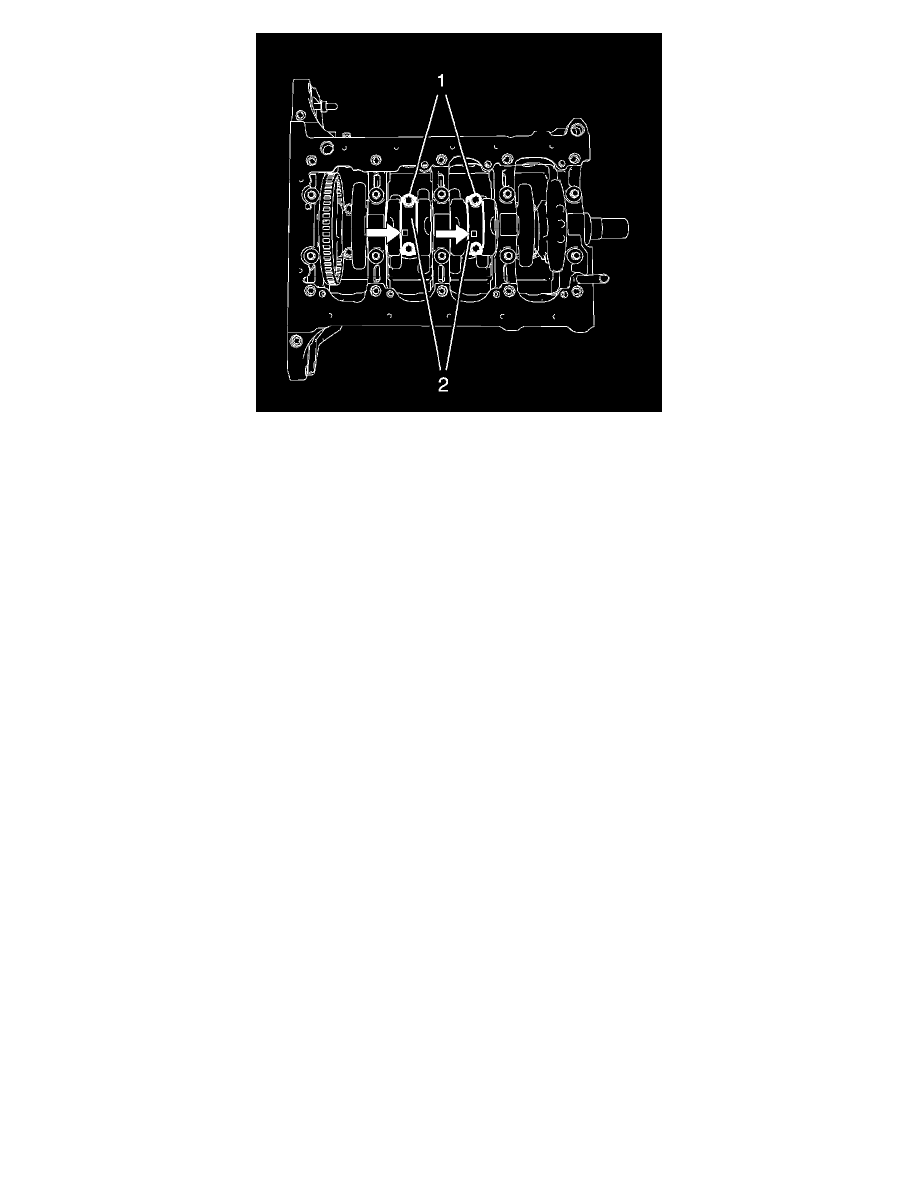
Note: The flarings (arrows) on the connecting rod bearing caps must point to the transmission side. The connecting rod bearing caps must be
installed in their original position.
12. Install the 2 connecting rod bearings and the 2 connecting rod bearing caps (2) of cylinder 3 and 2.
Caution: Refer to Fastener Caution (See: Service Precautions/Vehicle Damage Warnings/Fastener Caution).
13. Install the 4 connecting rod bearing cap bolts (1) and tighten in the following sequence:
1. Tighten the connecting rod bearing cap bolts to 25 Nm (18 lb ft).
2. Tighten the connecting rod bearing cap bolts an additional 45°. Use EN-470-B - wrench.
14. Install the oil pan Refer to Oil Pan Replacement (1.4L LUH and LUJ) (See: Engine Lubrication/Oil Pan/Service and Repair).
15. Lower the vehicle.
16. Install the cylinder head. Refer to Cylinder Head Replacement (1.4L LUH and LUJ) (See: Cylinder Head Assembly/Service and Repair).
17. Close the hood.