
Express 1/2 Ton Van V8-5.7L VIN R (1999)
Center Link: Service and Repair
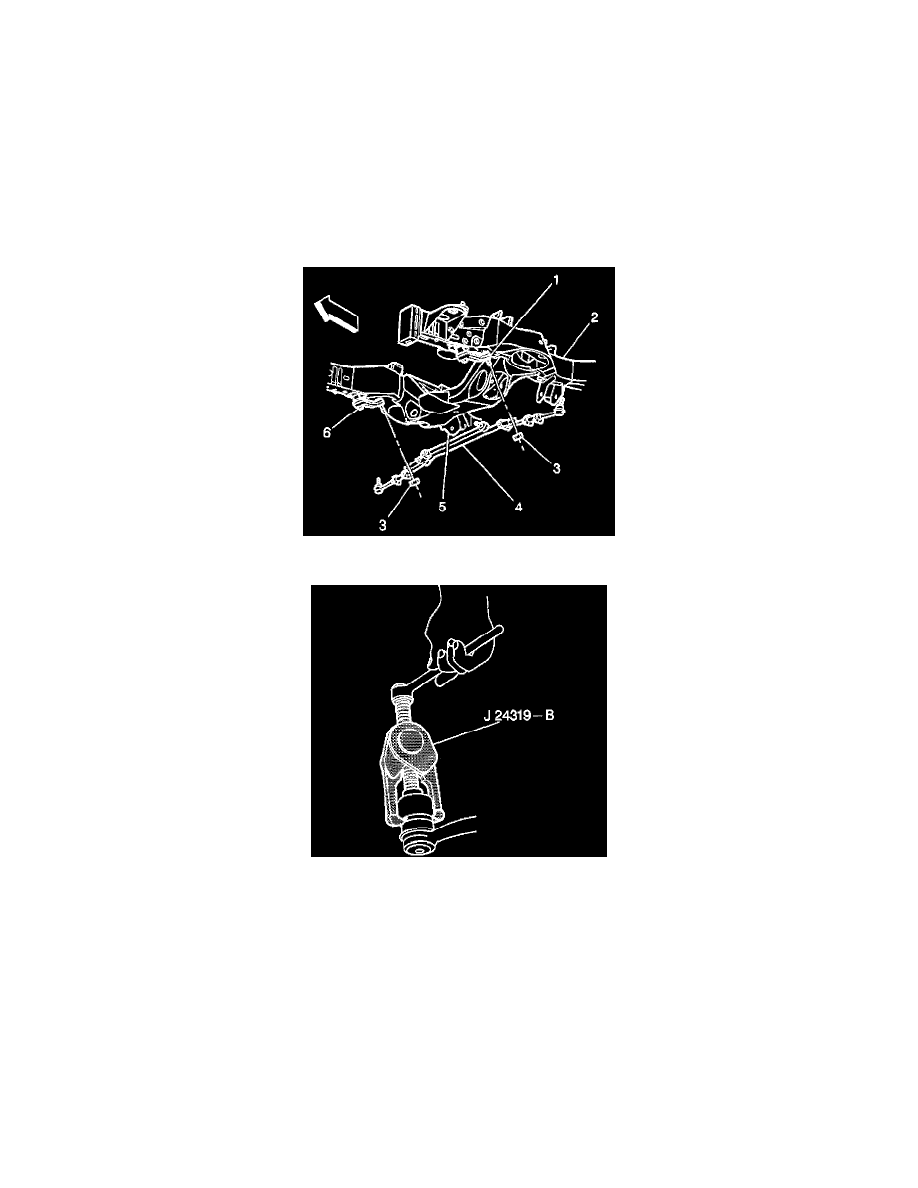
Relay Rod Replacement
REMOVAL PROCEDURE
-
Tools Required
-
J 24319-B Universal Steering Linkage Puller
1. Raise the vehicle. Support the vehicle with safety stands.
IMPORTANT: Do not free the ball stud by using a pickle fork or a wedge-type tool. Damage to the seal or bushing may result.
2. Remove the inner tie rod from the relay rod.
3. Remove the nuts from the idler arm and connecting rod arm ball studs at the relay rod.
4. Use the J24319-B in order to remove the relay rod (4) from the idler arm (1,6).
5. Use the J24319-B in order to remove the relay rod from the connecting rod.
6. Remove the relay rod from the vehicle.
7. Clean the threads on the ball stud and the ball stud nut.
8. Inspect the threads on the tie rod and the tie rod end for damage.
9. Inspect the ball stud threads for damage.
10. Inspect the ball stud seals for excessive wear.
INSTALLATION PROCEDURE
-
Tools Required
-
J 29193 Steering Linkage Installer (14mm)
-
J 29194 Steering Linkage Installer (12mm)