Lumina V6-191 3.1L (1990)

3.
REAR DOOR VENT GLASS RUBBER CHANNEL TO DOOR FRAME
After removing door trim panel inner seal strip retainer and door frame inside garnish molding:
A.
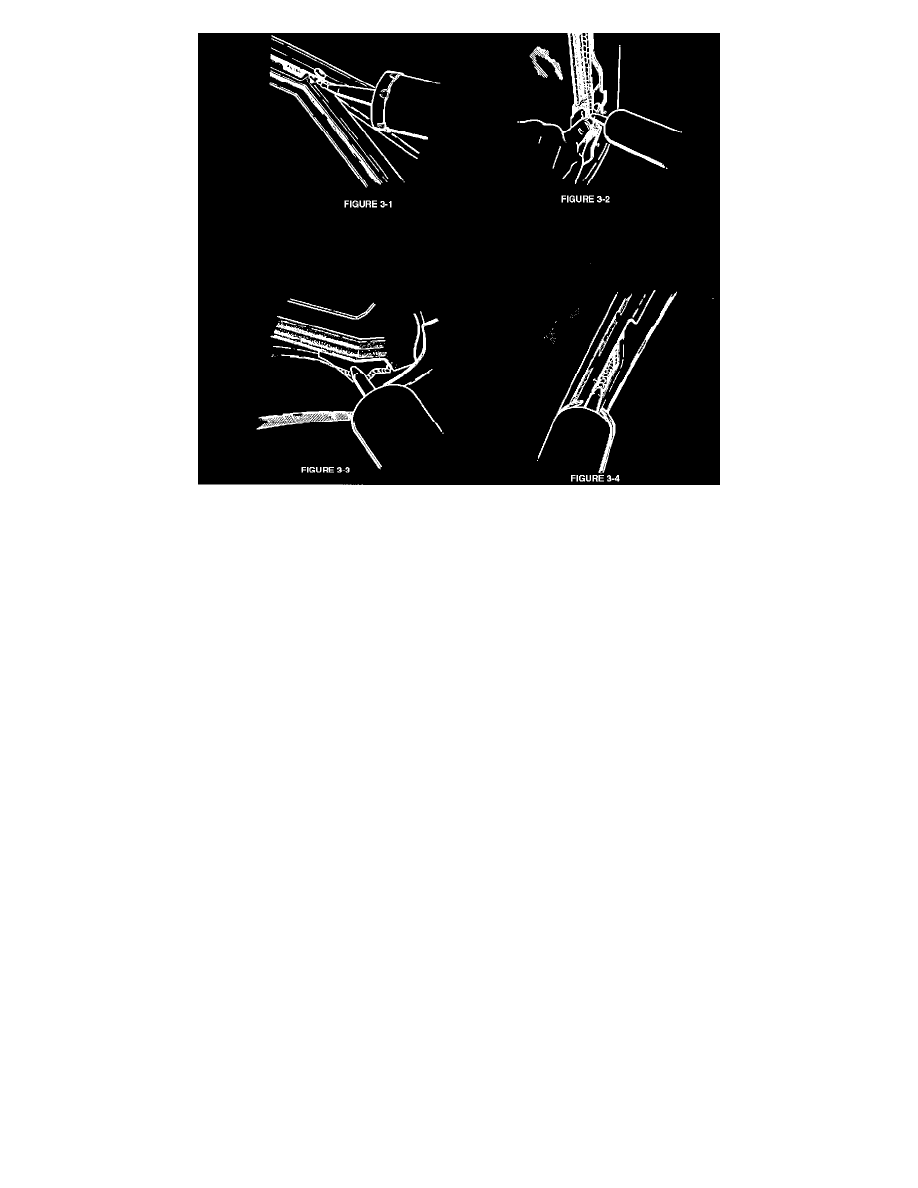
Carefully inject silicone rubber (clear or black) into area between the door flange and stationary glass rubber channel at the top of the
division post (Figure 3-1). Inject enough of the material until slight, squeeze out is seen to insure sealing of this area.
B.
While holding the flap out of the way, apply a bead of the same material between the inner edge of the rubber channel and the outer edge
of the door frame flange as shown in (Figure 3-2). Apply the bead the full length of the frame portion until slight squeeze out is seen.
C.
Continue down the door frame flange to the lower rear corner of the rubber channel, sealing all rubber to frame surfaces as shown in
Figure 3-3.
D.
Inject enough material into cavities in the door frame to plug or seal the holes as shown in Figure 3-4.
E.
Reinstall door frame inside garnish molding, inner seal strip retainer and trim panel.
IMPORTANT:
Operations using silicone rubber, some minor odor may be present and will dissipate after a short period of time.
Labor Operation Numbers:
For door weatherstrip shimming/moving door
use:
T1446 Right Side
T1447 Left Side
Labor Time
.4 Hours
For Sealing door frame to run channel on
front doors use:
T1448 Right Side
T1449 Left Side
Labor Time:
.7 Hours
For sealing door frame to rear vent channel
