
Metro L3-061 1.0L VIN 6 TBI (1998)
Rear Knuckle Alignment Link: Service and Repair
REMOVAL PROCEDURE
1. Raise-and support the vehicle.
2. Remove the rear tire and wheel assembly. Refer to TIRES AND WHEELS.
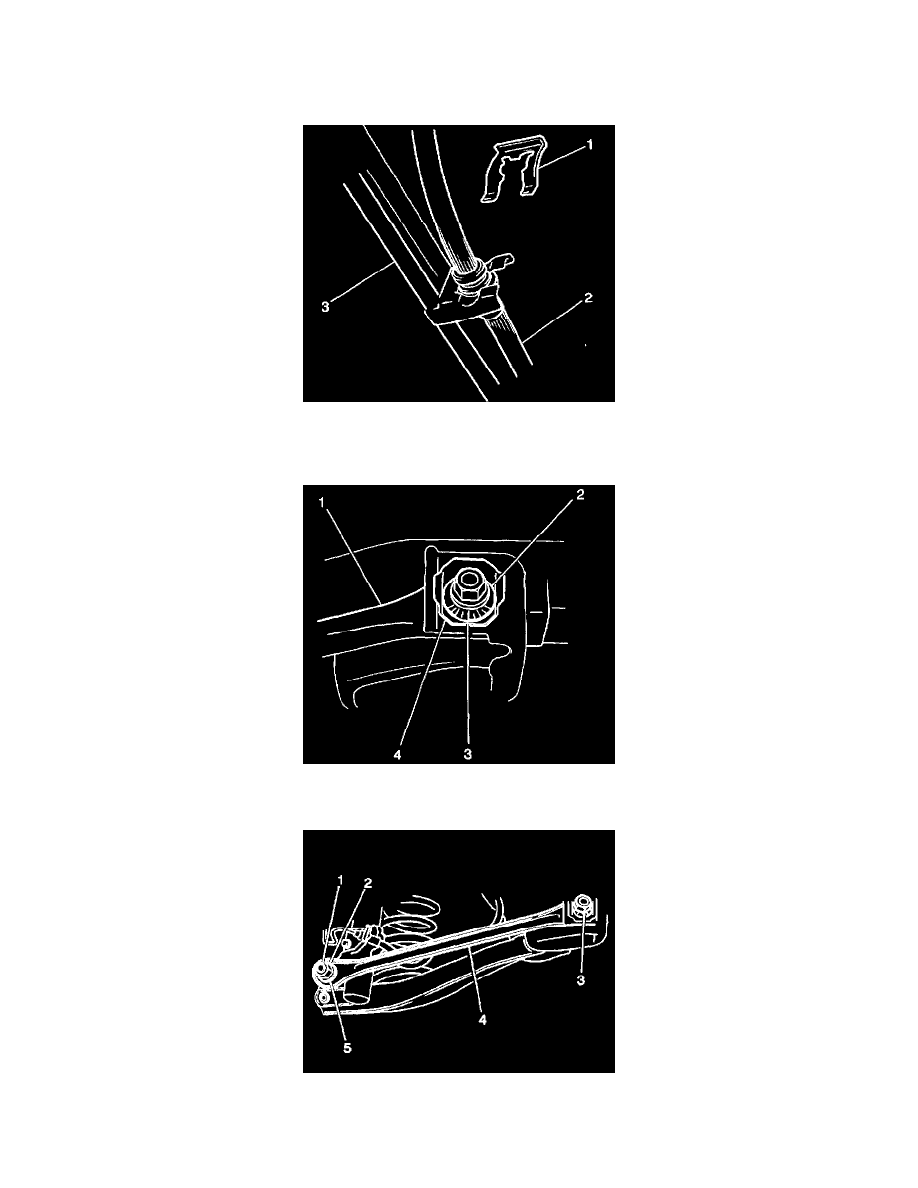
3. Disconnect the brake hose (2) from the control arm bracket.
3.1. Remove the E-clip (1) using pliers.
3.2. Pull the hose from the bracket.
4. Scribe a matchmark (3) on the control rod-to-body eccentric cam (2) prior to the bolt removal. This ensures proper eccentric cam positioning and
toe following installation of the control rod (1).
5. Remove the control rod-to-body nut and the bolt (3).
6. Remove the control rod-to-knuckle nut (2) and the washer. Pull the control rod (4) from the knuckle stud and remove the contra! rod from the
vehicle.