
Prizm L4-108 1.8L DOHC VIN 8 MFI (1998)
6. Remove the sliding pins from the caliper carrier (1).
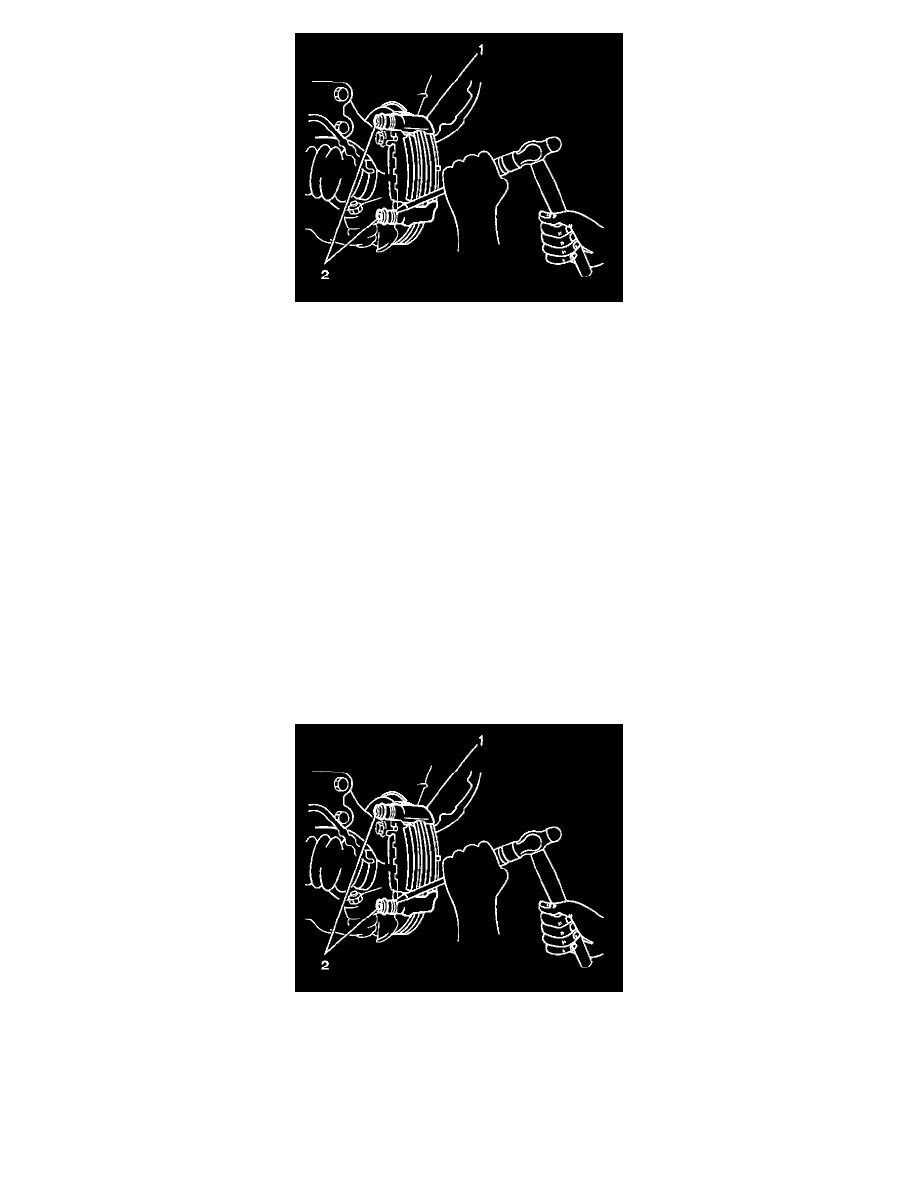
7. Remove the dust boots (2) from the caliper carrier using a dull chisel and a hammer.
8. Remove the bleeder valve from the caliper.
9. Clean the following components in denatured alcohol:
^
The caliper slide bushings
^
The caliper set ring
^
The piston
^
The caliper carrier
^
The caliper housing
10. Dry the components using unlubricated, compressed air.
11. Blow out all passages in the caliper housing and bleeder valve.
12. Inspect the following components for damage, wear or corrosion:
^
The caliper housing
^
The caliper carrier The piston
^
The piston seal
^
The piston boot
^
The caliper slide bushing
^
The caliper set ring
13. Replace the components if damage, wear or corrosion is evident.
INSTALLATION PROCEDURE
1. Lubricate all rubber parts with clean brake fluid.
NOTICE: Refer to Fastener Notice in Service Precautions.
2. Install the bleeder valve to the caliper.
^
Tighten the bleeder valve to 8.3 Nm (86 in. lbs.).
3. Lubricate the two new dust boots (2) with Lithium soap base glycol grease.