
Prizm L4-108 1.8L DOHC VIN 8 MFI (1998)
Tighten the steering gear boot heat shield bolt and nut to 5.4 Nm (48 inch lbs.).
5. Connect the exhaust pipe to the exhaust manifold. Ensure the gasket is installed properly. Secure with the 2 exhaust pipe springs and the 2 exhaust
pipe bolts.
Tighten
Tighten the exhaust pipe bolts to 62 Nm (46 ft. lbs.).
6. Install the rear transaxle mount bracket. Secure with 3 bolts.
Tighten
Tighten the bolts to 77 Nm (57 ft. lbs.).
7. Install the rear transaxle mount. Secure with the through bolt.
Tighten
Tighten the rear transaxle mount through bolt to 87 Nm (64 ft. lbs.).
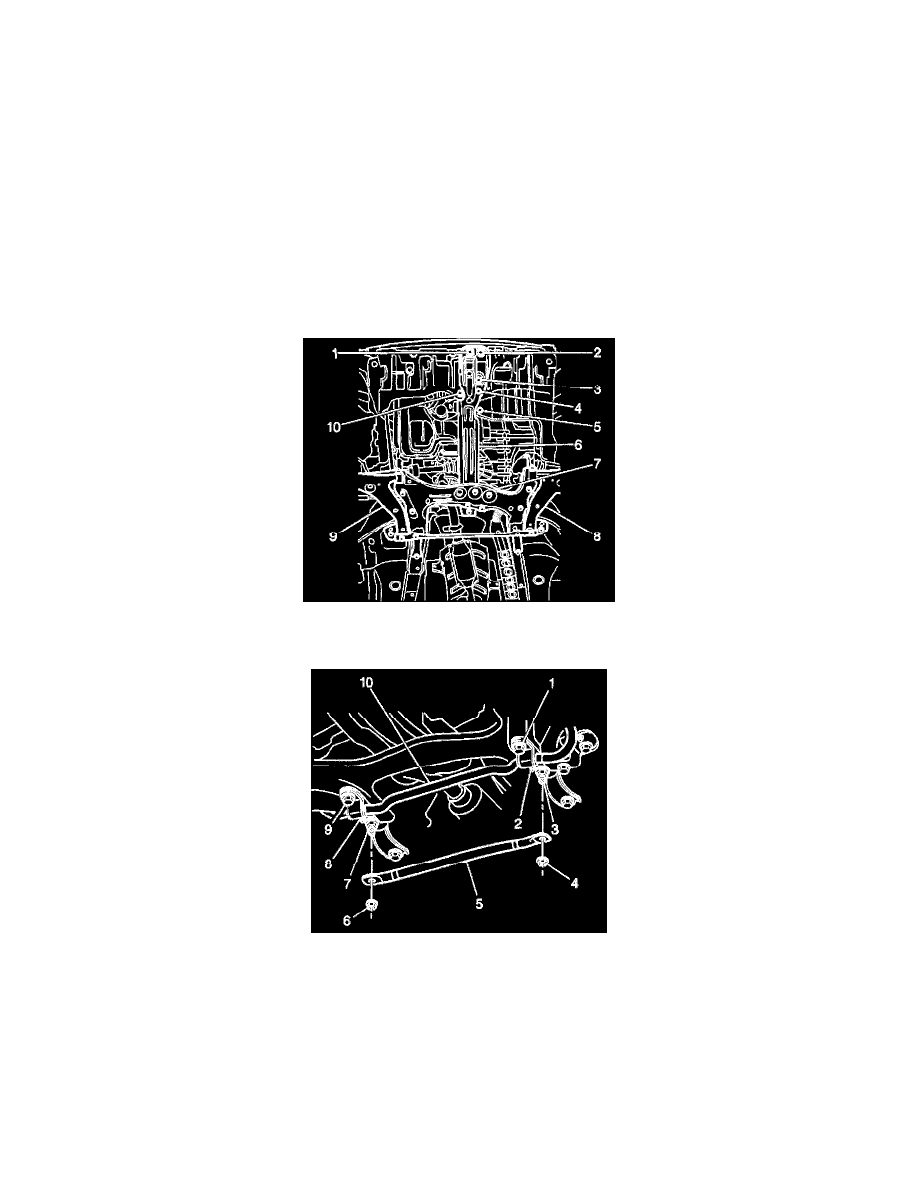
8. Install the front suspension crossmember (7), the bans support (6), the 2 control arms (8, 9), and the stabilizer shaft (if equipped) together as a unit.
Refer to FRONT SUSPENSION CROSSMEMBER REPLACEMENT in FRONT SUSPENSION.
9. Install the front suspension crossmember brace (5). Secure with 2 nuts (4, 6).
Tighten
Tighten the nuts to 69 Nm (51 ft. lbs.).
10. Install the outer tie rod. Refer to TIE ROD END REPLACEMENT- OUTER.
11. Install the front wheel and tire assemblies. Refer to TIRE AND WHEEL REMOVAL AND INSTALLATION in TIRES AND WHEELS.
12. Install the exhaust manifold pipe drive shaft heat shield. Secure with 1 nut and 2 bolts.
Tighten
Tighten the nut and bolt to 5.4 Nm (48 inch lbs.).