
S10/T10 Blazer 4WD V6-4.3L VIN W (1997)
13. Bushings.
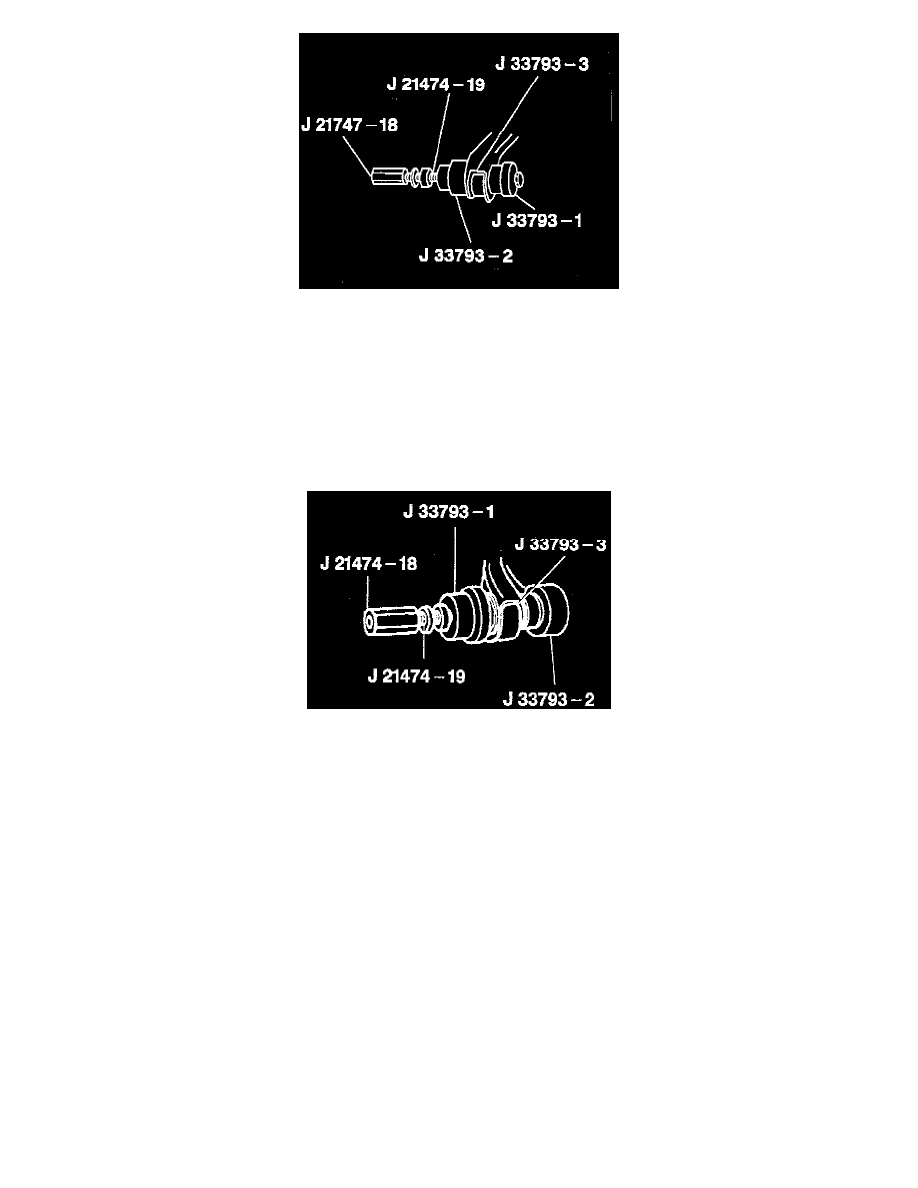
INSTALL OR CONNECT
^
Tools Required:
-
J 21474-18 Nut
-
J 21474-19 Bolt
-
J 33793-1 Installer
-
J 33793-2 Installer
-
J 33793-3 Spacer
1. Bushings to the upper control arm.
2. Bumper to the upper control arm.
3. Nut to the bumper.
-
Tighten nut to 27 Nm (20 ft. lbs.).
4. Upper control arm to the frame.
5. Cams to the bolts.
6. Bolts to the upper control arm.
-
Make sure the bolt heads are opposed inside the bracket.
-
Tighten nuts with front suspension loaded.
7. Cams.
8. Nuts.
-
Tighten front nut to 115 Nm (85 ft. lbs.).
9. Upper ball joint stud to the knuckle.
10. Nut to the upper ball joint stud.
-
Tighten nut to 83 Nm (61 ft. lbs.).
-
Tighten the nut to align the cotter pin. Do not tighten more than 1/6 turn.
11. New cotter pin. Bend pin ends against the nut flats.
-
Remove the support from the knuckle.
12. Tire and wheel.
Lower the vehicle.