
S10/T10 Blazer 4WD V6-4.3L VIN W (1997)
Control Arm: Service and Repair
Lower Control Arm and Bushing Replacement
REMOVE OR DISCONNECT
^
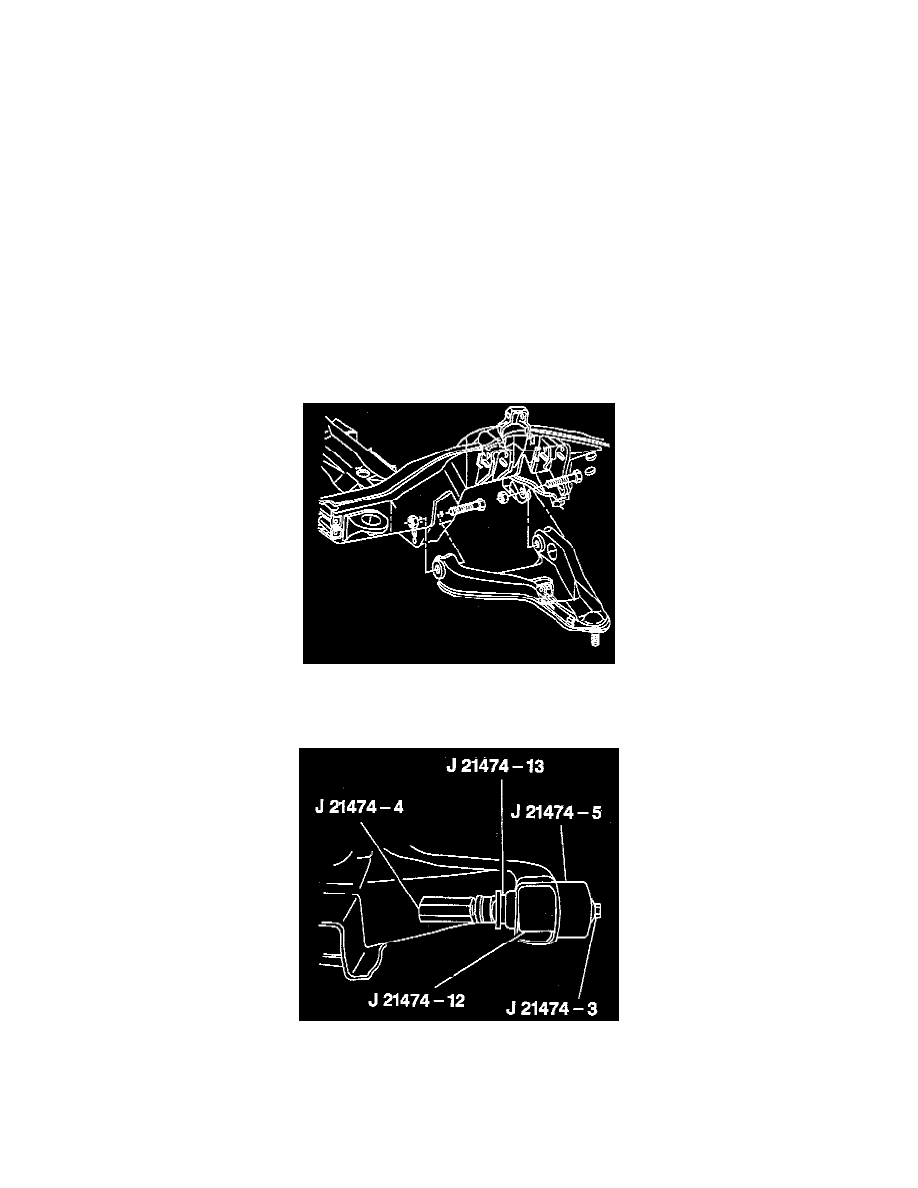
Tools Required:
-
J 21474-3 Screw Assembly
-
J 21474-4 Nut
-
J 21474-5 Control Arm Spacer
-
J 21474 Control Arm Spacer
-
J 33793-4 Bushing Remover and Installer
-
J 33793-5 Control Arm Spacer
-
J 33793-6 Spacer
Raise the vehicle and support it with safety stands.
1. Tire and wheel.
-
Unload the torsion bar.
2. Drive axle nut.
-
Removing axle nut will allow more clearance for removal of lower control arm.
3. Stabilizer shaft. Refer to "Stabilizer Shaft Replacement."
4. Shock absorber. Refer to "Shock Absorber Replacement" in this section.
5. Nuts and bolts securing the lower control arm to the crossmember and the frame bracket.
6. Ball joint stud from steering knuckle. Refer to "Hub, Bearing, Knuckle, and Seal Assembly Replacement."
7. Lower control arm.
8. Bushing.