
Tracker 2WD L4-1.6L VIN 6 (2000)
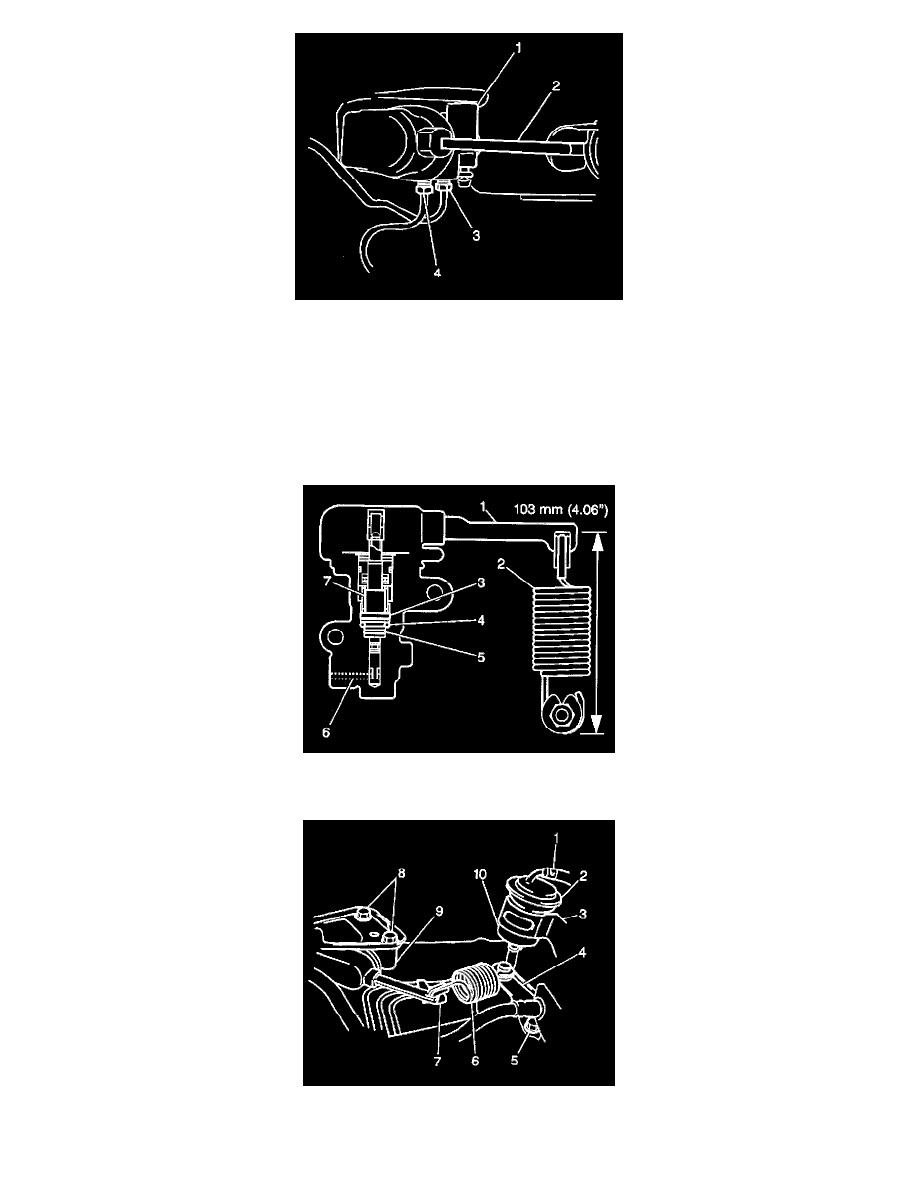
6. Install the brake pipes to the LSPV.
^
Tighten the brake pipe flare nuts (3,4) to 16 Nm (11.5 ft. lbs.).
^
Tighten the bleeder plug to 7.5 Nm (66.4 inch lbs.).
7. Lower the vehicle.
8. Fill the brake fluid reservoir. Refer to Master Cylinder Reservoir Filling.
9. Bleed the air from the hydraulic brake system. Refer to Hydraulic Brake System Bleeding.
10. Place the vehicle on a level floor.
11. Verify the vehicle trim height is correct. Refer to Trim Height Inspection Procedure and to Trim Height Specifications in Suspension General
Diagnosis.
12. Push up the LSPV lever (1) with your finger until the lever stops. Measure the length of the coil spring (2).
^
The coil spring should measure 103 mm (4.06 inch) between the spring ends.
13. If necessary, adjust the spring by changing the position of the stay (4).
^
Tighten the stay bolt to 23 Nm (17.0 ft. lbs.).