
Tracker 2WD L4-1.6L VIN 6 (2000)
Fuel Gauge: Service and Repair
Fuel Pressure Gauge Installation
INSTALLATION PROCEDURE
TOOLS REQUIRED
^
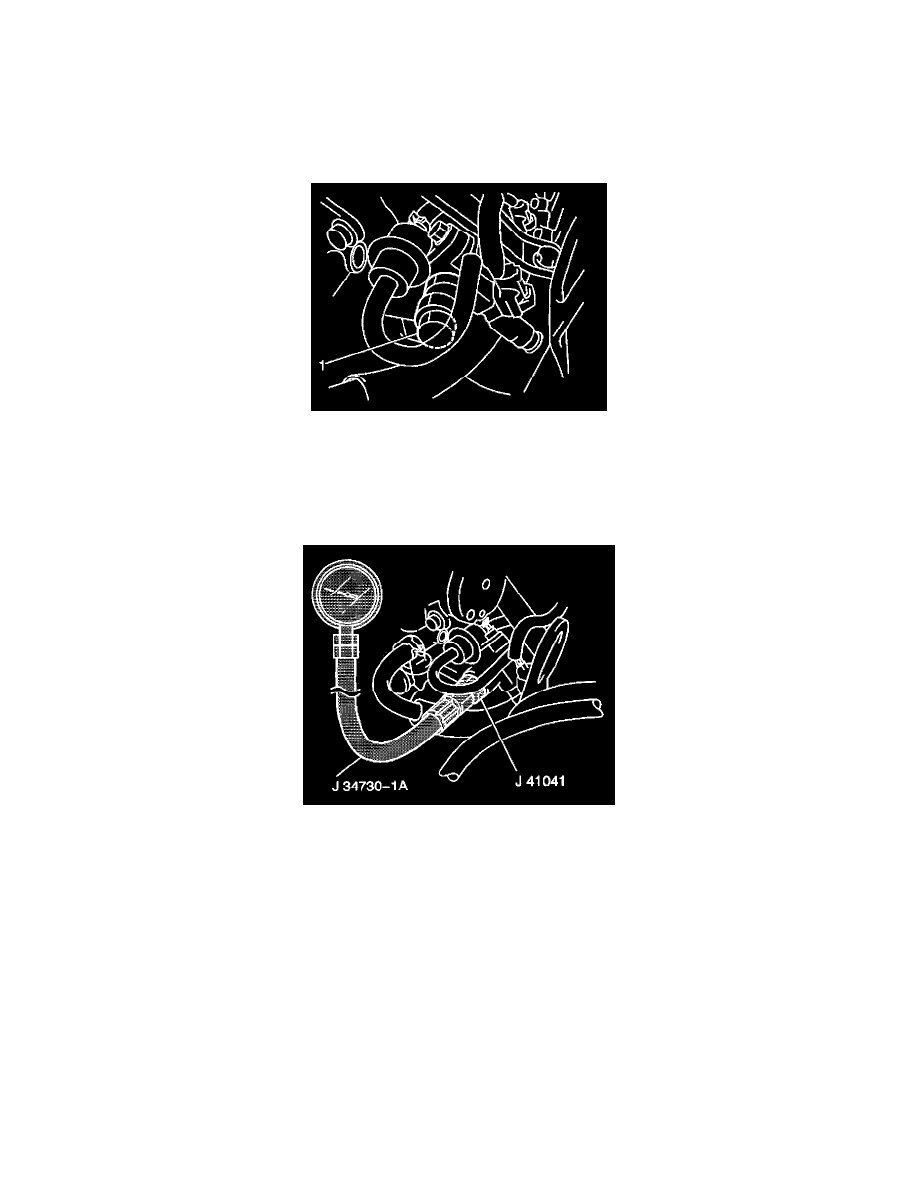
J 34730-1A Fuel Pressure Gauge
^
J 41041 Fuel Pressure Gauge Adapter
1. Relieve the fuel system pressure. Refer to Fuel Pressure Relief Procedure.
CAUTION: Refer to Battery Disconnect Caution in Cautions and Notices.
2. Disconnect the negative battery cable.
3. Remove the fuel plug bolt (1) from the end of the fuel rail.
4. Install the J 41041 fuel pressure gauge adapter to fuel rail.
5. Install the J 34730-1A fuel pressure gauge to the J41041 fuel pressure gauge adapter.
NOTE: Refer to Fastener Notice in Cautions and Notices.
6. Connect the negative battery cable.
7. Turn ON the ignition in order to pressurize the fuel system.
8. Turn OFF the ignition.
9. Check for any fuel leaks and repair as necessary.
10. Start the engine.
11. Idle the engine at the normal operating temperature.
12. Verify the fuel pressure as follows:
^
210-260 kPa (30-37 psi) with the engine idling.
^
250-300 kPa (36-43 psi) when the engine is not running, the ignition switch is On, and the fuel pump running.
^
The fuel pressure should hold at or more than 180 kPa (26 psi) within 1 minute of the engine not running while the ignition switch is Off and
the fuel pump is not running.
13. If the fuel pressure is not within the specifications, refer to Fuel System Diagnosis.
REMOVAL PROCEDURE