
Tracker 2WD L4-1.6L VIN 6 (2000)
spring. Note the location of these springs to ensure correct assembly
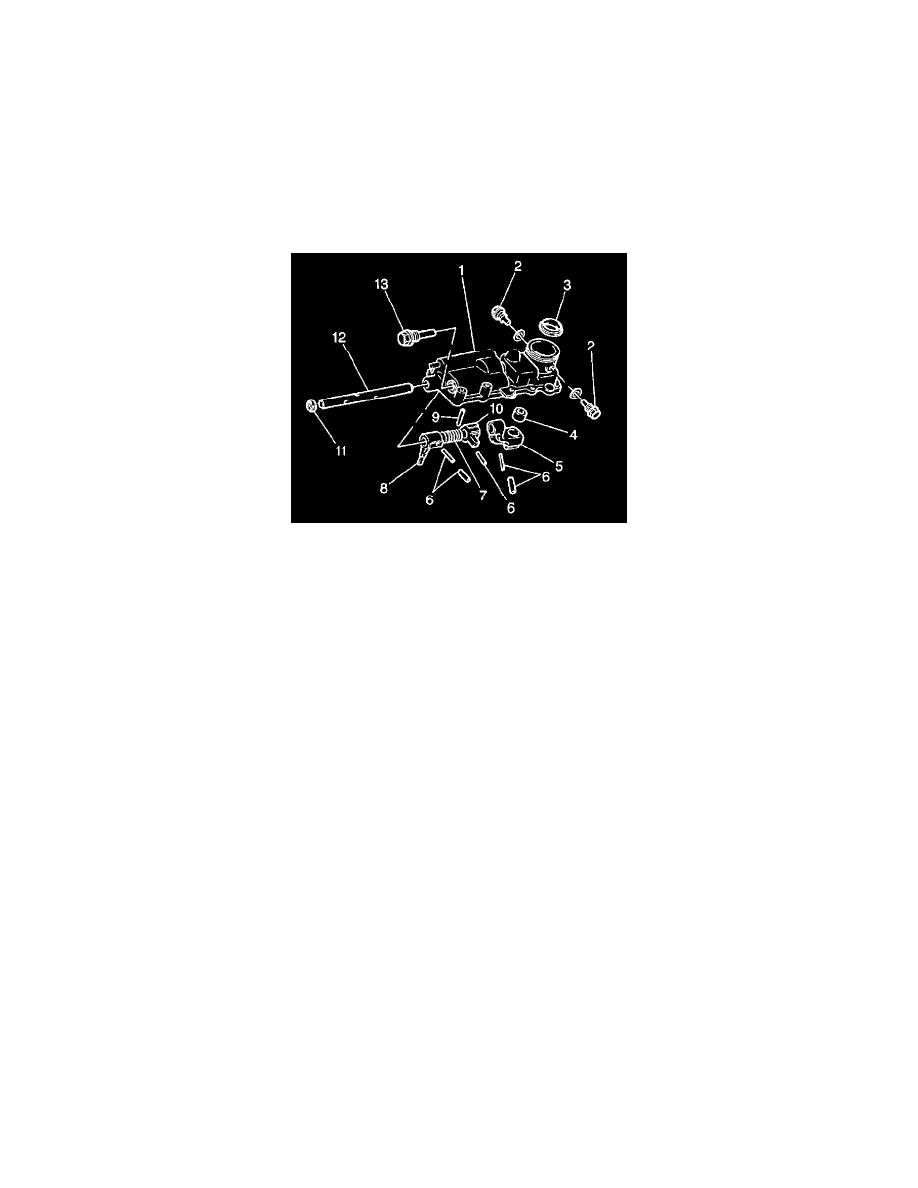
8. Remove the gearshift shaft (14) from the gearshift lever case (1) while simultaneously removing the gearshift lever (13), gearshift reverse gearshift
limit yoke (11) and the gearshift limit spring from the gearshift shaft (14).
9. Remove the reverse gearshift limit bolt (16) from the gearshift lever case(1).
10. Remove the following items from the gearshift lever case (1):
^
The 2 select return spring bolts (2)
^
The 3 select return springs (3)
^
The 2 select guide pins (4)
11. Remove the following items from the gearshift lever case (1):
^
The 2 lever locating bolts (5)
^
The 2 lever locating washers
12. Remove the gearshift lever case seat (3) from the gearshift lever case (1).
13. Clean all of the components thoroughly with solvent and air dry.
14. Inspect the gearshift shaft (12) by inserting into the gearshift lever case (1) and working back and forth while feeling for any binding. If the
gearshift shaft (12) does not move freely in and out of the gearshift lever case, replace the gearshift lever case and the gearshift shaft.
15. Inspect the gearshift lever (8), the reverse gearshift limit yoke (10) and the gearshift arm for smooth fit and movement on the gearshift shaft (12).
If any of the above components bind on the gearshift shaft (12), replace the gearshift shaft, the gearshift lever, the reverse gearshift limit yoke and
the gearshift arm.
16. Inspect the gearshift limit spring for weakness or distortion. Replace as necessary.
17. Inspect the gearshift control lever bushing for excessive wear. Replace as necessary.
18. Inspect the gearshift lever case seat for excessive wear. Replace as necessary.