
Tracker 4WD L4-1.6L VIN 6 (1998)
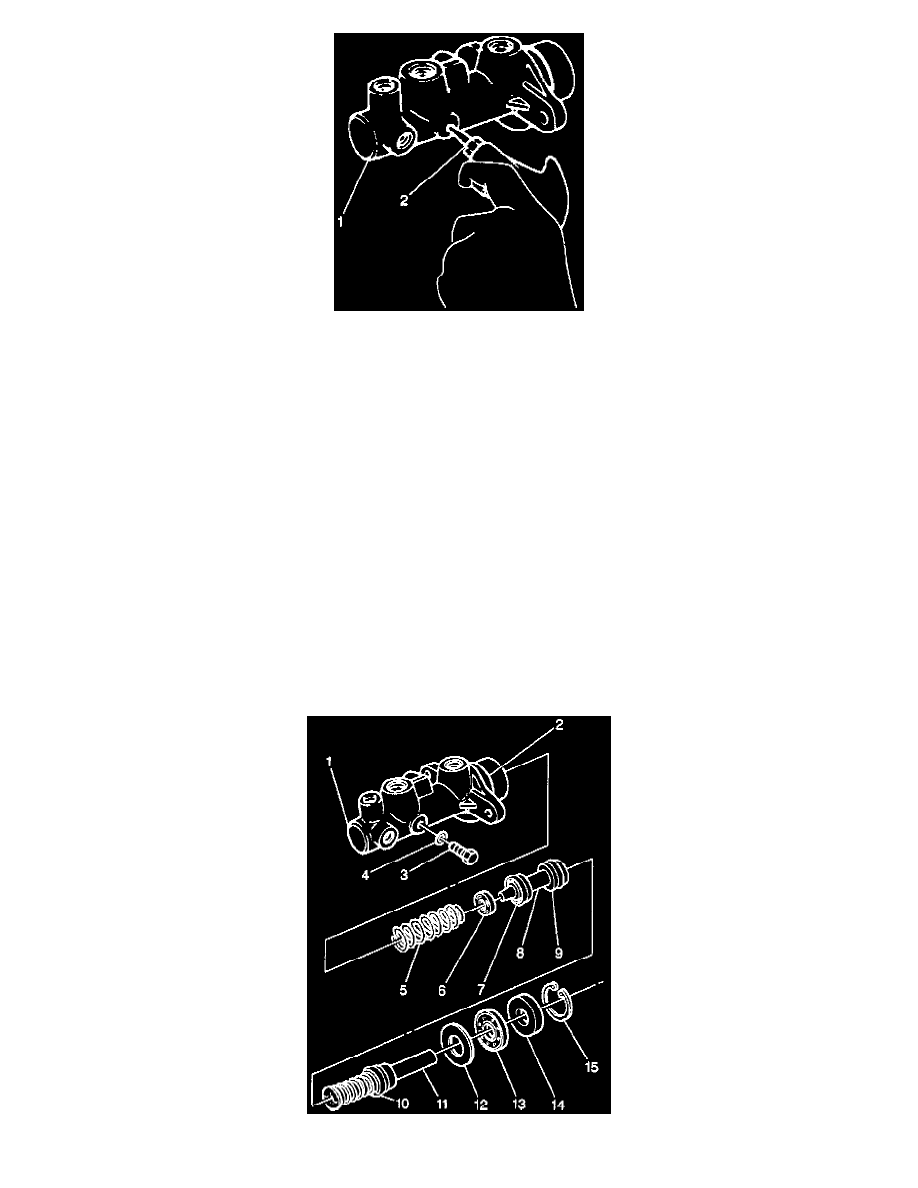
6. Remove the piston stopper bolt (2) and washer from the master cylinder (1).
CAUTION: Be careful when blowing the secondary piston out of the master cylinder with compressed air. The piston can exit the cylinder with
explosive force.
7. Remove the secondary piston, the spring seat and the spring by blowing dry compressed air into the piston stopper bolt hole.
8. Clean the following parts:
-
The reservoir, inside and out.
-
The master cylinder body and all of the internal parts with clean brake fluid.
-
Dry all parts with dry, compressed air.
IMPORTANT: Replacement internal parts for the master cylinder are available only as a complete piston set. Should any of the master cylinder
internal parts need to be replaced, replace them all.
9. Inspect the following parts:
-
The reservoir and cap for cuts, cracks and deformation.
-
The master cylinder body for scoring or corrosion. If these conditions are noted, replace the master cylinder.
-
The master cylinder internal parts for wear. Replace the master cylinder if the wear is excessive.
INSTALLATION PROCEDURE
1. Coat all of the parts with clean brake fluid.
2. Install the secondary piston spring (5), the spring seat (6) and the piston (8) into the master cylinder body (1).