
Tracker 4WD L4-1.6L VIN 6 (1998)
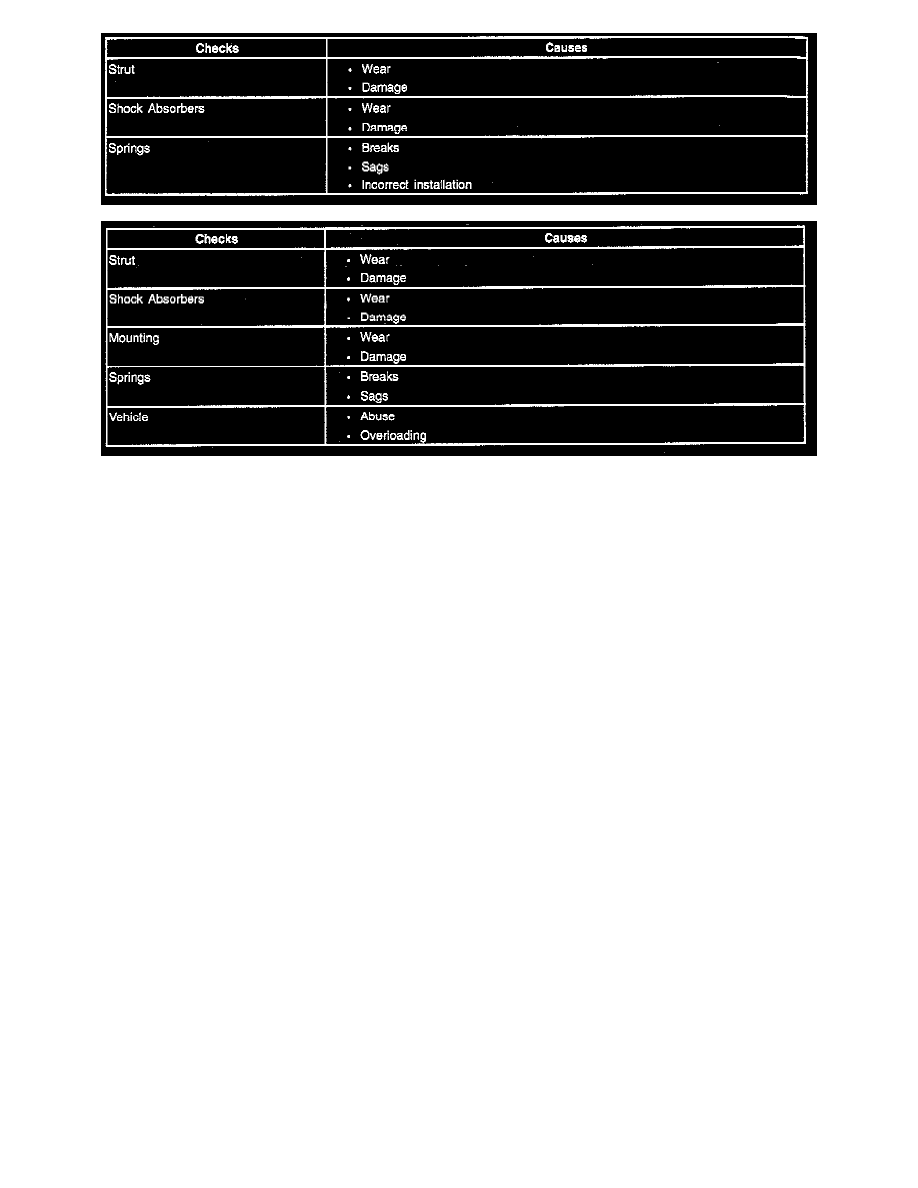
Struts or Shock Absorbers Leak
1. Fully extend the struts and shocks (with the wheels unsupported) in order to expose the seal cover area for inspection.
2. Inspect the seal cover area for signs of leaks.
3. Do not replace the seal if a slight trace of fluid exists.
The seal permits some seepage in order to lubricate the piston rod. A built in fluid reserve exists in order to allow for seepage.
4. Replace any leaking struts or shocks.
The following conditions identify a leaking strut or shock:
^
Fluid exists around the seal cover
^
Excessive fluid exists on the strut or the shock
Struts or Shock Absorbers Noisy
Use the following steps in order to inspect the struts:
1. Inspect all of the mountings for proper torque. A loose mounting may cause noise.
2. If all mountings are intact, bounce the vehicle in order to isolate the suspected unit.
3. Ride in the vehicle with the owner in order to be sure that you understand the complaint.
Use the following steps in order to inspect the shock absorbers:
1. If one of the rear shocks is noisy, support the rear axle in order to unload the shock mounts.
2. Disconnect the lower mounting of the suspected shock.
3. Quickly push the shock all of the way in, then pull the shock all of the way out.
Hearing a hissing noise while completing this procedure is normal.
4. Detect other objectionable noises by stroking the shock. If any sound other than a hissing noise is heard, replace the shock.
Struts or Shock Absorbers Weak
Use the following steps in order to inspect the struts:
1. Inspect and adjust the tire pressures to the pressures specifications shown on the tire placard. The tire placard is located on the driver's side door
lock pillar.
2. Note the load conditions under which the vehicle is normally driven.
3. Ride in the vehicle with the owner in order to verify the complaint.
4. Use the following procedure in order to test the strut dampeners/shocks:
4.1. Push down on the corner of the bumper nearest to the strut dampener/shock being inspected.
4.2. Quickly lift up the corner of the bumper nearest to the same strut dampener/shock being inspected.
4.3. Repeat the above push/pull action on each corner of the vehicle in turn in order to test each strut dampener/shock absorber.