
Tracker 4WD L4-1.6L VIN 6 (1998)
8. Remove the fourteen transmission fluid pan bolts from the transmission fluid pan.
9. Remove the transmission fluid pan and the gasket from the transmission.
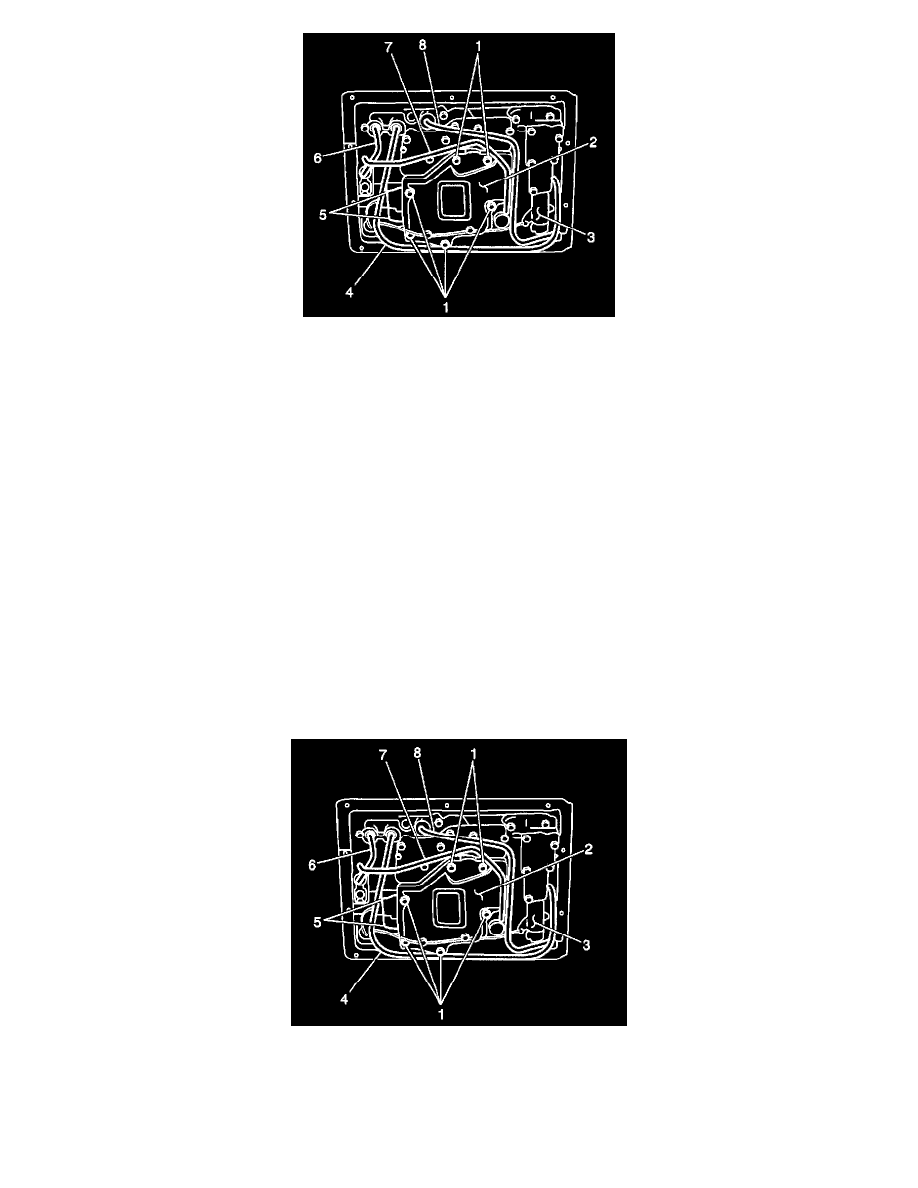
10. Remove the four fluid pipes in the following order: 7, 6, 4 and then 8.
11. Remove the following items from the valve body:
^
The six bolts (1)
^
The fluid filter screen (2)
^
The fluid filter gasket
^
The fluid filter spacer
^
The fluid filter spacer gasket
12. Clean the fluid filter screen with solvent and air dry.
IMPORTANT: A small amount of clutch material in the bottom of the transmission fluid pan is a normal condition and is consistent with normal
transmission wear. The bottom of the fluid pan is equipped with a magnet that will collect minute metal filings. However, if large amounts of
clutch material, metal shavings or other foreign matter are present, transmission disassembly and inspection is indicated.
13. Clean the transmission fluid pan with solvent and air dry.
14. Clean the fluid pan magnets with solvent and air dry.
15. Clean the transmission fluid pan.
16. Clean the fluid filter screen gasket mating surfaces
17. Inspect the fluid filter screen for tears or other damage. Replace as necessary.
INSTALLATION PROCEDURE
1. Install a new fluid filter screen gasket and fluid filter screen (2) to the valve body.
NOTICE: Refer to Fastener Notice in Service Precautions.
2. Secure the fluid filter screen (2) to the valve body with the six bolts (1).
^
Tighten the fluid filter screen bolts to 5 Nm (44 inch lbs.).