
Tracker 4WD L4-1.6L VIN 6 (1998)
Fluid Pan: Service and Repair
Transmission Oil Pan Installation
1. Install the following components to the valve body:
^
The new fluid filter screen gasket.
^
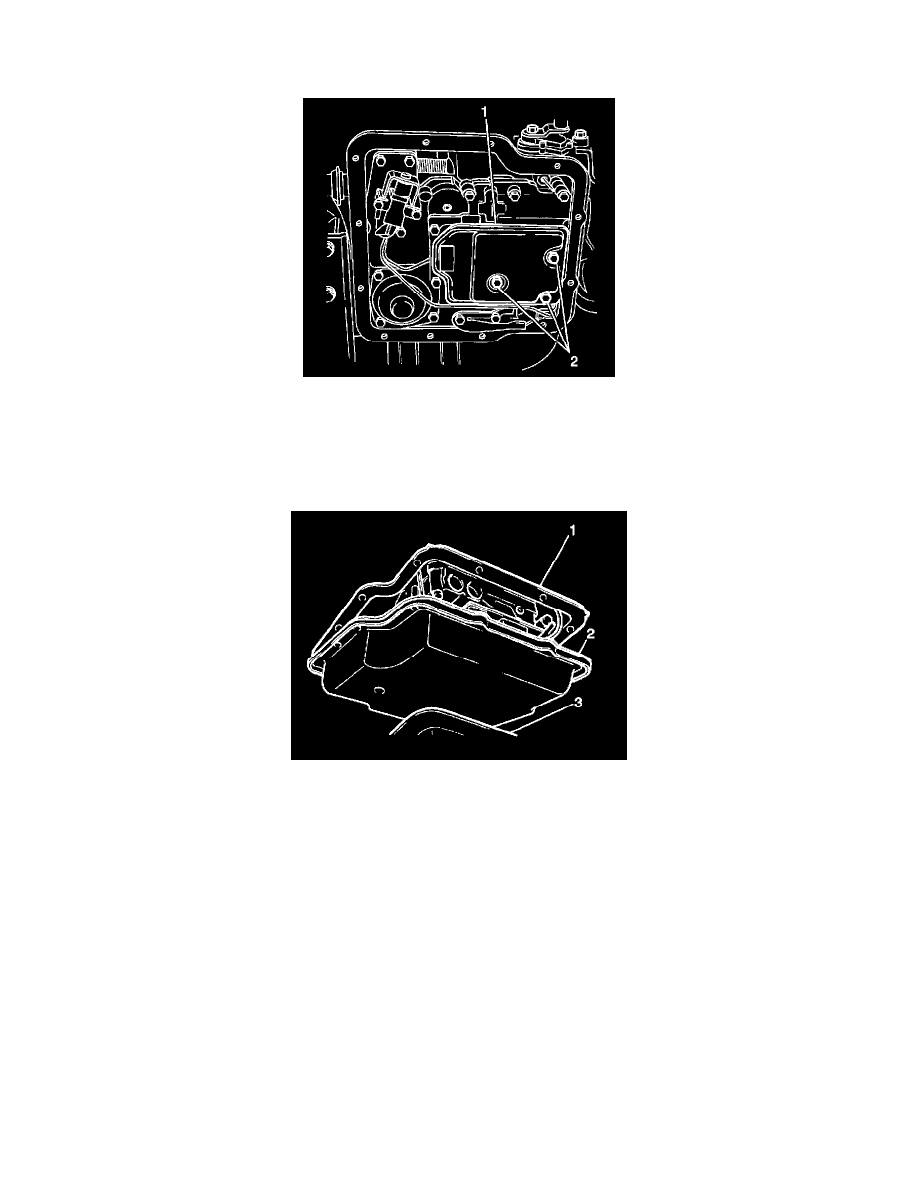
The fluid filter screen (1). Use the three fluid filter screen bolts (2), in order to secure the fluid filter screen. Tighten Tighten the fluid filter
screen bolts to 19 Nm (14 ft. lbs.).
NOTICE: Refer to Fastener Notice in Service Precautions.
2. Install the following components to the transmission (1):
^
The new transmission fluid pan gasket.
^
The transmission fluid pan (2). Use twelve transmission fluid pan bolts in order to secure the transmission fluid pan.
^
Tighten the transmission fluid pan bolts to 13 Nm (115 inch lbs.).
3. Install the front propeller shaft into the vehicle by aligning the index marks made during the front propeller shaft removal (four wheel eel drive
models).
^
Tighten the front propeller shaft bolts and nuts to 50 Nm (37 ft. lbs.).
4. Lower the vehicle.
5. Use the following procedure in order to refill the transmission if necessary.
^
Place the vehicle on a level surface.
^
Remove the fluid level indicator.
^
Add approximately 1.5 liters (1.6 quarts) of automatic transmission fluid into the fluid filler tube.
Use Dexron III automatic transmission fluid GM P/N 12346143 or the equivalent.
^
Install the fluid level indicator into the fluid filler tube.
^
Apply the parking brake and block the vehicle wheels.
^
Start the engine with the engine selector level in the PARK position.
^
Do not race the engine.
^
Perform the following procedure with the engine running at idle:
-
Remove the fluid level indicator.
-
Wipe off the fluid level indicator.