
Tracker 4WD L4-2.0L VIN C (1999)
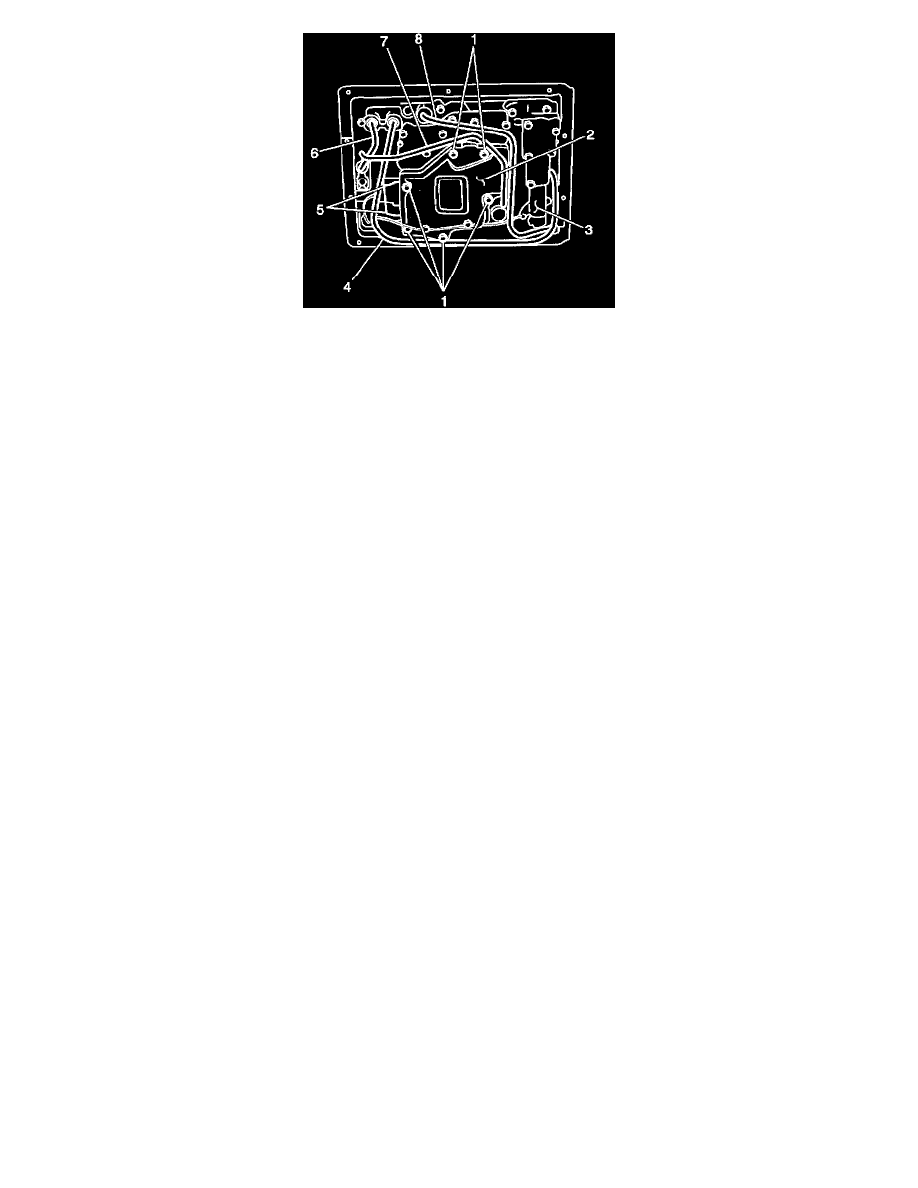
8. Install the filter screen and, bolts (1).
9. Install the fluid pipes in the following order 6, 8, 4 and then 7.
10. Install the valve body. Refer to Valve Body and Accumulator Pistons Removal.
Important: When installing the transmission pan, ensure that the filler tube connects properly.
11. Install the new transmission fluid pan gasket and fluid pan to the transmission.
12. Secure the transmission fluid pan to the transmission with the 14 bolts.
^
Tighten the fluid pan bolts to 5 Nm (44 inch lbs.).
13. Install the transmission drain plug (1) into the transmission.
^
Tighten the transmission drain plug to 16 Nm (12 ft. lbs.).
14. Install the front propeller shaft. Refer to Propeller Shaft Replacement - Front.
15. Lower the vehicle.
16. Connect the negative battery cable.
17. Refill the transmission as necessary. Refer to Automatic Transmission Fluid/Filter Changing.