
Tracker 4WD L4-2.0L VIN C (1999)
49.
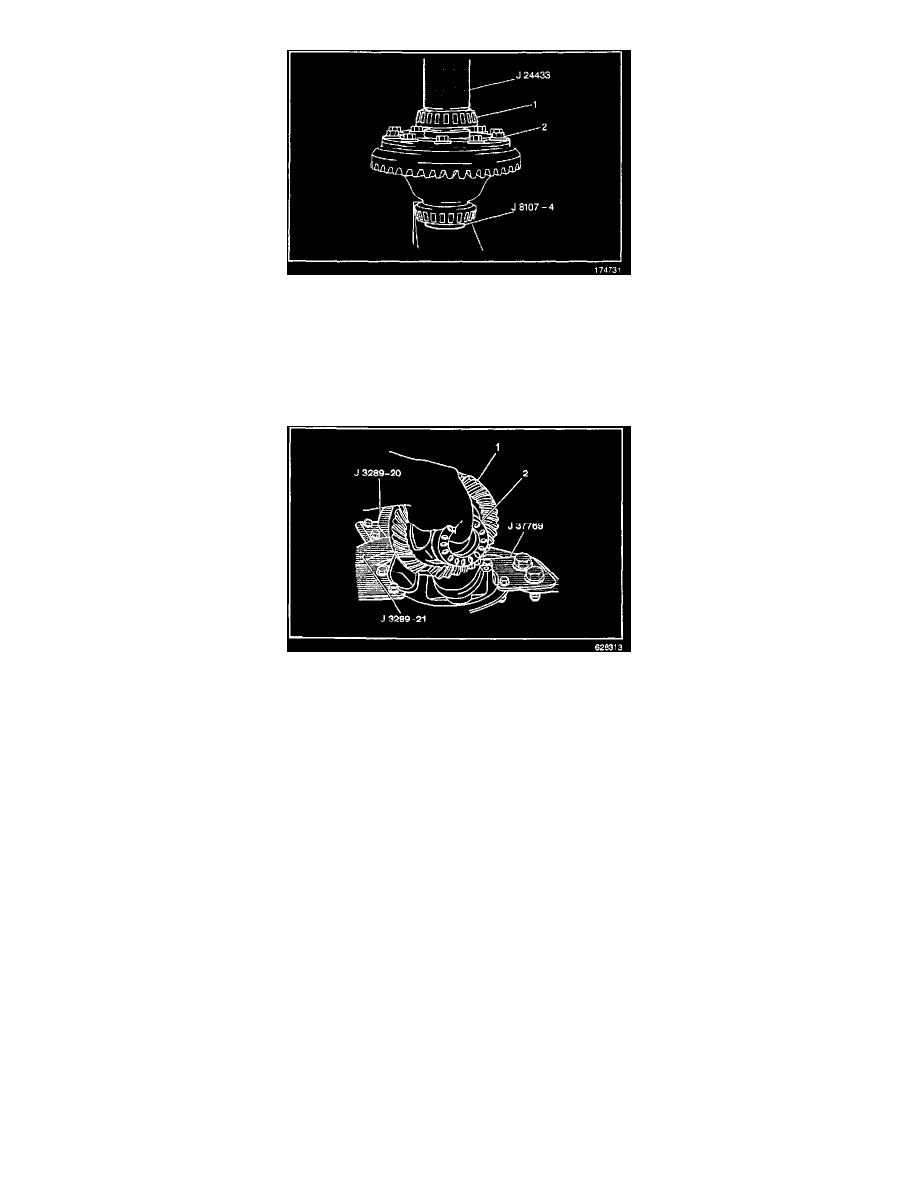
Install the side bearing (1) on the right side of the differential case assembly (2) using the J 24433 with the J 8092 and J 8107-4. Place the
differential case assembly on the hydraulic press using the J 8107-4 for support and to protect the left differential side bearing.
Use the J 24433 with the J 8092 in order to place the right differential side bearing on the right differential case with the tapered side up and
slowly press the right differential side bearing onto the right differential case.
50.
Install the differential case assembly into the differential carrier.
51.
Install both side bearing adjusters (2) on the side bearing races.
52.
Install both side bearing caps onto the differential carrier and secure with the four side bearing cap bolts.
Tighten
Tighten the differential side bearing cap bolts to 15 Nm (11 lb ft).
53.
Perform the differential side bearing preload adjustment using the procedure listed below.
54.
Perform the backlash inspection and adjustment using the procedure listed below.
55.
Install the differential inner air hose.
56.
Install the side bearing lock plates and the 2 bolts to the differential carrier.
Tighten
Tighten the side bearing lock plate bolts to 13 Nm (10 lb ft).
57.
Remove the holding fixture and adapters from the differential carrier.
58.
Apply RTV silicone sealer P/N 1052917, or equivalent, to the differential carrier mating surface on the front axle housing.