
Concorde V6-2.7L VIN V (2001)
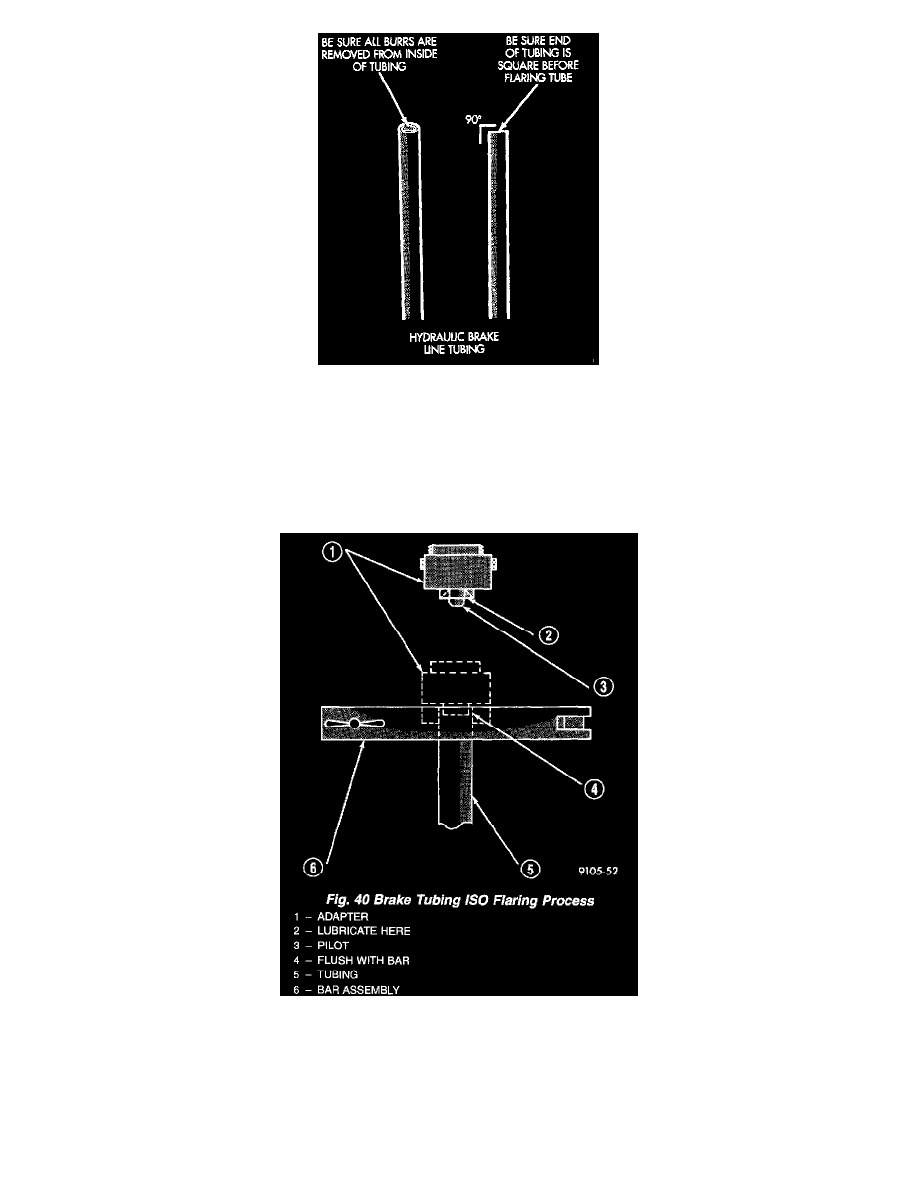
Tube End Properly Prepared For Flaring
2. Ream out any burrs or rough edges showing on inside of tubing. This will make the ends of tubing square and ensure better seating of flared end
tubing.
3. Place a tube nut on tubing before the flare is made.
CAUTION: All ISO style tubing flares are of metric dimensions. When performing any service procedures on a vehicle using ISO style tubing
flares, metric size tubing of 4.75 mm MUST be used with metric ISO tube flaring equipment.
To create a (metric) ISO style tubing flare, use Snap-On Flaring Tool TFM-428, or the equivalent. See figure and proceed with the steps listed
below. Be sure to place the tubing nut on tube before proceeding to flare the tubing.
4. Carefully prepare the end of the tubing to be flared. Be sure the end of the tubing is square and all burrs on the inside of the tubing are removed.
This preparation is essential to obtain the correct form of a (metric) ISO tubing flare.
5. Open the jaws of the Flaring Tool. Align the jaws of the flaring tool around the tubing. Close the jaws of the Flaring Tool around the tubing, but
do not lock the tubing in place.
6. Position tubing in jaws of the Flaring Tool so that it is flush with top surface of flaring tool bar assembly.
7. Install the correct size adaptor for the brake tubing being flared, on the feed screw of the yoke assembly. Center the yoke and adapter over the end