
Pacifica V6-3.8L VIN L (2005)
11) Remove lower intake manifold (Fig. 159).
WARNING: INTAKE MANIFOLD GASKET IS MADE OF VERY THIN METAL AND MAY CAUSE PERSONAL INJURY,
HANDLE WITH CARE.
12) Remove intake manifold seal retainers screws (Fig. 159). Remove intake manifold gasket.
13) Inspect and clean manifold.
CLEANING
1) Discard gasket(s).
2) Clean all sealing surfaces.
INSPECTION
Check for:
-
Damage and cracks of each section.
-
Clogged water passages in end cross-overs (if equipped).
-
Check for cylinder head mounting surface distortion using a straightedge and thickness gauge.
INSTALLATION - LOWER INTAKE MANIFOLD
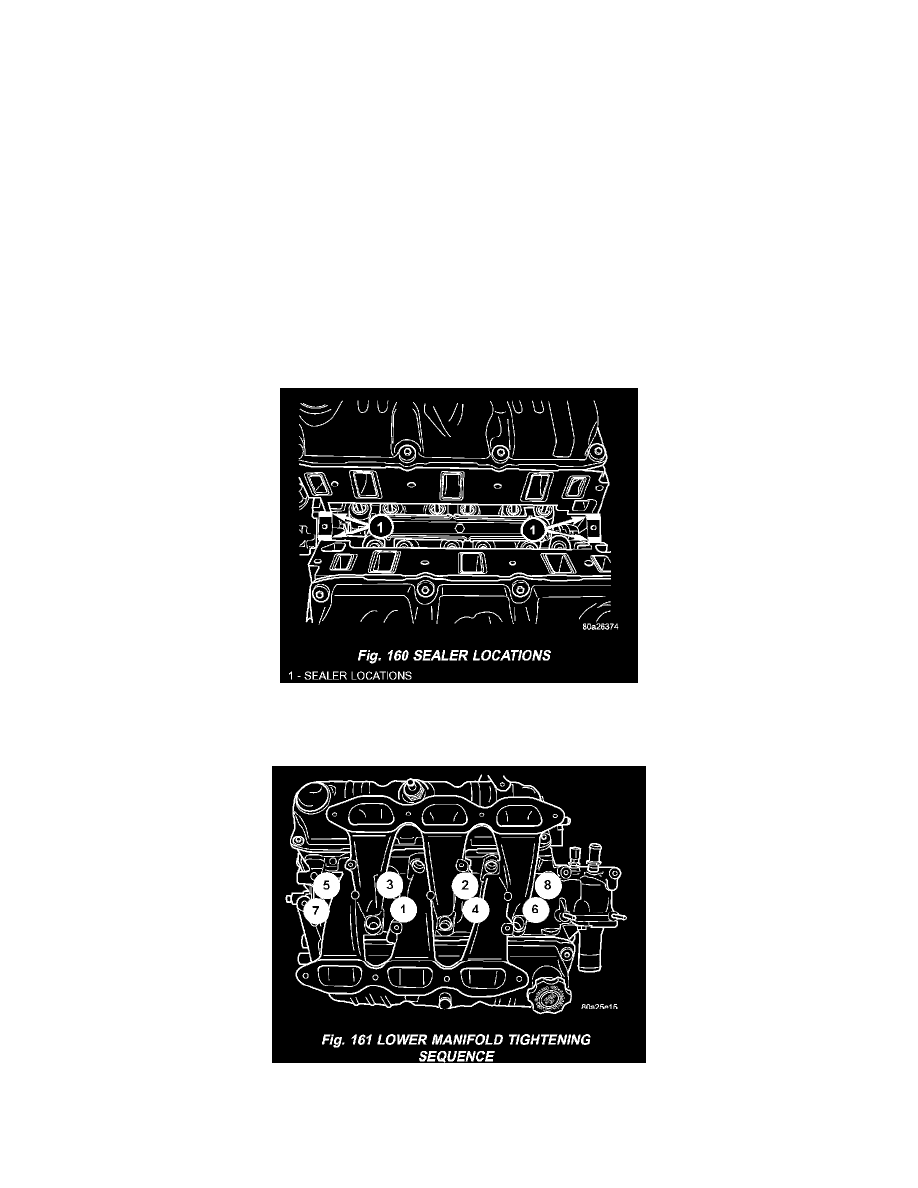
1) Place a bead (approximately 1/4 inch diameter) of Mopar Engine RTV GEN II onto each of the four manifold to cylinder head gasket corners (Fig.
160).
2) Carefully install the new intake manifold gasket (Fig. 159). Tighten end seal retainer screws to 12 Nm (105 inch lbs.).
3) Install lower intake manifold (Fig. 159). Install the bolts and torque to 1 Nm (10 inch lbs.). Then torque bolts to 22 Nm (200 inch lbs.) in
sequence shown in (Fig. 161). Then torque again to 22 Nm (200 inch lbs.). After intake manifold is in place, inspect to make sure seals are in
place.
4) Install the fuel injectors and rail assembly.