
Pacifica V6-3.8L VIN L (2005)
ASSEMBLY
1. Install the air doors into the passenger side of the air distribution housing as required. Align the air doors with the pivot shaft holes in the housing.
2. Install the air vane and retaining screw to the passenger side of the air distribution housing. Tighten the screw to 2 N.m (17 in. lbs.).
3. Align the air door pivot shafts with the pivot holes in the center partition and install the partition onto the passenger side of the air distribution
housing.
4. Install the driver side air vane and retaining screw to the center partition. Tighten the screw to 2 N.m (17 in. lbs.).
5. Install the blend-air door to the driver side of the air distribution housing. Align the air door with the pivot shaft hole in the housing.
6. Align and install the blend door gear into the pivot shaft of the driver side blend-air door. Make sure that the retaining tab on the door gear is
securely engaged to the pivot shaft.
7. Align the air door pivot shafts to each other and carefully install the driver side half of the air distribution housing to the passenger side half of the
housing.
8. Install the seven screws that secure the two halves of the air distribution housing together. Tighten the screws to 2 N.m (17 in. lbs.).
9. Inspect the foam seal, especially at the parting line. If the seal is deformed or damaged, it must be replaced.
10. Install the screw to the center of the driver side air distribution housing. Tighten the screw to 2 N.m (17 in. lbs.).
11. Position the floor distribution ducts onto the air distribution housing.
12. Install the six screws that secure the floor distribution ducts to the air distribution housing. Tighten the screws to 2 N.m (17 in. lbs.).
NOTE: Align the guide pin on the linkage arms with the guides on the mode door cam during installation of the floor door gear and linkage arms.
13. Install the passenger side blend door stop, driver side blend door gear, floor door gear, mode door cam, instrument panel door linkage arm and the
defrost door linkage arm onto the driver side of the air distribution housing.
14. Position the mode door and blend door actuators onto the driver side of the air distribution housing. If necessary, rotate the actuators slightly to
align the splines on the actuator output shaft with those in the air door linkage.
15. Install the two screws that secure each actuator to the air distribution housing. Tighten the screws to 2 N.m (17 in. lbs.).
16. Carefully install the heater core into the driver side of the air distribution housing.
17. Install the two screws that secure the heater core to the air distribution housing. Tighten the screw to 2 N.m (17 in. lbs.).
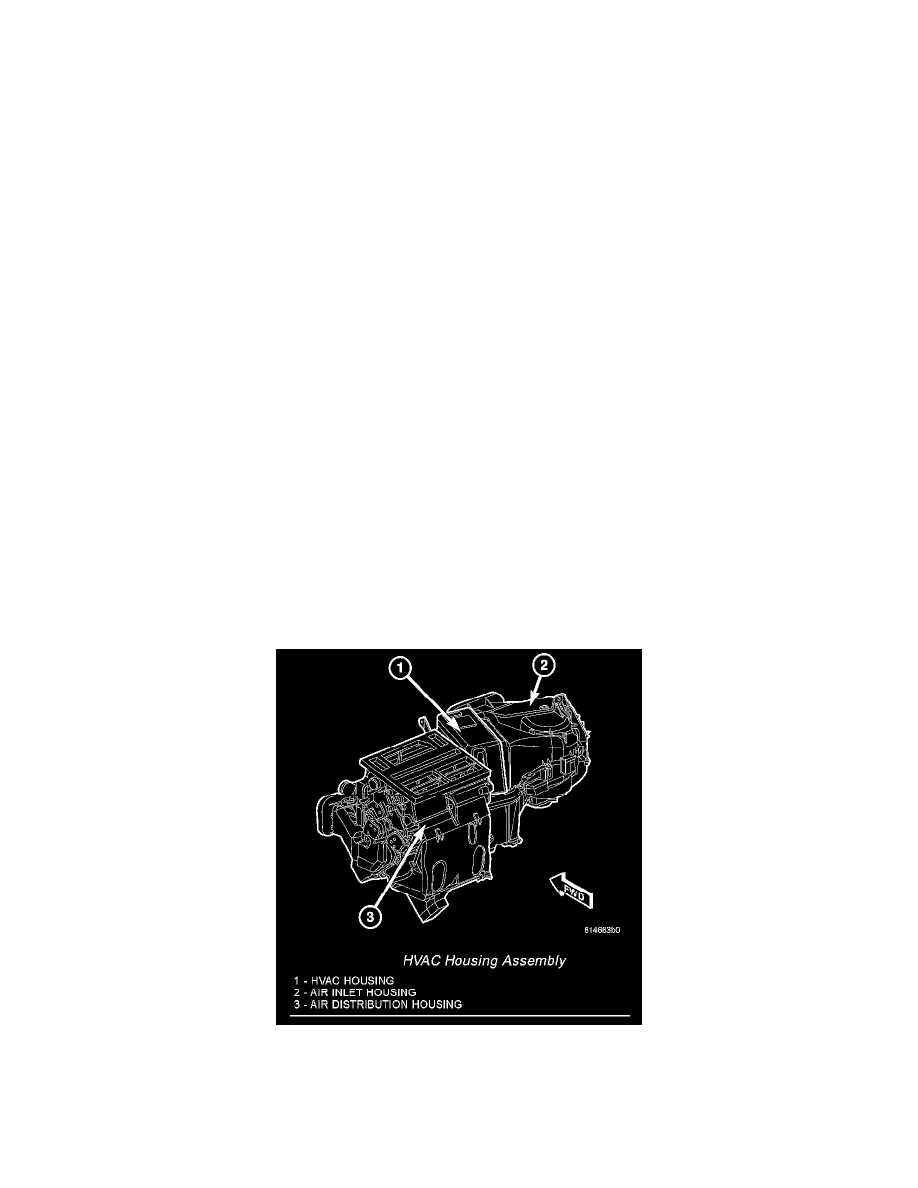
18. Install the air distribution housing onto the HVAC housing.
HVAC Housing
DISASSEMBLY
NOTE: The HVAC housing must be removed from the vehicle and disassembled for service of the A/C evaporator.
1. Remove the HVAC housing from the vehicle and place it on a workbench.
HVAC Housing Assembly
2. Remove the air distribution housing from the HVAC housing.
3. Remove the air inlet housing from the HVAC housing.
4. Remove the A/C expansion valve from the A/C evaporator.