
PT Cruiser L4-2.4L (2008)
15. Install the air cleaner cover.
16. Check the stop lamps to verify they are operating properly and not staying on when the pedal is in the released position.
17. Road test the vehicle to ensure proper operation of the brakes and speed control (if equipped).
With Manual Transaxle
WITH MANUAL TRANSAXLE
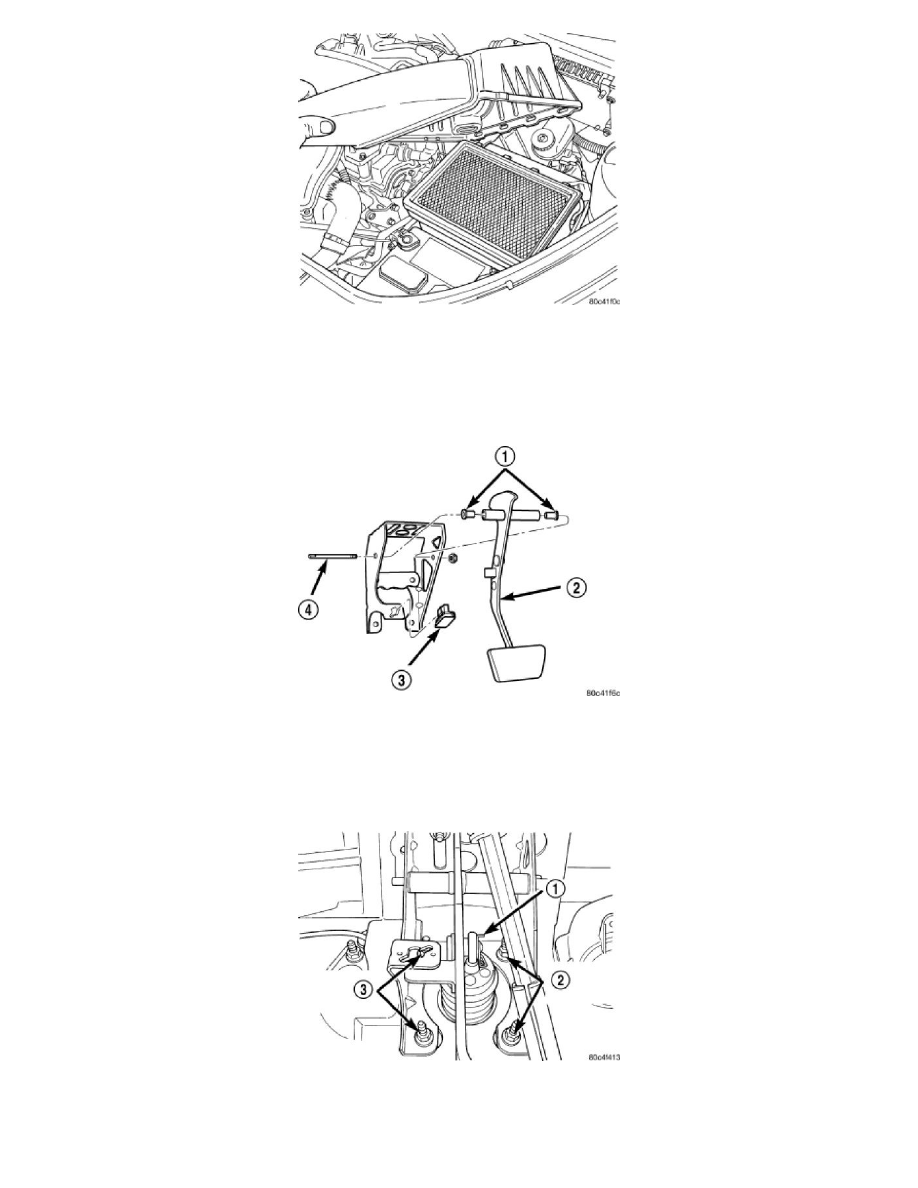
1. Lubricate the brake pedal bushings (1) with Mopar(R) Lubriplate or equivalent.
2. If removed, slide a bushing (1) in each side of the pedal (2) pivot until the bushing shoulder contacts the pedal pivot.
3. Install the brake pedal (2) and bushings into the pedal mounting bracket by sliding the pedal up between the sides of the bracket behind the stop
lamp switch mounting flange.
4. Once the pedal bushings line up with the mounting holes in the bracket, install the pivot shaft (4) through the pedal from the left side.
5. Install the pivot shaft nut. Tighten the nut to 34 Nm (25 ft. lbs.).
6. Install the power brake booster push rod on the pin mounted on the side of the brake pedal. Install a new retaining clip (1) on the end of the pin.
Do not reuse the old clip.
CAUTION: Do not reuse the original stop lamp switch. The switch can only be adjusted once. That is during initial installation of the