
PT Cruiser L4-2.4L (2008)
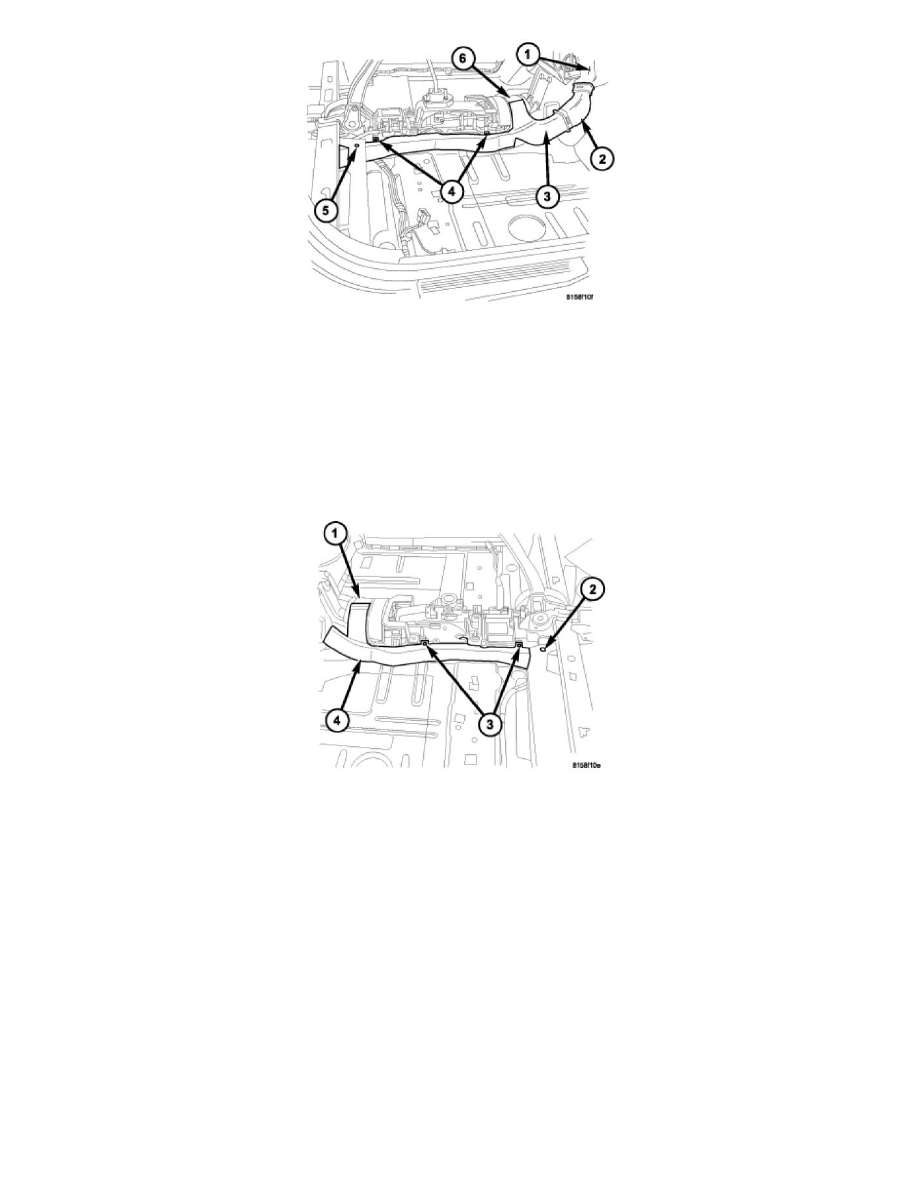
NOTE: Illustration shown with front floor carpet removed for clarity.
7. Remove the center floor console See: Body and Frame/Interior Moulding / Trim/Console/Service and Repair/Center Console - Removal.
8. Remove the two screws (4) that secure the right rear floor duct (3) to the floor panel.
9. Remove the push-pin retainer (5) that secures the rear floor carpet to the right rear floor duct.
10. Disengage the right rear floor duct from the left rear floor duct (7) and the right rear intermediate floor duct (2).
11. Pull the right rear floor duct out from the opening in the rear carpet and remove the duct from the vehicle.
12. If required, disengage the right rear intermediate floor duct from the right floor distribution duct (1) and remove the intermediate duct from the
vehicle.
LEFT REAR FLOOR DUCT
NOTE: Illustration shown with front floor carpet removed for clarity.
13. Remove the center floor console See: Body and Frame/Interior Moulding / Trim/Console/Service and Repair/Center Console - Removal.
14. Remove the two screws (3) that secure the left rear floor duct (4) to the floor panel.
15. Remove the push-pin retainer (2) that secures the rear floor carpet to the left rear floor duct.
16. Disengage the left rear floor duct from the right rear floor duct (1).
17. Pull the left rear floor duct out from the opening in the rear carpet and remove the duct from the vehicle.