
PT Cruiser L4-2.4L (2008)
Axle Beam: Service and Repair
Installation
Rear Disc Brake Vehicles
REAR DISC BRAKE VEHICLES
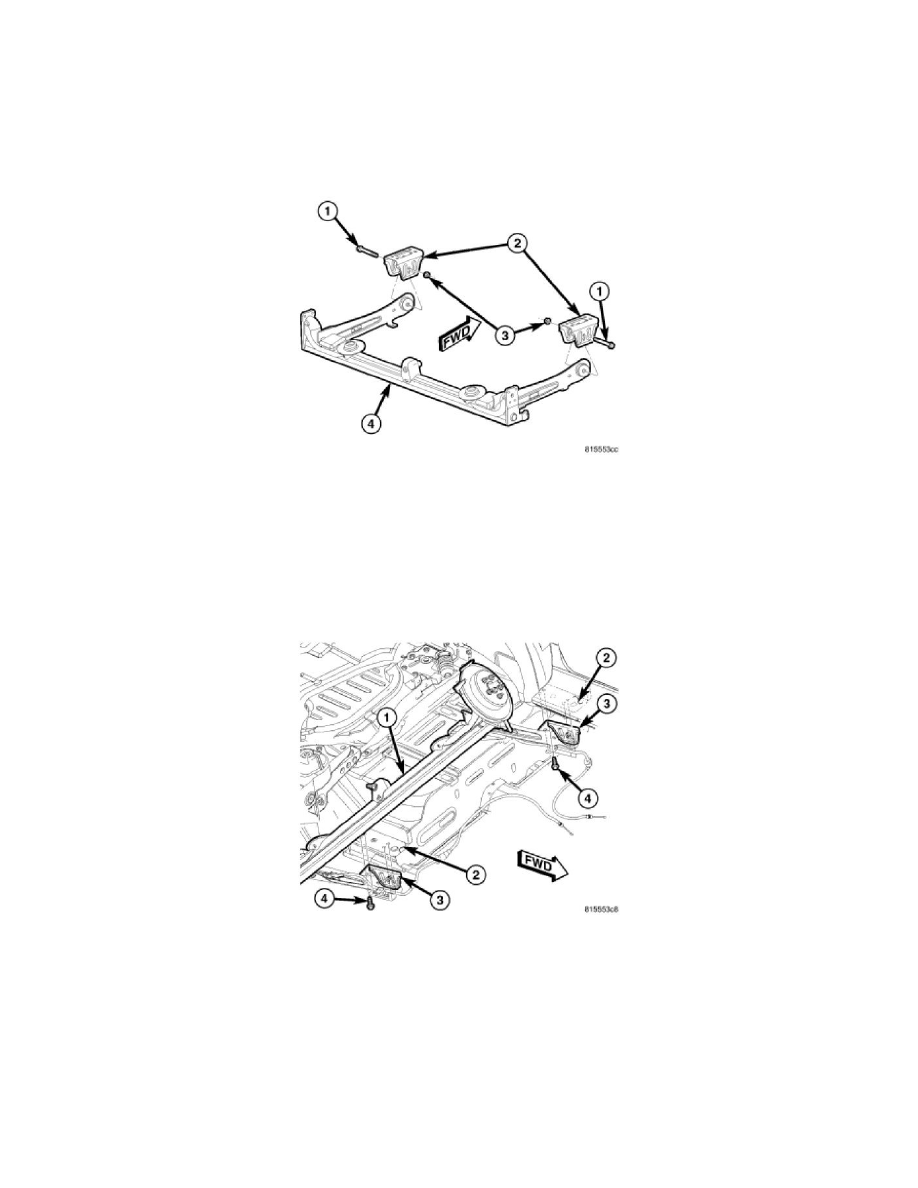
1. If removed, install the trailing arm forward brackets (2) on each side of the axle in the following way:
a. From above the axle (4), place the bracket (2) down over the axle trailing arm bushing aligning the hole in the bracket with the center hole in
the bushing.
b. From the outboard side of the axle and bracket, push the thru-bolt (1) through the bracket and bushing. The trailing arm bracket thru-bolts
must be installed from the outside, in toward the center of the axle assembly, otherwise the bolt threaded ends will come in contact
with the body of the vehicle upon axle installation on vehicle.
c. Install the nut (3) on the inboard end of the bolt. Tighten the nut until the bracket has resistance when turned, but still moves independent of
the axle bushing. Do not tighten at this time; it must be fully tightened with the vehicle at curb height.
2. Center the axle beam on a transmission jack standing at axle removal height.
3. Swing the axle trailing arms up aligning the brackets (3) with the scribed marks made upon removal.
4. Install all eight (four per side) axle bracket-to-body mounting bolts (4). Thread the bolts in, but do not fully tighten at this time.
5. Tap the brackets (3) as necessary to align the brackets with the scribed marks, then tighten all the bolts to 54 Nm (40 ft. lbs.).