
PT Cruiser L4-2.4L (2008)
Trailing Arm Bushing: Service and Repair
Installation
INSTALLATION
NOTE: To ease and attain proper installation of the bushing using Special Tool 8405, use Mopar(R) Rubber Bushing Installation Lube as
indicated in the following step.
1. Apply Mopar(R) Rubber Bushing Installation Lube to the outside edges of the NEW bushing. Also, lubricate the inside of Installer, Special Tool
8405-2, with the special lube.
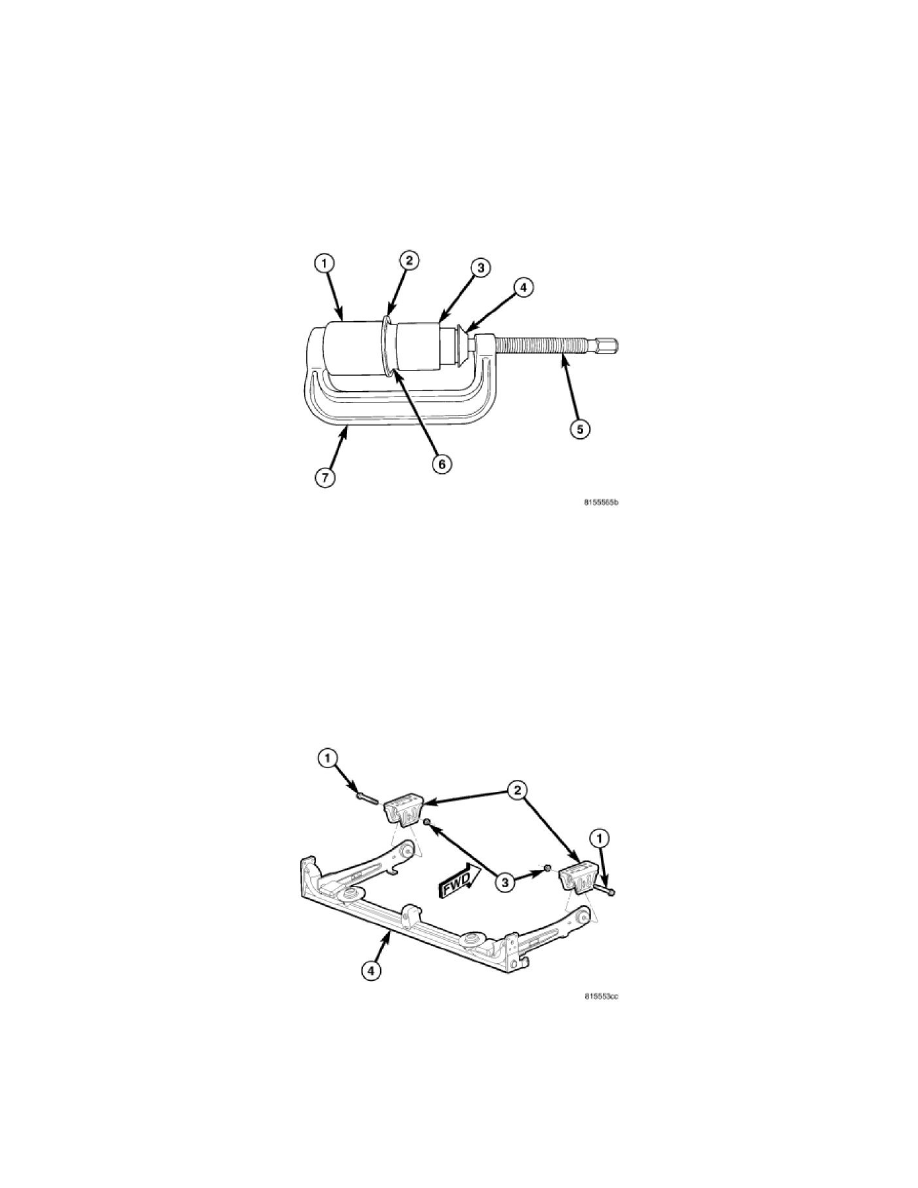
2. Place the stepped end of Installer (3), Special Tool 8405-2, on the end of the trailing arm bushing sleeve (2) that has the curved flange (6) at the
arm.
3. Place the lubricated bushing (4) inside the large opening in the Installer (3).
4. Place the Press (7), Special Tool C-4212F, with Receiver (1), Special Tool 8405-1, installed, over the arm (2), Installer (3) and bushing (4) as
shown. When properly installed, the Press screw-drive (5) will be toward the center of the vehicle. Note the curve on the axle trailing arm (6). This
curve prevents the tool from being properly installed in the opposite direction.
5. Using hand tools, slowly tighten the Press screw-drive (5), pressing the bushing into the trailing arm sleeve. Do not over-install the bushing; the
bushing can be pushed out the other side if care is not used. Push the bushing in until freed from the installer (3) and centered in the trailing arm
sleeve. The outer lips of the bushing must hang out past the end of the sleeve on each side of the trailing arm.
6. Remove the tools from the trailing arm.
7. If the opposite side bushing needs to be installed, repeat STEP 1 through STEP 6 on that side of the vehicle.
8. Install the trailing arm forward bracket(s) (2) on the axle in the following way:
a. From above the axle (4), place the bracket (2) down over the axle trailing arm bushing aligning the hole in the bracket with the center hole in
the bushing.
b. From the outboard side of the axle and bracket, push the thru-bolt (1) through the bracket and bushing. The trailing arm bracket thru-bolts
must be installed from the outside, in toward the center of the axle assembly, otherwise the bolt threaded ends will come in contact
with the body of the vehicle upon axle installation on vehicle.
c. Install the nut (3) on the inboard end of the bolt. Tighten the nut until the bracket has resistance when turned, but still moves independent of