
Lanos S Hatchback L4-1.6L DOHC D-TEC MFI (1999)
14. Apply a bead of adhesive sealing compound to the grooves of the crankshaft bearing caps.
15. Install the crankshaft bearing caps to the engine block.
16. Tighten the crankshaft bearing caps using new bolts.
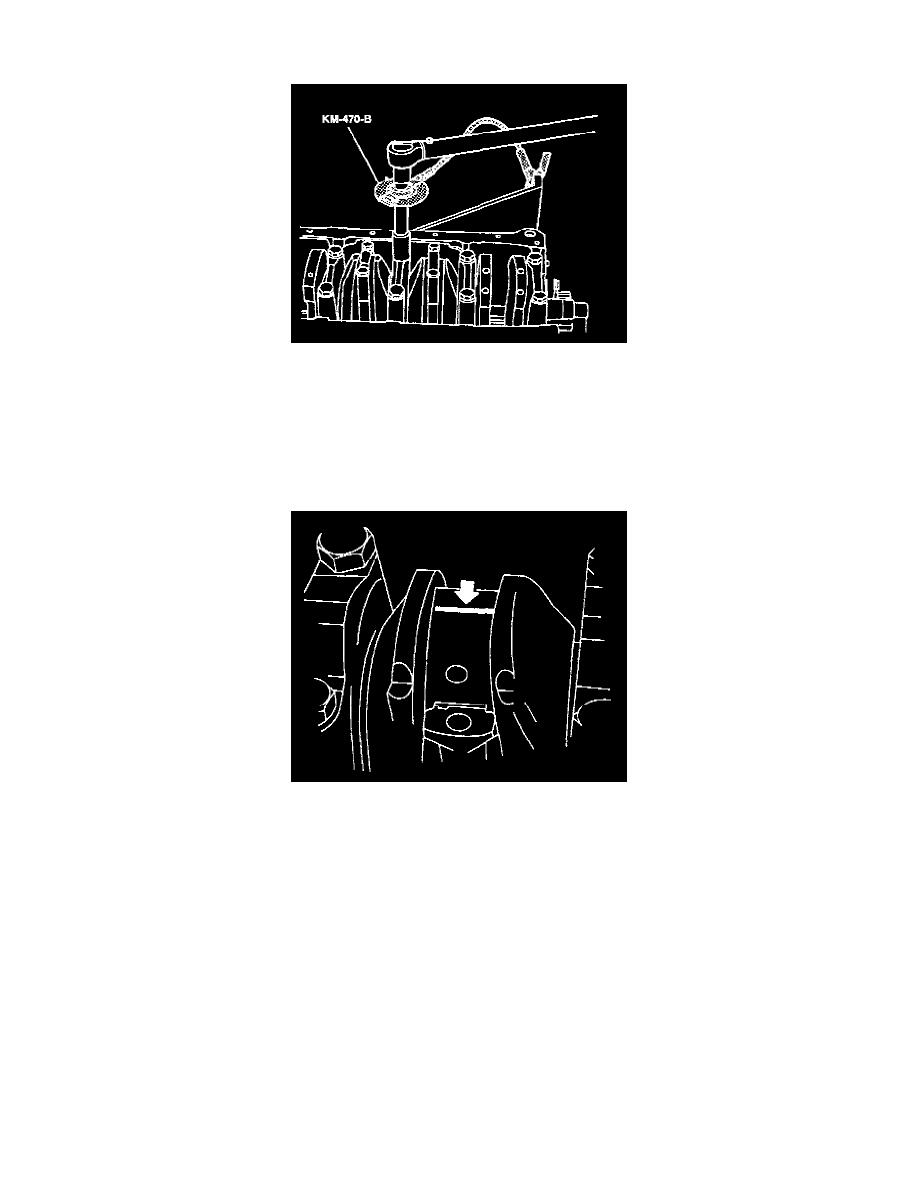
Tighten the crankshaft bearing cap bolts to 50 Nm (37 ft. lbs.) using a torque wrench. Use the angular torque gauge KM-470-B to tighten the
crankshaft bearings 45 degrees plus 15 degrees.
Important: Grease the connecting rod journals and lubricate the connecting rod bearings slightly so that the plastic gauging thread does not tear
when the connecting rod bearing caps are removed.
17. Inspect all of the connecting rod bearing clearances using plastic gauging.
18. Cut the plastic gauging threads to the length of the connecting rod bearing width. Lay them between the connecting rod journals and the
connecting rod bearings.
19. Install the connecting rod bearing caps.
Tighten the connecting rod bearing cap bolts to 25 Nm (118 ft. lbs.) using a torque wrench. Use the angular torque gauge KM-470-B to tighten the
connecting rod bearing cap bolts to 30 degrees plus 15 degrees.
20. Remove the connecting rod bearing caps.