
Lanos S Hatchback L4-1.6L DOHC D-TEC MFI (1999)
7. Thread the adjuster plug locknut onto the adjuster plug.
Tighten
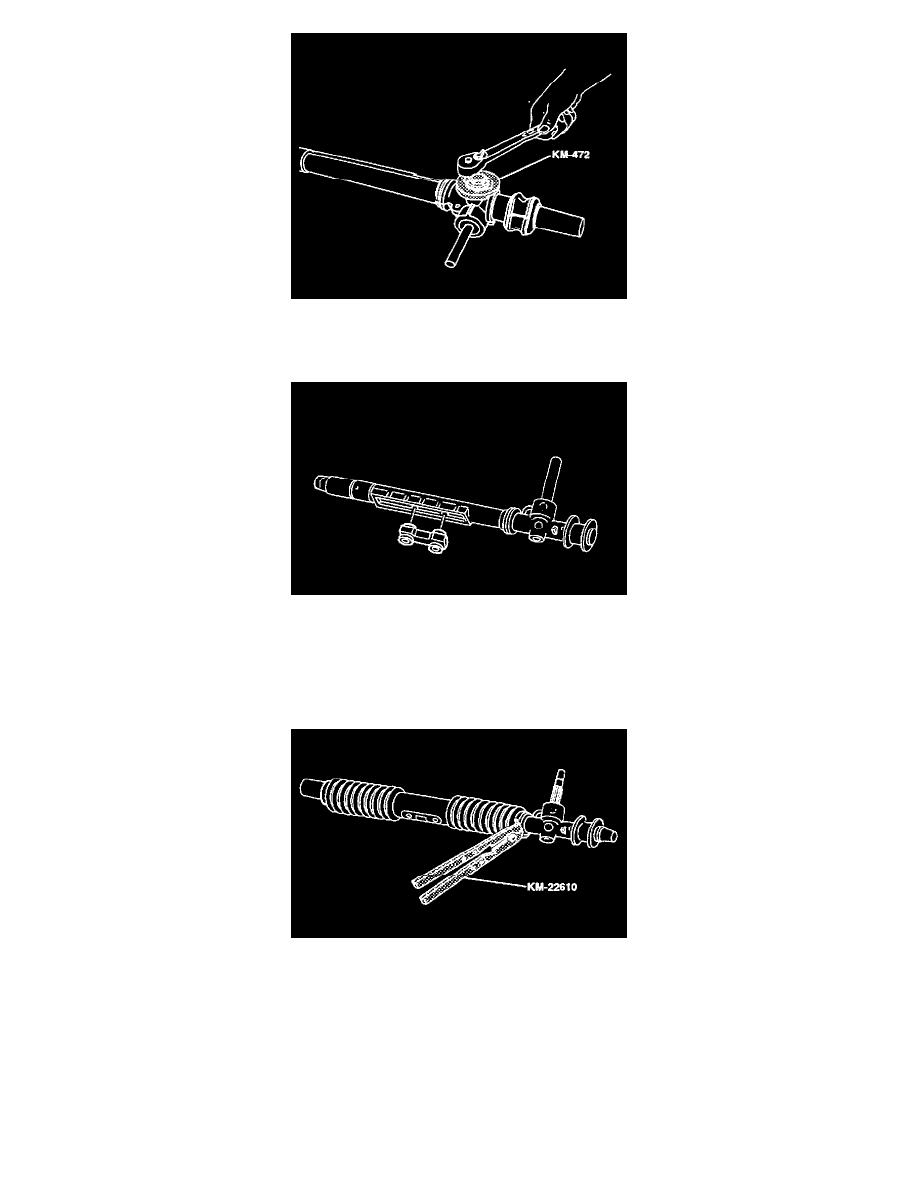
Tighten the adjuster plug locknut to 70 Nm (52 ft. lbs.) using the wrench KM-472. Hold the adjuster plug stationary.
8. Place the rack guide assembly into the rod and rack assembly. Center the rack guide assembly in the housing window opening.
9. Slide a new boot clamp onto the rack and pinion boot.
NOTICE: Be sure centering cover washers are in place on rack and pinion boot. For ease of assembly, install the inner tie rod bolts through the
center cover washers and rack guide, then lightly thread the bolt into the rod and rack assembly. This will help keep the components in proper
alignment.
10. Position the boot clamps onto the rack and pinion boot. Crimp the clamp using the installer KM-J-22610. Be sure the boot retaining bushing is in
place.
11. Install the rack and pinion assembly into the vehicle.