
Caliber L4-2.4L (2009)
Accumulator HVAC: Service and Repair
Accumulator - Removal
REMOVAL
WARNING: Review safety precautions and warnings before performing this procedure See: Service Precautions/Warning and See: Service
Precautions/Caution . Failure to follow these instructions may result in possible serious or fatal injury.
1. Disconnect and isolate the negative battery cable.
2. Recover the refrigerant from the refrigerant systemSee: Service and Repair/Refrigerant System Recovery.
3. Raise and support the vehicle.
4. Remove the right front wheel See: Maintenance/Wheels and Tires/Service and Repair/Removal and Replacement/Tires and Wheels - Removal.
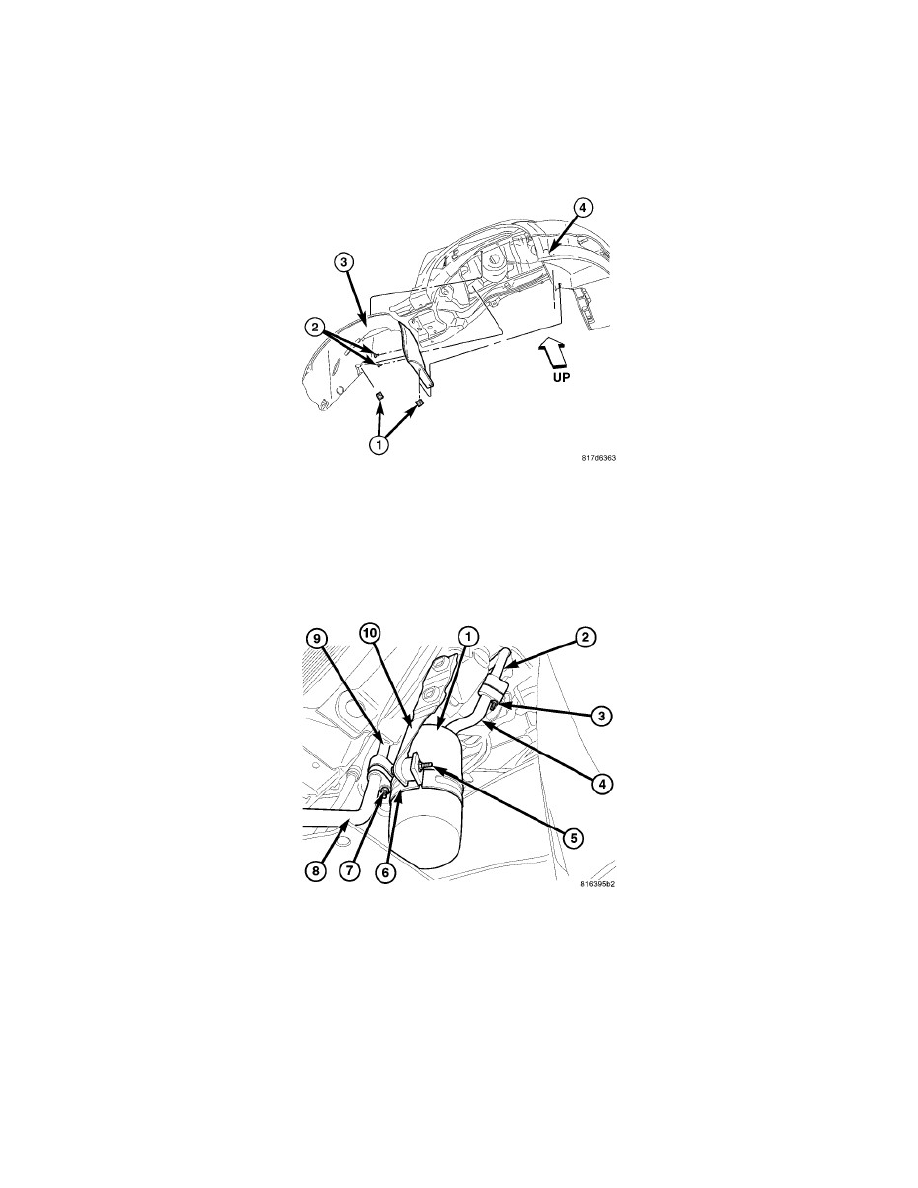
5. Remove the three push-pin retainers (1) and three screws (2) that secure the front portion of the right front wheelhouse splash shield (3) to body
(4) and position the front of the wheelhouse splash shield out of the way to gain access to the A/C accumulator.
6. Remove the nut (7) that secures the lower A/C suction line (8) to the accumulator outlet tube (9) and disconnect the suction line from the
accumulator tube.
7. Remove the bolt (5) and retaining band (6) that secure the A/C accumulator to the mounting bracket (10).
8. Remove the nut (3) that secures the upper A/C suction line (2) to the accumulator inlet tube (4) and disconnect the suction line from the
accumulator tube.
9. If necessary remove the accumulator mounting bracket from the body.
10. Remove and discard the O-ring seals and gaskets and install plugs in, or tape over the opened refrigerant line fittings and the accumulator ports.