
Caravan AWD V6-201 3.3L (1991)
7.
Install the main bearing caps and finger tighten the bolts.
8.
Install the connecting rod bearings and caps, tighten the rod nuts to 54 N-m PLUS 1/4 TURN (40 ft.lbs. PLUS 1/4 turn) torque.
9.
Tighten number 1, 3, and 4 main bearing cap bolts to 41 N-m PLUS 1/4 turn (30 ft. lbs. PLUS 1/4 turn) torque.
10.
Rotate the crankshaft so that number 6 piston is at or near top dead center.
11.
To ensure correct alignment of the thrust bearing halves the following procedure MUST BE FOLLOWED:
^
Using a leather or rubber mallet, sharply strike the front of the crankshaft at the vibration damper bolt hole (this will drive the crankshaft
to its rear most position)
^
Now, sharply strike the rear of the crankshaft (this will drive crankshaft to its foremost position).
Figure 3
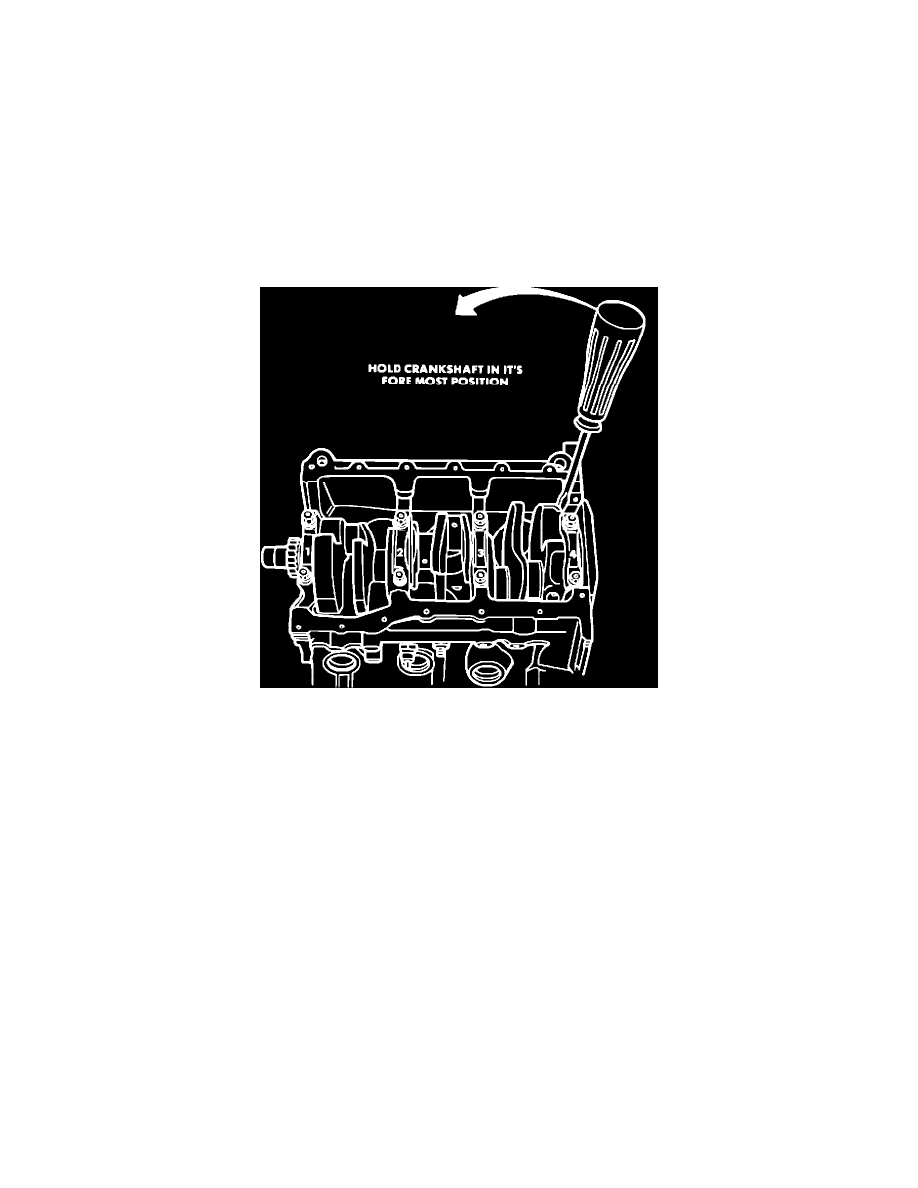
^
Wedge a pry bar or screwdriver between the rear of the block and the rear crankshaft counterweight to hold the crankshaft in its foremost
position. Figure 3.
^
Tighten the thrust bearing cap bolts to 41 N-m PLUS 1/4 turn (30 ft.lbs. PLUS 1/4 turn) torque. Remove the pry bar.
^
Check crankshaft end play.
12.
Install the timing chain cover.
13.
Install crankshaft rear oil seal retainer and gasket. Tighten bolts to 12 N-m (105 inch lbs.) torque.
NOTE:
BE SURE TO USE SEAL PILOT TOOL C-4681 WHEN INSTALLING OIL SEAL AND RETAINER ASSEMBLY.