
Caravan AWD V6-201 3.3L (1991)
NOTE:
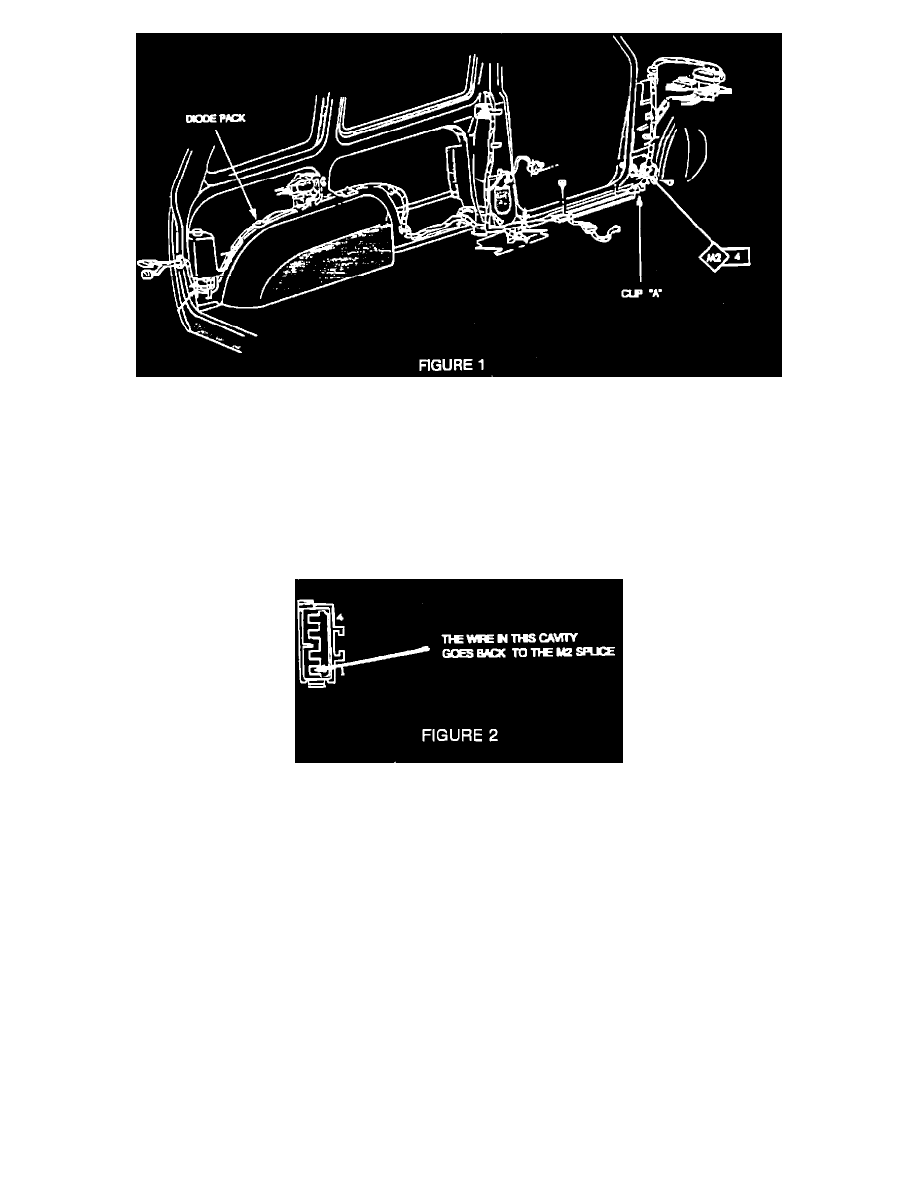
IF THE M2 SPLICE APPEARS TO BE GOOD OR AFTER THE REPAIR IS COMPLETED THE SYMPTOMS STILL OCCUR, CHECK FOR AN
OPEN CIRCUIT BETWEEN THE M2 SPLICE AND THE DIODE PACK. REFER TO FIGURE 1 FOR DIODE PACK LOCATION AND FIGURE 2
FOR THE PROPER CAVITY OF THE DIODE PACK CONNECTOR FOR CHECKING CONTINUITY BACK TO THE M2 SPLICE.
1.
Remove the left side sill trim plate.
2.
Remove the left side kick panel.
3.
Take the wiring harness out of clip "A" (refer to Figure 1).
4.
Cut away the friction tape wrapping the harness to locate the M2 splice and then remove the splice covering.
5.
Strip the insulation back on all of the wires in the splice until one inch of good conductive material is exposed.
6.
Place the new shrink tube (pn 4419644) over one of the wires. Then twist all wires of the splice together.
7.
Solder the splice. Heat the splice with a soldering iron until the solder flows through the strands of the wires. Use only rosin core solder. When
cooled the joint should be smooth.
8.
Slide the shrink tube over the entire non-insulated area of the spliced wires. Heat the tube with a heat gun until it is reduced to the diameter of the
wires and sealant comes out of both ends of the tube.
9.
Rewrap the wiring harness with friction tape.
10.
Reinstall the wiring harness into clip "A".
11.
Reinstall the left side kick panel and sill trim plate.
POLICY:
Reimbursable within the provisions of the warranty.