
Caravan AWD V6-201 3.3L (1991)
Control Arm: Service and Repair
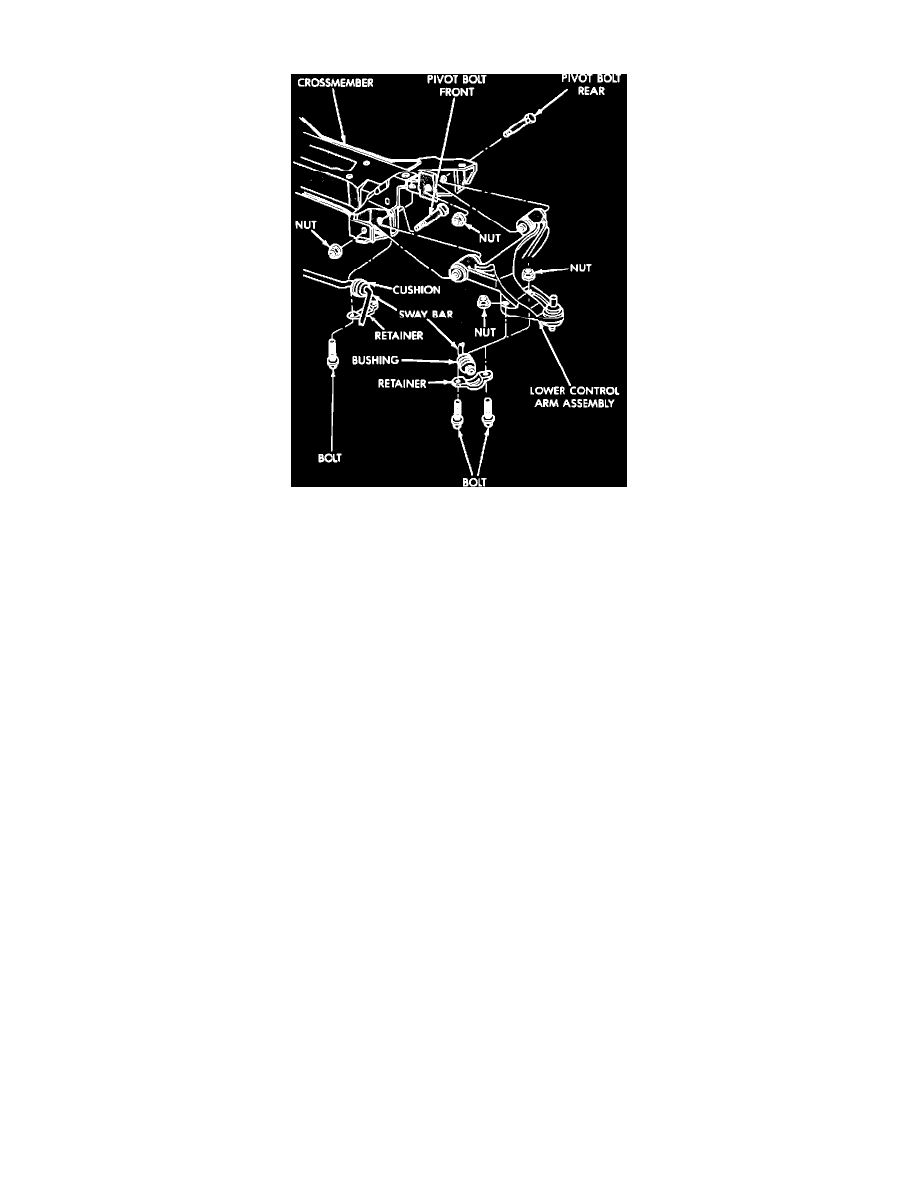
Fig. 8 Lower control arm assembly
REMOVAL
1. Raise and support vehicle.
2. Remove front inner pivot through bolt, rear stub strut nut, retainer and bushing, then the ball joint to steering knuckle clamp bolt.
3. Separate ball joint from steering knuckle by prying between ball stud retainer and lower control arm. Pulling steering knuckle out from vehicle
after releasing from ball joint can separate inner C/V joint.
4. Remove sway bar to control arm nut, then rotate control arm over sway bar.
5. Remove rear stub strut bushing, sleeve and retainer. On AWD models, pivot bushings are not serviceable and must be replaced as a unit.
INSTALLATION
1. Install retainer, bushing and sleeve on stub strut.
2. Position control arm over sway bar and install rear stub strut and front pivot into crossmember.
3. Install front pivot bolt and loosely assemble nut.
4. Install stub strut bushing and retainer and loosely assemble nut.
5. Install ball joint stud into steering knuckle, then the clamp bolt. Tighten clamp bolt to specifications.
6. Place sway bar end bushing retainer to control arm, then install retainer bolts. Tighten retainer bolts to specifications.
7. Lower vehicle so suspension fully supports vehicle, then tighten front pivot bolt and stub strut nut to specifications.