
Charger SRT-8 V8-6.1L (2009)
5. Install and tighten the nut (2) that secures the foot rest to the weld stud. Tighten the nut to 16 Nm (12 ft. lbs.).
6. Reposition the driver side front carpet to the cowl side inner panel and the front door opening sill and secure with the push-pin fastener.
7. Reinstall the trim onto the driver side lower cowl side inner panel. See: Cowl Trim Panel - Installation.
A-Pillar Trim Panel-Removal
REMOVAL
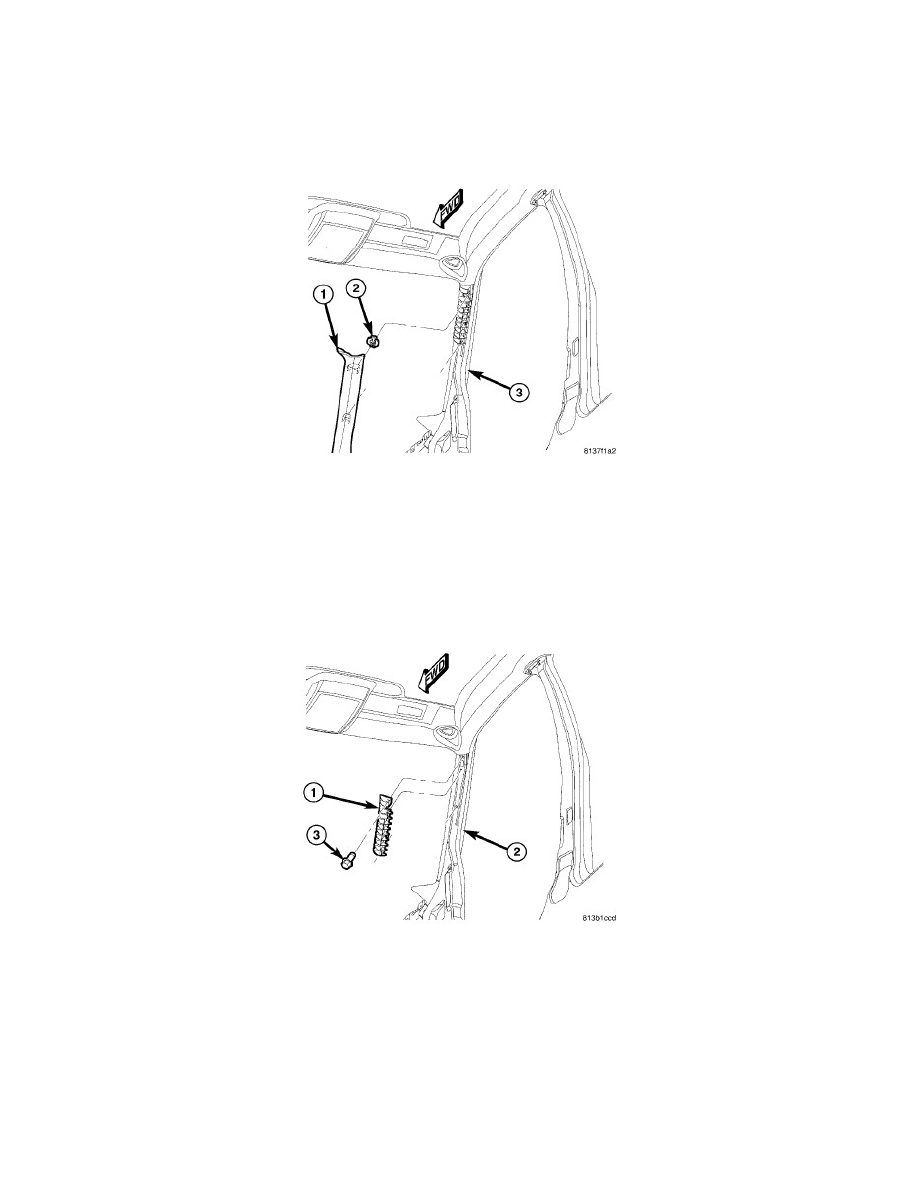
1. Using a trim stick or another suitable wide flat-bladed tool, carefully pry the upper end of the A-pillar trim (1) rearward from the inside of the
A-pillar (3) far enough to disengage the two spring clip retainers that secure the trim to the slots in the pillar.
2. Disengage the base of the A-pillar trim from the end of the instrument panel top cover.
3. Remove the A-pillar trim from the vehicle.
A-Pillar Trim Panel-Installation
INSTALLATION
1. Check to be certain that the energy absorbing cartridge (1) is properly installed and in good condition on the inside of the A-pillar (2). Replace the
cartridge if any damage is evident. Tighten the screws (3) to 3 Nm (25 in. lbs.).