
D250 3/4 Ton Pickup 2WD V8-318 5.2L VIN R 4-bbl (1982)
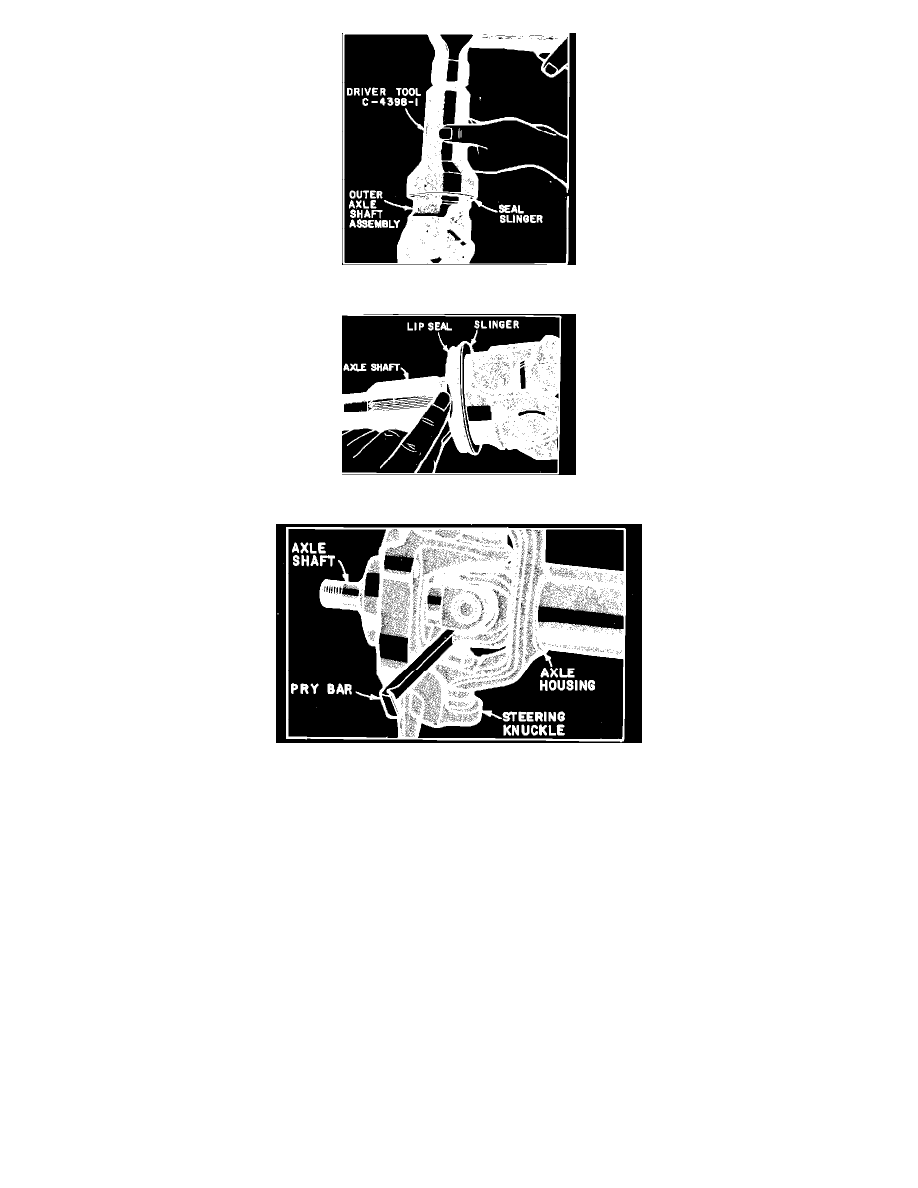
Fig. 9 Installing seal slinger on outer axle shaft. 44 FBJ Units w/disc brakes. Models w/full time 4WD
Fig. 10 Installing lip seal on outer axle shaft. 44 FBJ Units w/disc brakes. Models w/full time 4WD
Fig. 11 Using pry bar to retain axle shaft. 44 FBJ Units w/disc brakes. Models w/full time 4WD
Assembly & Installation
1. Secure steering knuckle right side up in a vise and press upper and lower ball joints into position using proper tools. Install snap ring on lower
joint and new boots on both joints.
2. Thread new sleeve into ball joint yoke on axle housing ensuring that two threads are exposed at the top.
3. Position steering knuckle on axle housing yoke, then install a new lower ball joint nut and torque to 80 ft-lbs.
4. Use Tool No. C-4169 and a torque wrench to torque sleeve in upper ball joint yoke to 40 ft-lbs, then install upper ball joint nut and torque to 100
ft-lbs. Install cotter pin if slot in nuts and hole in stud align. If not, tighten, do not loosen nut to align.
5. On left side only, position steering knuckle arm over studs on steering knuckle. Install tapered dowels and nuts, then torque nuts to 90 ft-lbs.
Secure drag link to steering knuckle arm and torque nut to 60 ft-lbs.
6. Secure tie rod end to steering knuckle. Torque nut to 45 ft-lbs.
7. Install brake dust shield, if removed.
8. Inspect outer axle shaft seal surface for grooving. If surface is grooved, repair as described in "Servicing Rotor Hub or Bearings".
9. Apply RTV sealer to seal surface of axle shaft then using driver, C-4398-1, install seal slinger with lip toward splines onto outer axle shaft.
10. Carefully insert axle shaft into housing so as not to damage differential seal at side gears. After sliding axle shaft completely in, wedge a pry bar
through universal joint to retain shaft.