
Dakota 2WD L4-2.5L VIN P (2001)
Constant Velocity Joint: Service and Repair
Inner
REMOVAL
1. Remove the axle driveshaft.
2. Place the C/V joint housing in a vise.
3. Remove the inner boot retaining clamps. Pull the inner boot back onto the interconnecting shaft. Discard the retaining clamps.
4. Pull tripod and shaft straight out from the inner C/V joint housing.
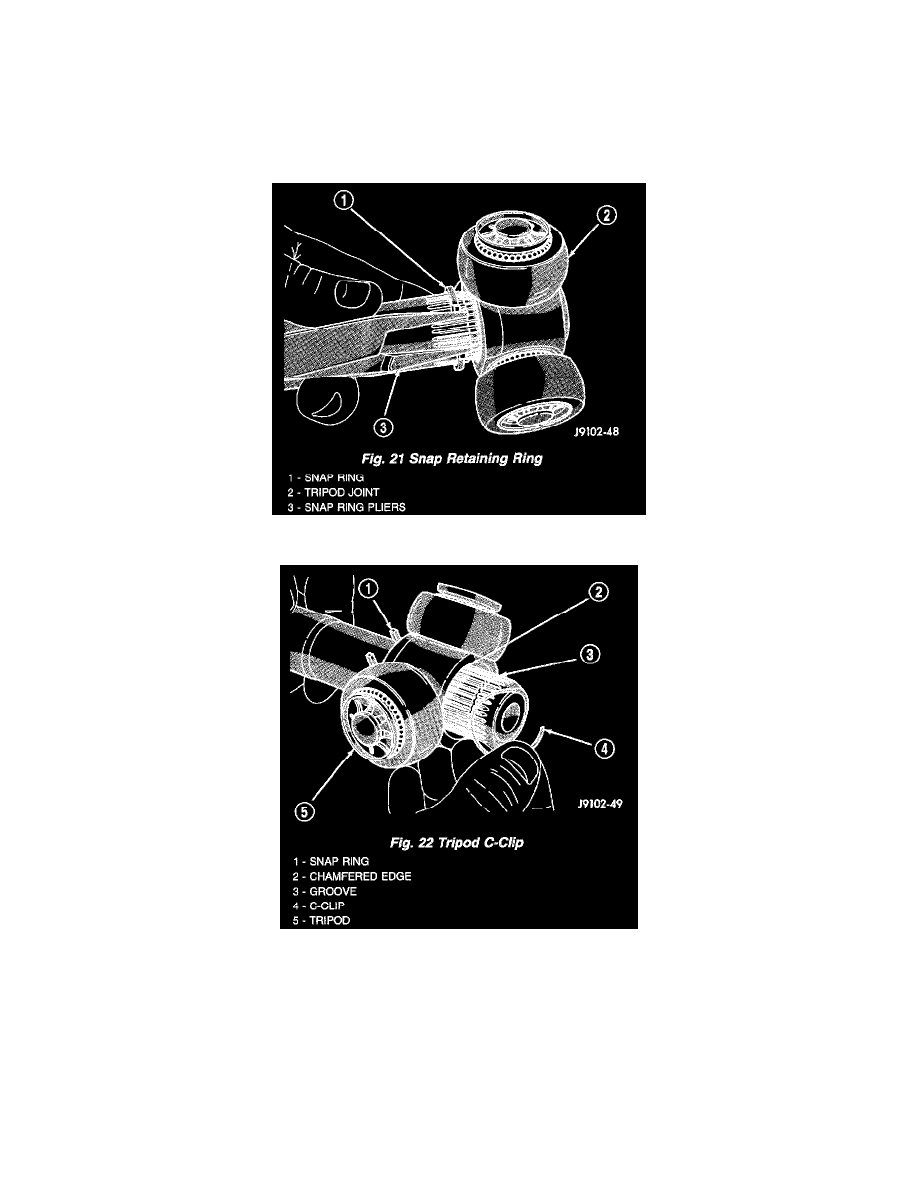
5. Remove snap ring from behind the tripod and slide tripod toward the center of the shaft (Fig. 21).
6. Remove C-clip from the end of the shaft (Fig. 22).
7. Remove tripod from the shaft and replace boot, if necessary.
8. Remove lubricant from the interior of the housing and the tripod.
9. Inspect needle bearing raceways in the housing and tripod components for excessive wear and damage. Replace the tripod as a unit only if
necessary.
INSTALLATION
1. Slide boot down on shaft for work access.
2. Install snap ring past the ring groove. Slide the tripod onto the end of the shaft. Chamfered end of tripod is adjacent to the C-clip groove.
3. Install C-clip and slide the tripod out against the clip. Install the snap ring in the inner groove. Be sure the snap ring and C-clip are seated.
4. Apply the required quantity of lubricant to the housing and boot. Coat the interior of the joint housing and the tripod.
5. Insert and seat the tripod and shaft in the housing.