
Durango 4WD V8-5.9L VIN Z (1998)
Amplifier: Service and Repair
REMOVAL
WARNING: ON VEHICLES EQUIPPED WITH AIRBAGS, REFER TO AIR BAGS AND SEAT BELTS/AIR BAGS BEFORE
ATTEMPTING ANY STEERING WHEEL, STEERING COLUMN, OR INSTRUMENT PANEL COMPONENT DIAGNOSIS OR SERVICE.
FAILURE TO TAKE THE PROPER PRECAUTIONS COULD RESULT IN ACCIDENTAL AIRBAG DEPLOYMENT AND POSSIBLE
PERSONAL INJURY.
1. Disconnect and isolate the battery negative cable.
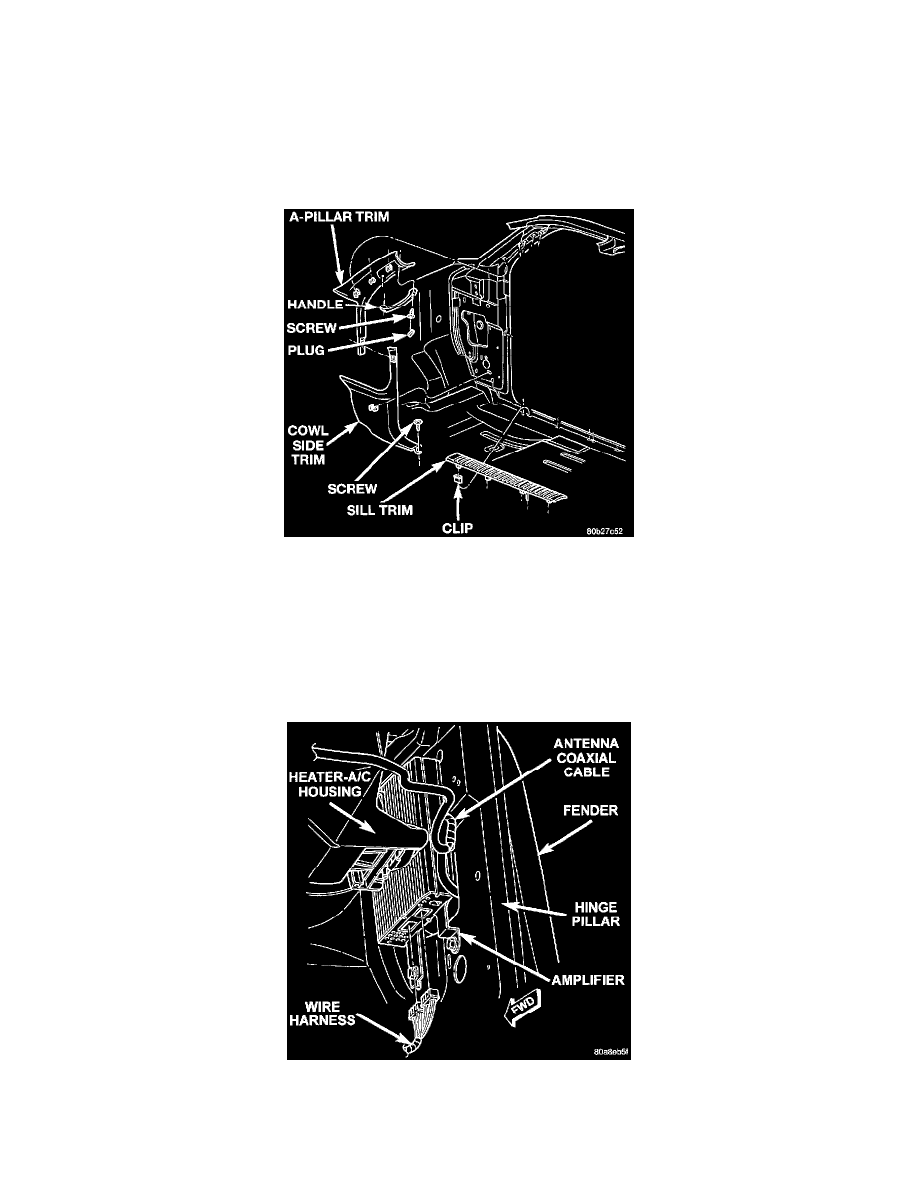
Cowl Side Trim Remove/Install
2. Using a trim stick or another suitable wide flat-bladed tool, gently pry along the edges of the passenger side front door sill trim to release the clips
that secure it to the sill. Carefully disengage the ends of the sill trim from the inner cowl side trim panel at the front, and from the lower B-pillar
trim at the rear, then remove the sill trim from the sill.
3. Remove the screw that secures the rear tab on the inner cowl side trim panel to the sill.
4. Grasp the forward edge of the trim panel and pull it inboard far enough to disengage the clip that secures it to the cowl side.
5. Using a trim stick or another suitable wide flat-bladed tool, gently pry the inner cowl side trim panel to release the clip that secures it to the
A-pillar trim and the front door hinge pillar.
Amplifier Connections Remove/Install
6. Unplug the two wire harness connectors from the amplifier.