Durango 4WD V8-5.9L VIN Z (1998)

13.
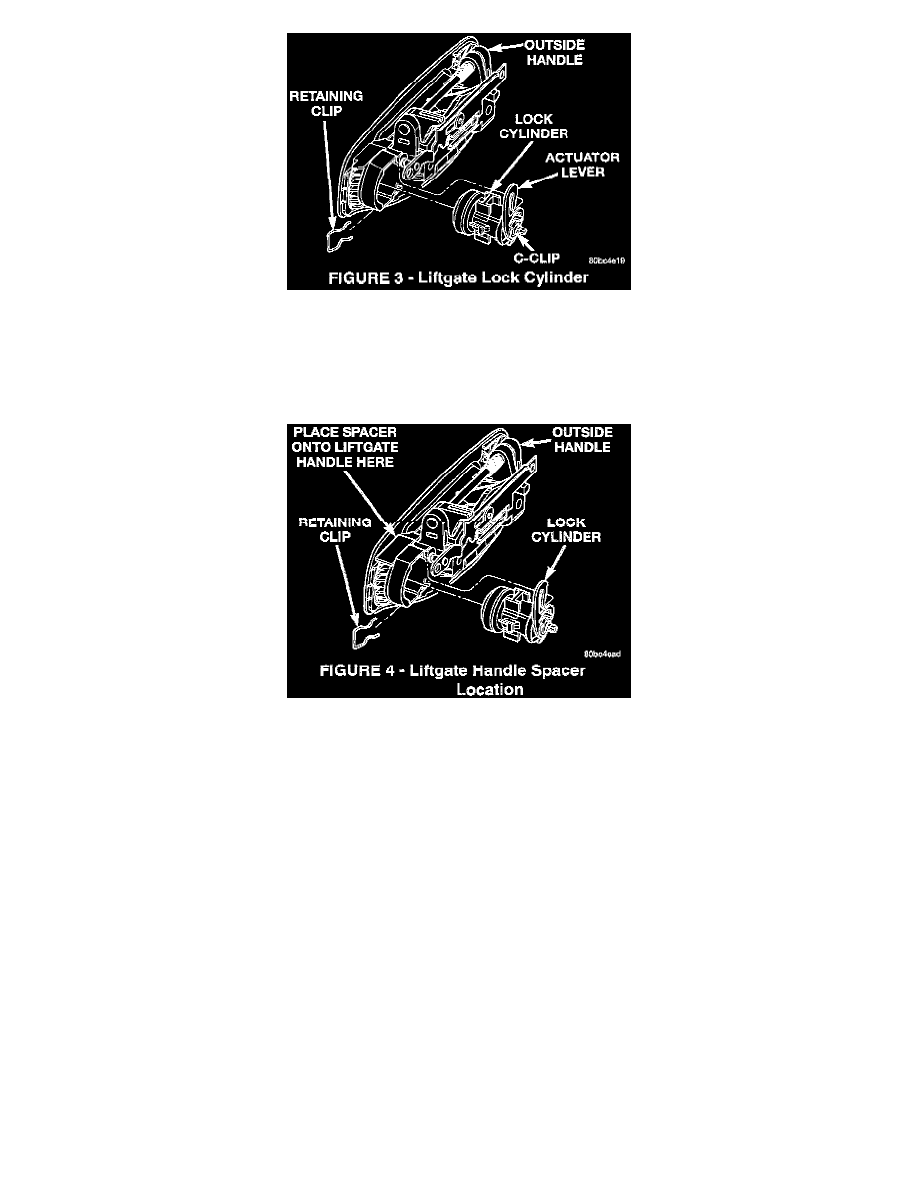
Remove the retaining clip retaining the lock cylinder in the liftgate handle and remove the C-clip and lock cylinder actuator lever, then separate the
lock cylinder from the handle (Figure 3).
14.
Position the liftgate lock cylinder into the new liftgate handle p/n 55256558AB.
15.
Install the lock cylinder retaining clip onto the liftgate handle, then install the actuator lever and C-clip onto the lock cylinder.
16.
Clean the area where spacer p/n 05014592AA will go (Figure 4).
17.
Peel the adhesive protective tape from the spacer p/n 05014592AA.
18.
Install the spacer onto the liftgate handle as shown in Figure 4. The spacer must be inserted underneath the existing foam seal so that the side of
the spacer can contact the inner surface of the liftgate handle.
19.
Position the liftgate handle onto the liftgate.
NOTE:
MAKE CERTAIN THAT THE LIFTGATE HANDLE IS PUSHED ALL THE WAY TO THE RIGHT WHEN INSTALLING THE LIFTGATE
HANDLE ONTO THE LIFTGATE.
20.
Install the nut that attaches the liftgate handle to the liftgate.
21.
Connect the latch rod and actuator rod.
22.
Connect the vehicle security harness connector if equipped.
23.
Perform a function check of the liftgate lock cylinder by pressing the keyless entry transmitter or locking the doors with the power door lock
switch.
24.
Install the liftgate watershield.
25.
Position the lower trim panel at liftgate.
