
Durango 4WD V8-5.9L VIN Z (1998)
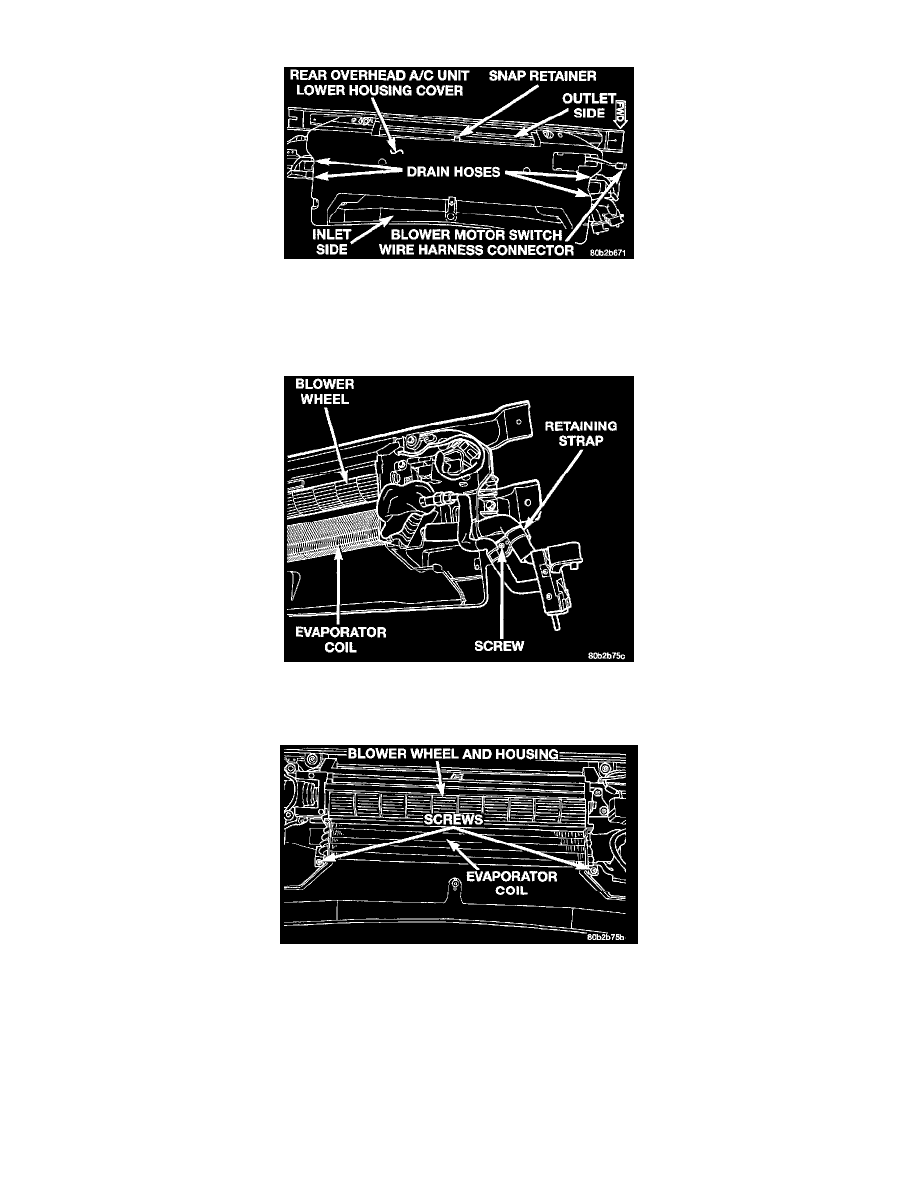
6. Remove the nine screws that secure the lower housing cover to the rear overhead A/C unit.
Rear Overhead A/C Unit Lowe Housing Cover Remove/Install
7. Release the lower housing cover snap retainer near the center of the outlet side (rear) of the rear overhead A/C unit.
8. Feed the rear blower motor switch wire harness and connector through the hole in the right end of the rear overhead A/C unit lower housing cover
while removing the cover from the unit.
Rear A/C Tube Retaining Strap Remove/Install
9. Remove the screw that secures the rear overhead A/C refrigerant tube and block fitting retaining strap to the right side of the upper housing cover.
Rear Evaporator Coil Remove/Install
10. Remove the two screws that secure the rear evaporator coil to the rear overhead A/C unit upper housing cover.
11. Remove the rear evaporator coil from the rear overhead A/C unit.
INSTALLATION
1. Position the rear evaporator coil to the rear overhead A/C unit and secure with two mounting screws. Tighten the mounting screws to 2.2 Nm (20
in. lbs.).
2. Install the rear overhead A/C refrigerant tube and block fitting retaining strap to the right side of the upper housing cover and secure with a screw.
Tighten the mounting screws to 2.2 Nm (20 in. lbs.).
3. Feed the rear blower motor switch wire harness and connector through the hole in the right end of the rear overhead A/C unit lower housing cover